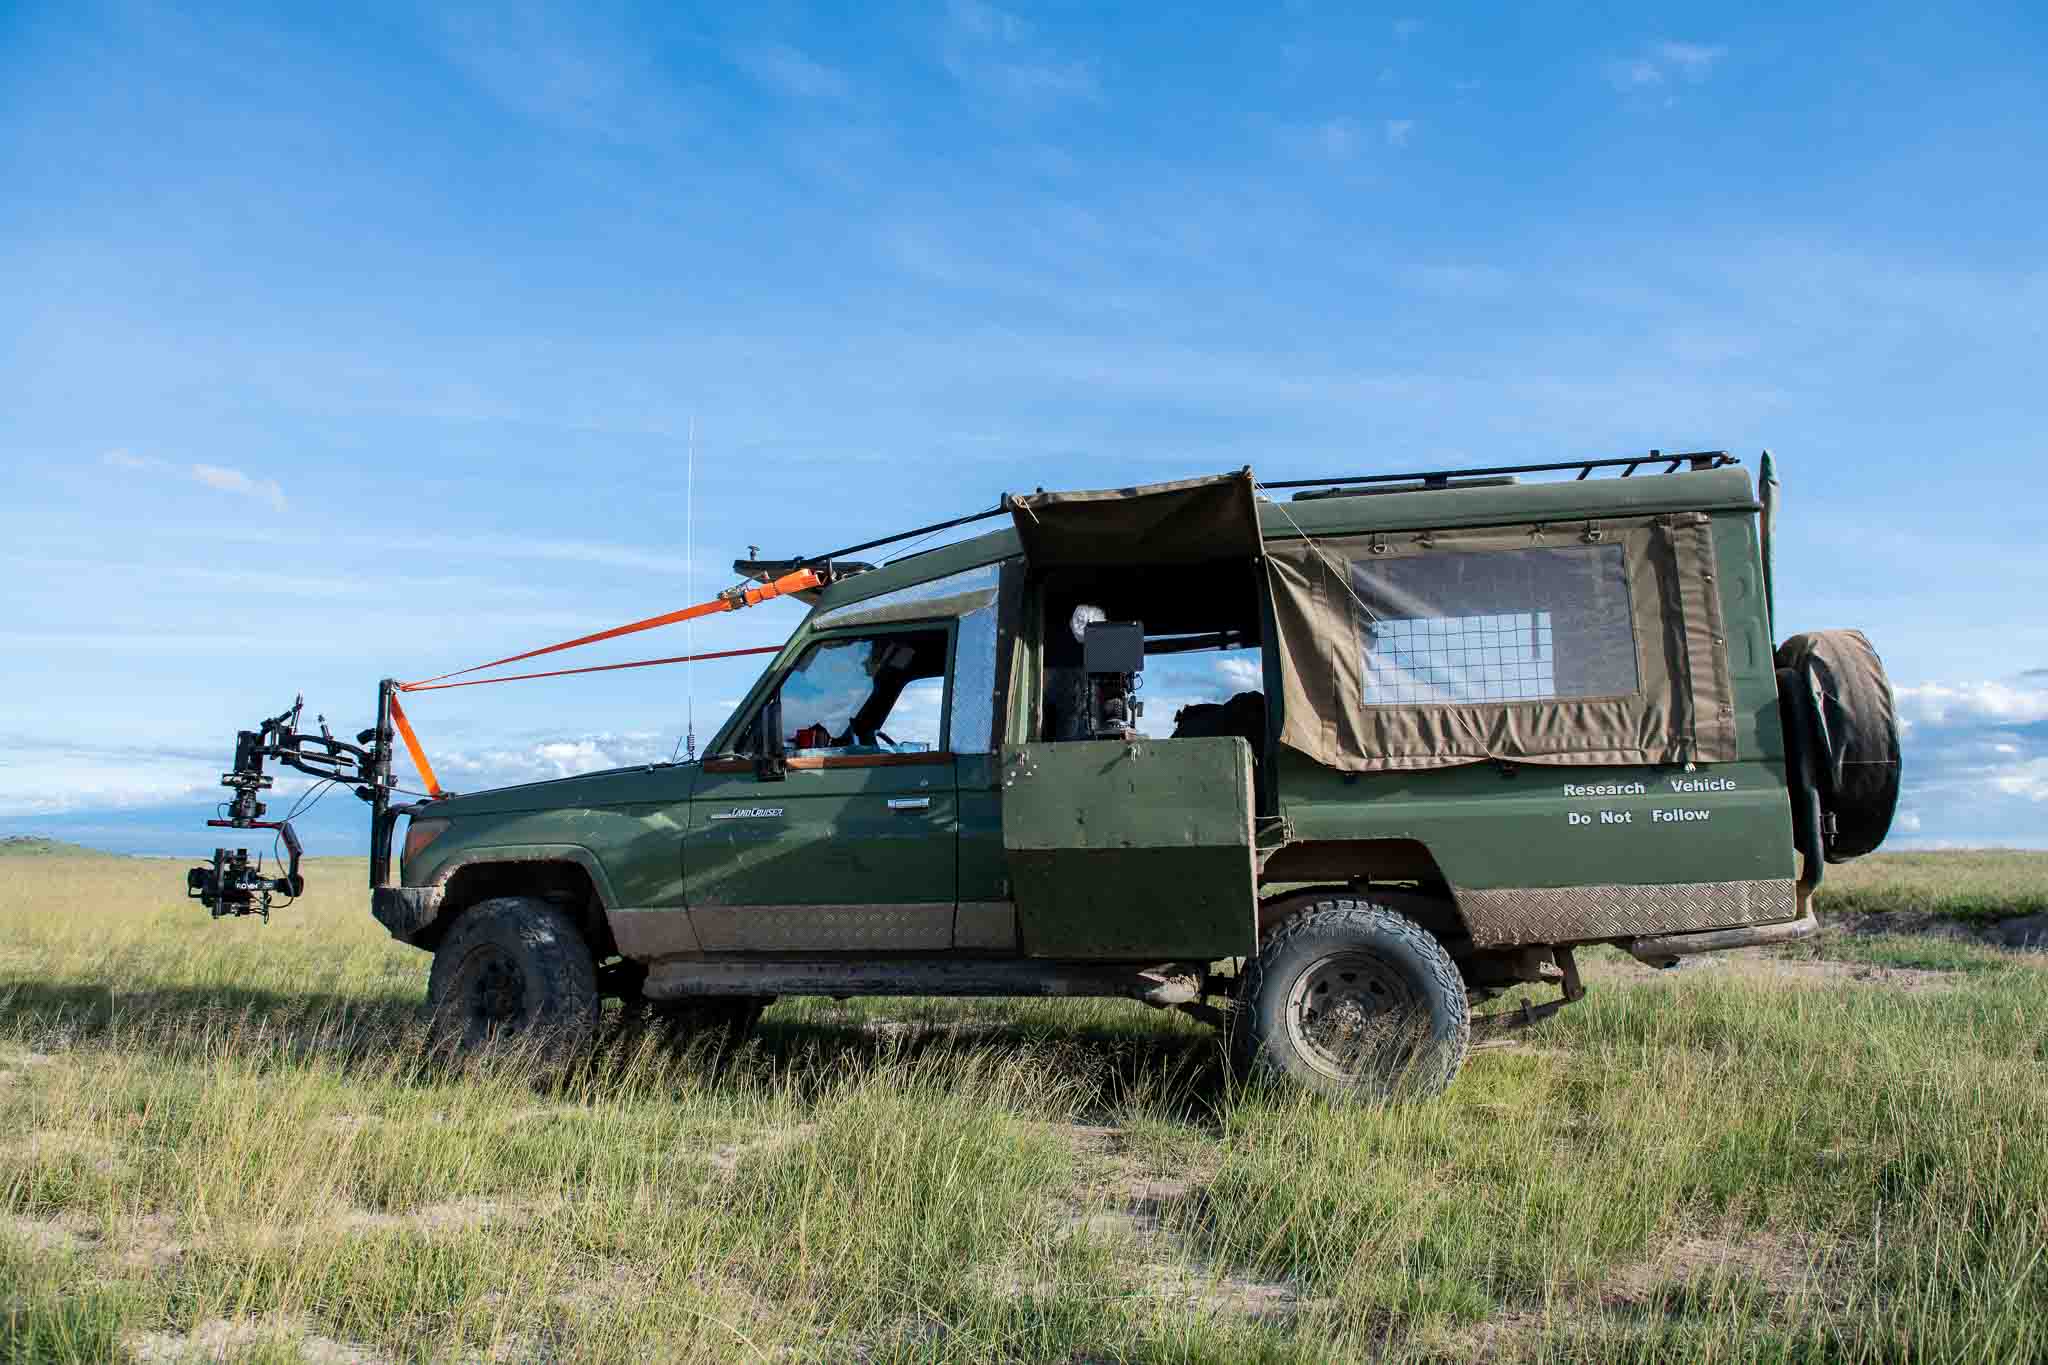
DJI Ronin 2 gimbal car rig for wildlife cameras!
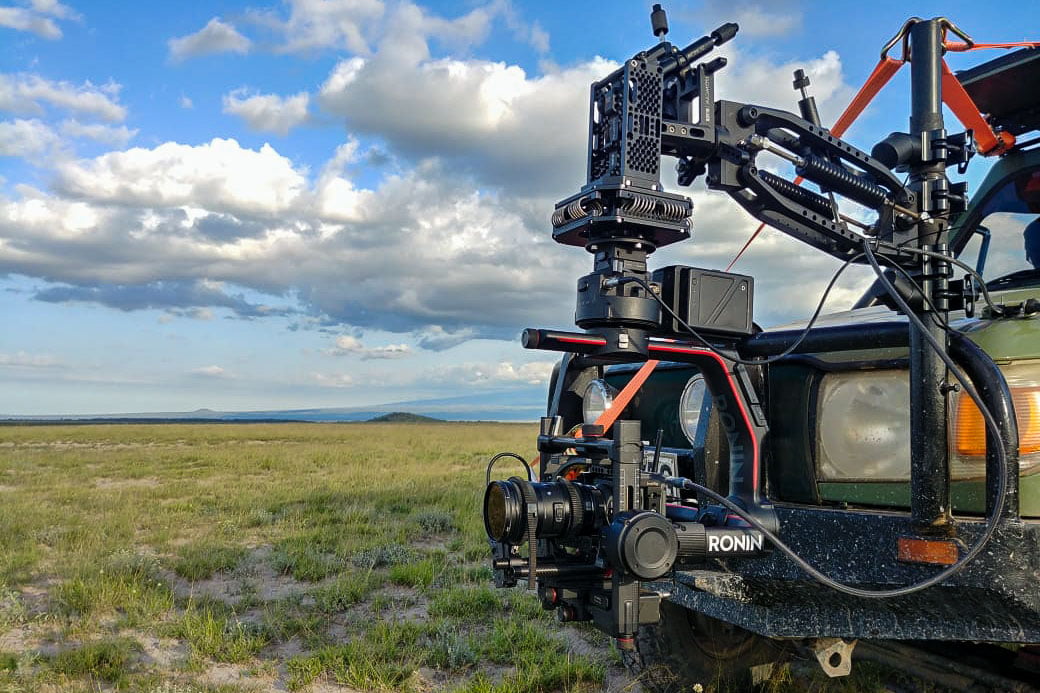
I was using a DJI Ronin 2 gimbal car rig on one of my last shoots in Amboseli National Park as a wildlife cameraman. This setup was used in combination with my zCam and my 18-35mm and 70-200mm lenses.
After the first test run, I realized that there are micro jitters in the footage. So I spend two days figuring out what the problem was. At the end it was a worn out dampener from the gimbal arm which the rental house had not replaced.
Check the rental equipment!
This shows how important it is to take care of your equipment! And also that not all rental houses are providing a good service to their kit. Fortunately the kit came with a spare dampener. Otherwise the shoot would have been ruined!
Check-list Gimbal Car Rigs:
Make sure your camera is perfectly balanced on the gimbal.
Check all the springs, dampeners and anti vibration pads of your gimbal arm.
Set the gimbal arm springs to the right stiffness.
Make sure your anti vibration pad is strong enough for the total weight of the rig.
Reduce as many vibrations as possible from the car by using spanners, cable ties and rubber isolators where metal touches metal.
Calibrate your gimbal before every shooting session.
Remove your rig when driving longer distances without filming.
Secure your gimbal arm with spanners while driving long distances without the gimbal attached.
Check all screws of the rig, gimbal and the gimbal arm after each shooting session. Tight them up if needed!