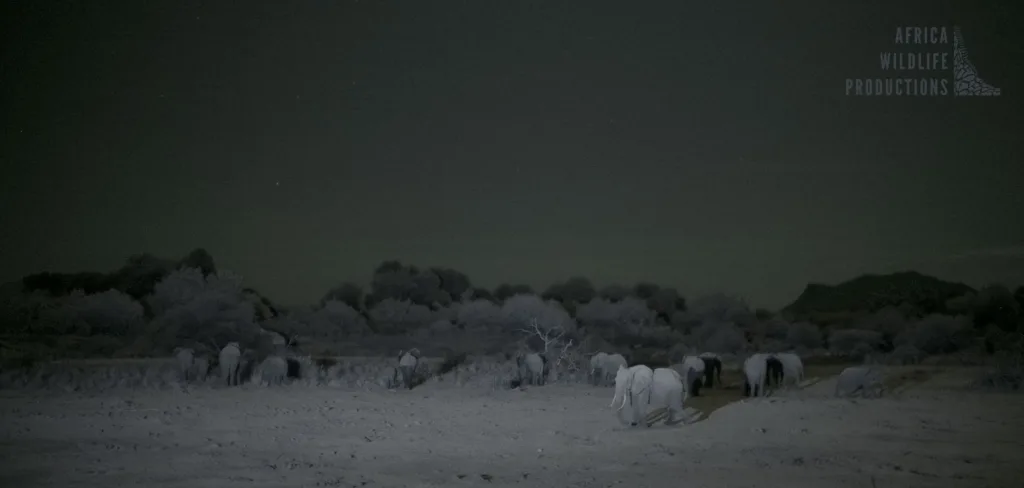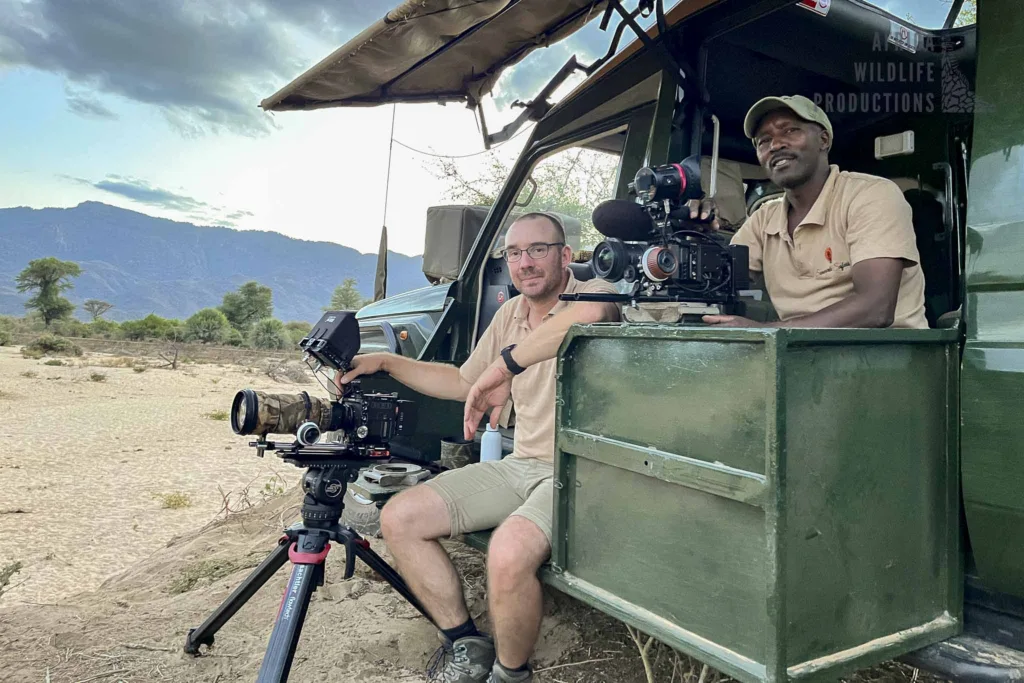
Filming wildlife at night can be challenging, especially if you don’t have access to high-end thermal cameras like the Selex or other thermal imaging devices. So the only option left is filming wildlife with Infrared Cameras!
Filming Wildlife with Infrared Cameras - Which cameras to use?
In recent years, filming wildlife at night using color cameras has become more popular. A standout example is the Apple TV series *Earth at Night in Color*, which captivated viewers with a new approach to nighttime wildlife filming. One of the cameras used in the series was the Canon ME20F. A camera capable of shooting in very high ISO ranges but only outputs a 1080p signal. To deliver 4K footage, this camera requires an external recorder, which can upscale the image to 4K. It’s a time-consuming process, and the Canon ME20F performs best with the assistance of a full moon, as only then is there enough ambient light to film without additional lighting.
But what if there is no moonlight, or you are filming in total darkness? The only remaining option is to use infrared (IR) lights or thermal cameras. During my most recent shoot, where I filmed some rarely documented wildlife behavior, I had to come up with a strategy for shooting wildlife at night in the best way possible. After many days of research and valuable input from Aleksander Domanski, I devised a plan.
I needed to get a full-spectrum converted camera. Fortunately, I had my older zCam E2 sitting unused in the cupboard. After using this camera in low-light conditions before, I knew it could be a great candidate for a full-spectrum conversion. I sent the camera to Kolari Vision in the United States for the conversion. Afterward, I had the only full-spectrum-modified zCam E2 in Kenya!

The Plan & Bringing Light into the Darkness…
For the upcoming project, I needed a setup capable of filming a wide area in total darkness. Fortunately, the animal behavior occurred in one specific location, which allowed me to plan how to illuminate the area with infrared lights. I had previously worked on the project *Secrets of the Elephants* with Mike from TShed, a UK-based rental company that specializes in IR-modified cameras and lights for wildlife filming. After discussing the necessary equipment with Mike, it seemed like my plan was coming together.
I sketched out an initial setup of what I expected the scene to look like and how I would light it using the IR lights. The lights I chose were GJD IX 850 IR lights, which are powerful enough for this kind of shoot. I rented six of these lights from TShed. Based on the expected light and camera lens angles, I was able to estimate the appropriate positions for both the lights and cameras. However, the final setup would be determined during a scouting visit to the location.
Power Source and Light Set-up!
Since the shoot was taking place in the remote wilderness of Northern Kenya, I needed a solution to power the IR lights without creating noise pollution. The answer was an Ecoflow Delta 2 1800W Power Station, which had enough capacity to run the lights all night long. After some quick calculations, I was confident this power station would meet our needs. To maximize flexibility with the lighting, I ran individual plugs to a multi-plug extension cable, allowing me to control each light independently. This also helped conserve energy, as I could only run the lights needed at any given time.
During the final area recce, I decided the best lighting strategy was to position 4-5 individual lights, each illuminating a specific section of the scene. Since these IR lights are quite bright, I used 95° diffusers to get the widest beam possible. For the first night, I rigged all the IR lights with the 95° diffusers. Later, I used a combination of 65° and 95° diffusers. Our base of operations was our Land Cruiser, and all the cables were run back from the IR light positions to the vehicle. I kept things simple, using plugs at both ends of the cables, with labels indicating which light each plug controlled.
Once the cables and lights were in place, I used light stands and tailor-made wooden poles for the lights, hiding the cables in the sand. As the sun set, we were ready for the first test. An important note: be mindful of the angle at which you place your lights. Lighting a scene directly from the front can result in unnatural eye reflections from the animals. I recommend using side lighting where possible, and if feasible, place the lights higher up, such as on a bank. In my case, I positioned the lights away from the camera, which eliminated any visible eye reflection.
Lenses, lenses, lenses….
I still needed to sort out one crucial detail: lenses. Before arriving on location, I only had a rough estimate of the distances to the subjects based on Google Maps, so I packed every lens I might need. From super-wide angles to 500mm primes, I didn’t want to take any chances. I knew that any lens with an f-stop higher than f4 would be practically useless in the low-light conditions, so I narrowed my selection down to the fastest lenses I had.
Given that the zCam E2 has a Micro Four Thirds (MFT) sensor, I also considered using speed boosters. I had a few Metabones speed boosters on hand, which would allow me to use my full-frame lenses with the MFT sensor. After reading up on potential issues like artifacts, hot spots, and flaring, I decided to err on the side of caution and ordered a regular MFT to Nikon G lens adapter instead. Better safe than sorry!
In the end, I used the following lenses for the shoot, and the results were fantastic with no issues:
- SIGMA 18-35mm f/1.8
- SIGMA 120-300mm f/2.8
- SIGMA 500mm f/4
- Nikon 70-200mm f/2.8
The lenses performed beautifully, and I was thrilled to see them working so well with the speed boosters.
Camera Settings & Filming Experiences
The first night of filming arrived, and I was eager to see how things would turn out. It didn’t take long for our subjects to appear, and once the IR lights were switched on in total darkness, it felt like filming during the day. The results were absolutely stunning and exceeded my expectations.
I set my zCam E2 to ISO 12,800, which produced a clean image with minimal noise, making it easier to reduce in post-production. I opened the lenses as wide as possible to maximize light intake, which resulted in a very narrow depth of field. This is something to be aware of, as even slight changes in focus could throw off the shot. Fortunately, the subjects weren’t moving too quickly, so I was able to adjust focus after a bit of practice.
I used a Zacuto Kameleon Pro EVF with my camera, both to get a better view of focus and to avoid casting light on our faces, which can make animals skittish. This was a trick I learned during some previous shoots from hides. The EVF allowed me to stay hidden in the darkness while still monitoring the shot.
White balance can be tricky with full-spectrum modded cameras since they capture all wavelengths of light. To avoid an unnatural look, I set my white balance to 3000K, which produced a very purple tone. I countered this by adjusting the tint setting on the zCam to -80, which resulted in a color balance that closely resembled moonlight (which is around 4100K). Though it wasn’t a perfect match, it gave me a solid starting point for the final grade.
After reviewing the footage, which was recorded in ProRes 422 & HQ, I found that the color grading was straightforward. With a bit of expertise, I was able to replicate the “moonlight” look quite well. The noise pattern was minimal, and a light noise reduction in post-production did the job. I’m excited to see how professional colorists will further refine the footage.
Filming Wildlife with Infrared Cameras - Conclusion!
Filming wildlife at night presents unique challenges, especially when you don’t have access to high-end military-grade equipment. However, don’t be discouraged! With the right planning and the right equipment, amazing results are achievable. Whether you’re using IR or full-spectrum-modified cameras, paired with proper lenses and IR lighting, you can create beautiful and natural-looking footage, without resorting to FLIR or thermal imagery.
When positioning your IR lights, always aim for side lighting relative to the camera to avoid reflections in the animal’s eyes. Take time to gather as much information as possible about your location, make a detailed plan, and carefully select the equipment needed to set up your scene. This includes factoring in distances, power requirements, lens choices, and diffuser angles.
One of the most challenging aspects is pulling focus with fast, wide-open lenses. It’s a skill that requires practice, and using an EVF can help you pull focus more accurately. If you’re using speed boosters, be sure to test your lenses beforehand to ensure you can achieve infinity focus.
Ultimately, filming wildlife at night with infrared lights and full-spectrum cameras can yield stunning images—just make sure to test your gear before the shoot and have a solid plan in place. If you have any questions about filming wildlife at night, feel free to reach out to me at andreas@africawildlifeproductions.com.
