Infrared wildlife photography opens up a surreal, dreamlike side of Africa’s wilderness. In this article, professional wildlife photographer and safari guide Andreas Knausenberger shares how to capture breathtaking IR images on your next photographic safari.
Infrared Wildlife Photography – A New Dimension in Wildlife Photography
Over the last 15 years as a wildlife photographer, I have experienced and photographed countless unforgettable sightings, mainly in Kenya, Uganda, Botswana, Gabon, and South Africa. Without a doubt, wildlife photography never gets boring—you experience new subjects, light conditions, and photographic opportunities every single day.
This year, I spent more than ten weeks out in the bush, guiding other wildlife photographers on photo safaris to epic locations like the Masai Mara, Amboseli, and Samburu. As a safari guide and photography guide, I wanted to try something different this time. After filming a major project for Sky Nature and PBS using my full-spectrum–modded camera, I decided to experiment with infrared wildlife photography.
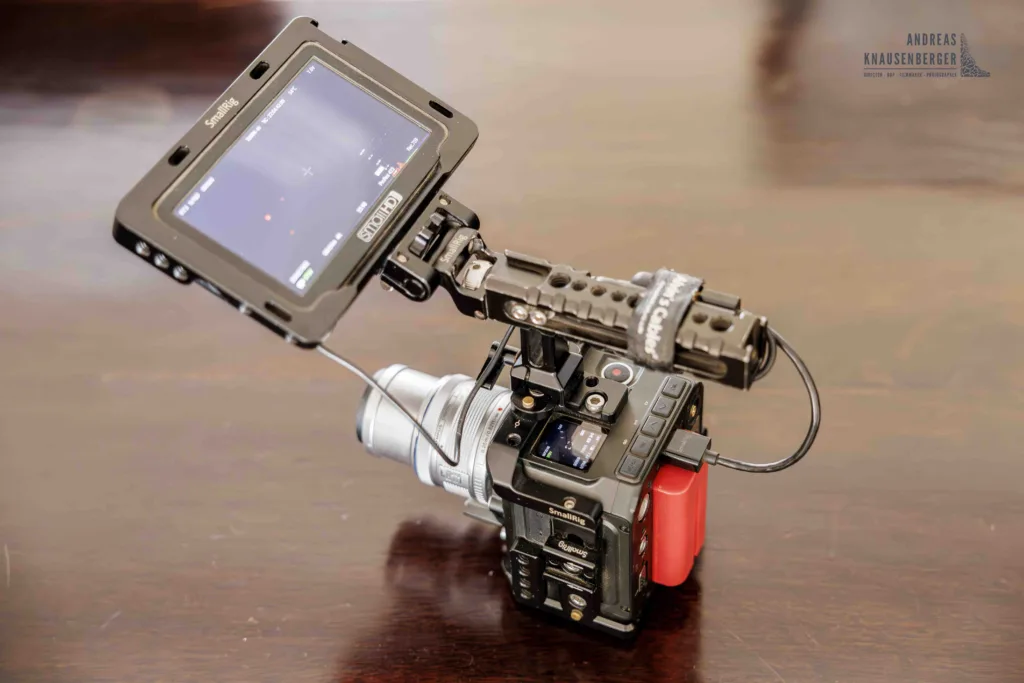
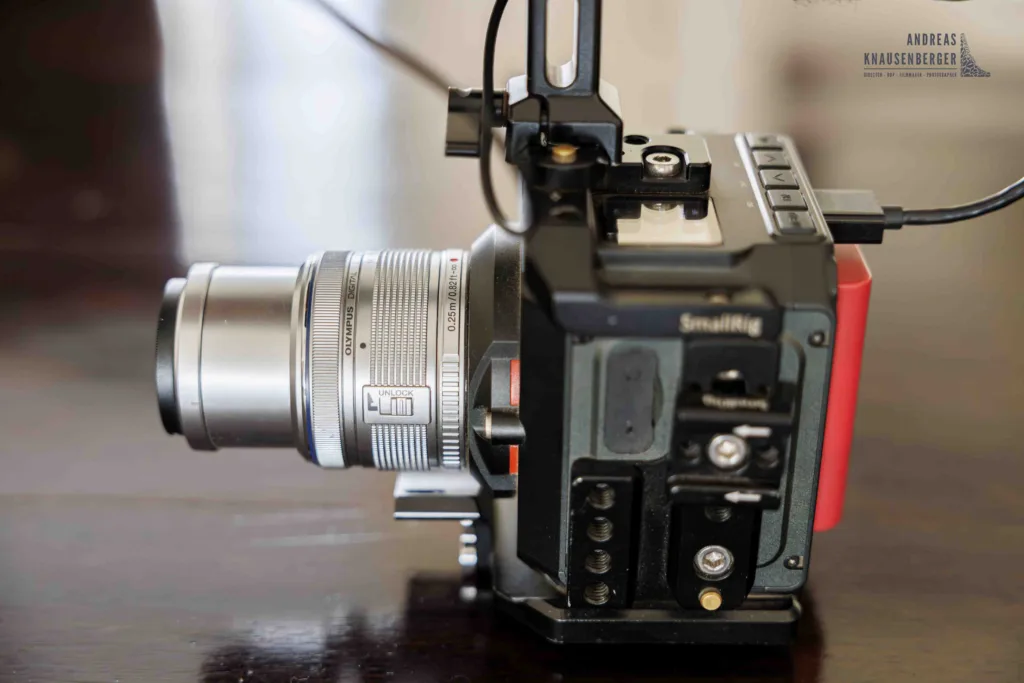
My zCam E2 is a cinema camera, not a stills camera, but you can still take DNG RAW photos with it—good enough to start this new idea rather than investing in more expensive camera equipment. 😊
So, I sat down and started some research on infrared photography in general. And what had I gotten myself into again? Different filters, lenses that only work with certain systems, hot spots, manual focus issues… I quickly realized that taking IR pictures isn’t as easy as it might seem. But now I wanted to take it to another level — Infrared Wildlife Photography!
Finding the Right Camera and Conversion
To take infrared photography seriously, you need a camera converted to full spectrum or to specific wavelengths such as 550 nm to 850 nm. I recommend getting a full-spectrum conversion, as this gives you more flexibility later. Full spectrum means your camera “sees” all the different wavelengths—from ultraviolet to visible light, all the way into infrared.
My zCam E2 has a full-spectrum conversion, as I use it in various filming situations with 850 nm and 920 nm IR lights. I had my zCam converted by Kolari Vision, a company that specializes in infrared photography and camera conversions. They also sell a variety of high-quality filters for IR photography. I highly recommend them!
There are other companies in the UK and Europe that can do IR conversions as well—just google “infrared camera conversion” to find options in your region.
The Problem with Lenses…
Now let’s address the elephant in the room: the infrared hotspot. Not all lenses will give you a clean image during daylight. The biggest issue is that most modern lenses produce hotspots because they are optimized for visible light, not for infrared photography. These hotspots result from lens coatings and design.
So, what can we do about it?
Kolari has an entire page dedicated to lens hotspot performance. Check their recommendations here: https://kolarivision.com/lens-hotspot-list
I tested all my lenses, and unfortunately, none performed really well. The zCam E2 is a Micro Four Thirds camera, so I looked for a compatible lens with good IR performance that wouldn’t break the bank. I decided on the Olympus Zuiko Digital 14–42 mm f/3.5–5.6 ED, which you can find for around €250. After some testing, I realized this lens performs very well indeed.
If you’re looking to get started with infrared photography, have a look at the link above and see which lenses will work best for your setup.
Infrared Filters
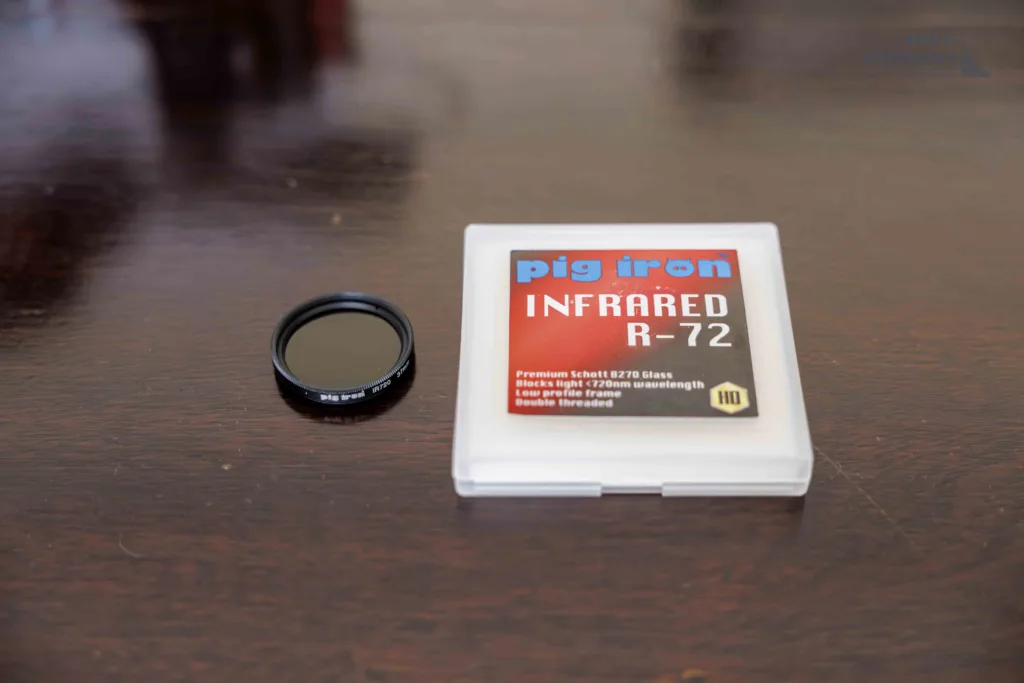
After solving the lens problem, it was time to explore filter options. There are many available, and depending on the look you want to achieve, you’ll need to pick the right one. IR filters block all wavelengths below the number indicated on the filter.
For example, a 720 nm filter blocks all light below that wavelength. I decided to use a 720 nm filter from Pig Iron, as 720 nm is considered the standard infrared photography filter—a great starting point.
How to Take Infrared Wildlife Pictures
With all the technical details sorted out, it was finally time to head back into the bush and start experimenting with infrared wildlife photography. I wasn’t too sure about my first shots—they looked strange on my external monitor. Because the Z Cam E2 is a cinema camera, I needed to use my 5-inch external monitor for framing and focusing. I could see the white foliage, but the rest still looked off. I had to experiment with the white balance to achieve a more pleasing image.
General Camera Settings
At the beginning, figuring out the right settings was a bit of a challenge. Since my camera isn’t a stills camera, I had to rely on the exposure tools available on my SmallHD Focus monitor. Most of the time, I shot at the camera’s native ISO of 500, and only in darker situations did I switch to the second native ISO of 1250.
The camera’s dynamic range is quite high, so extreme exposures weren’t really a problem—as long as nothing clipped in the darks or highlights.
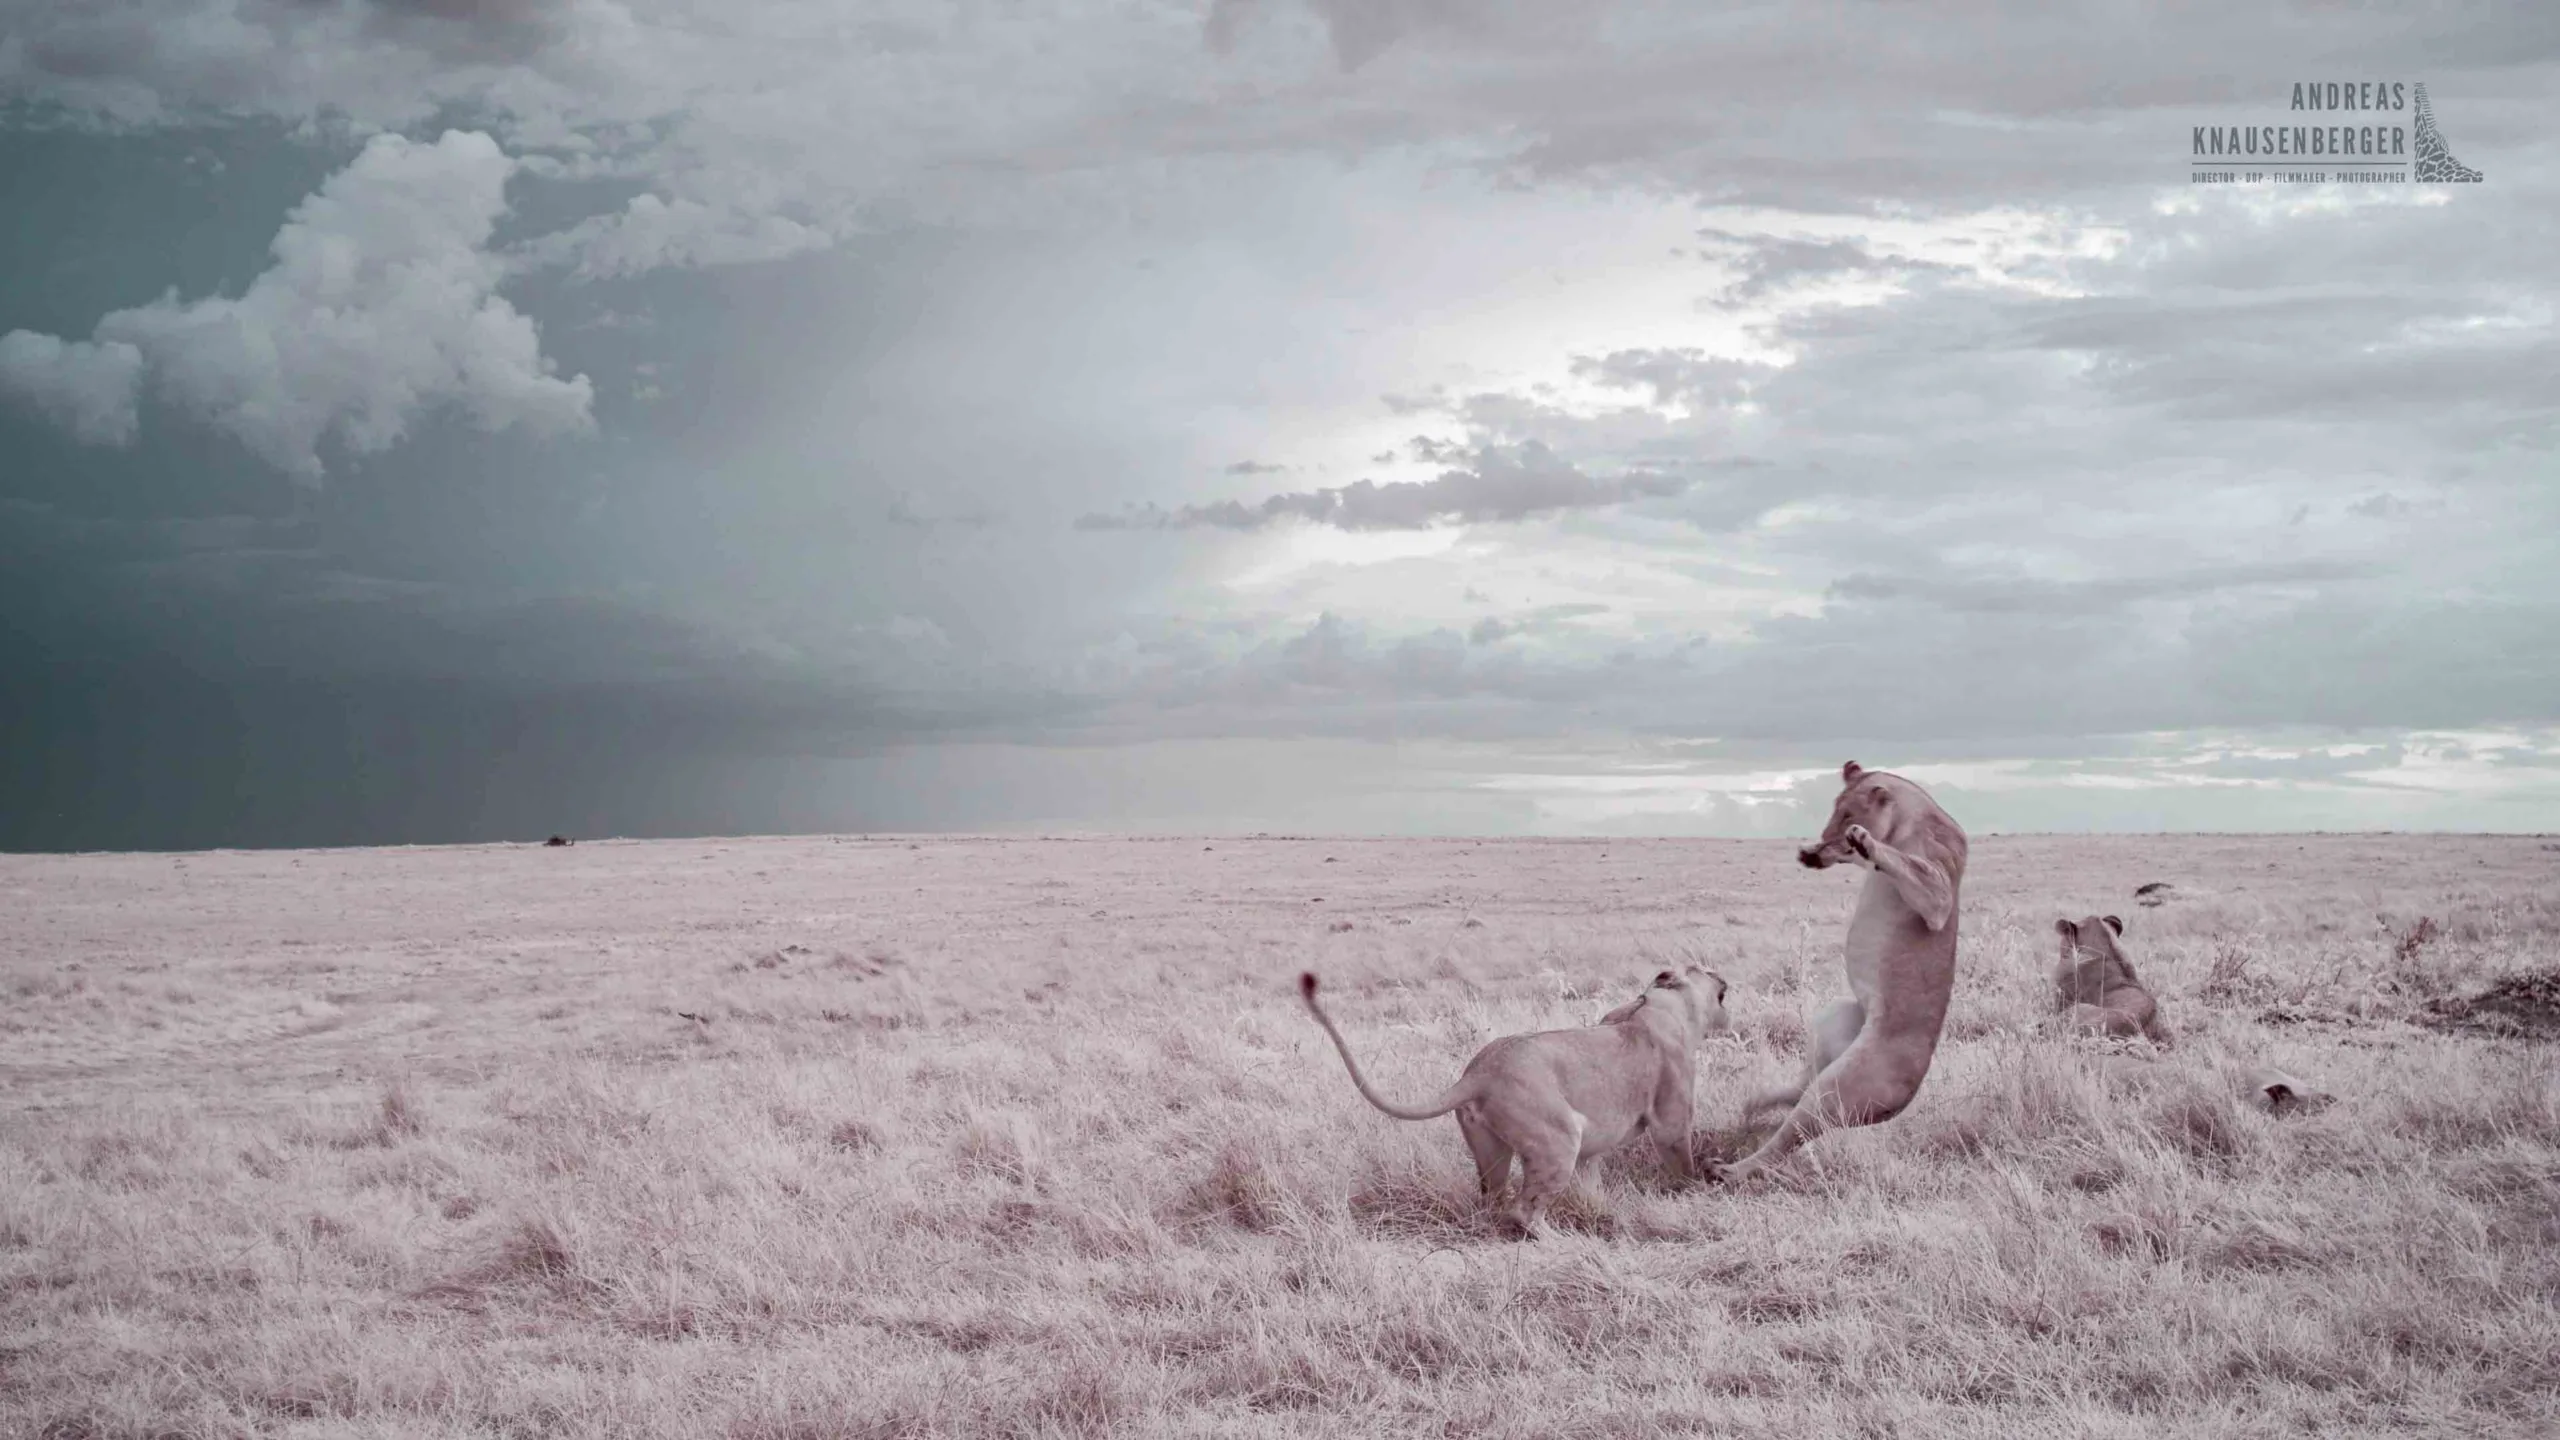
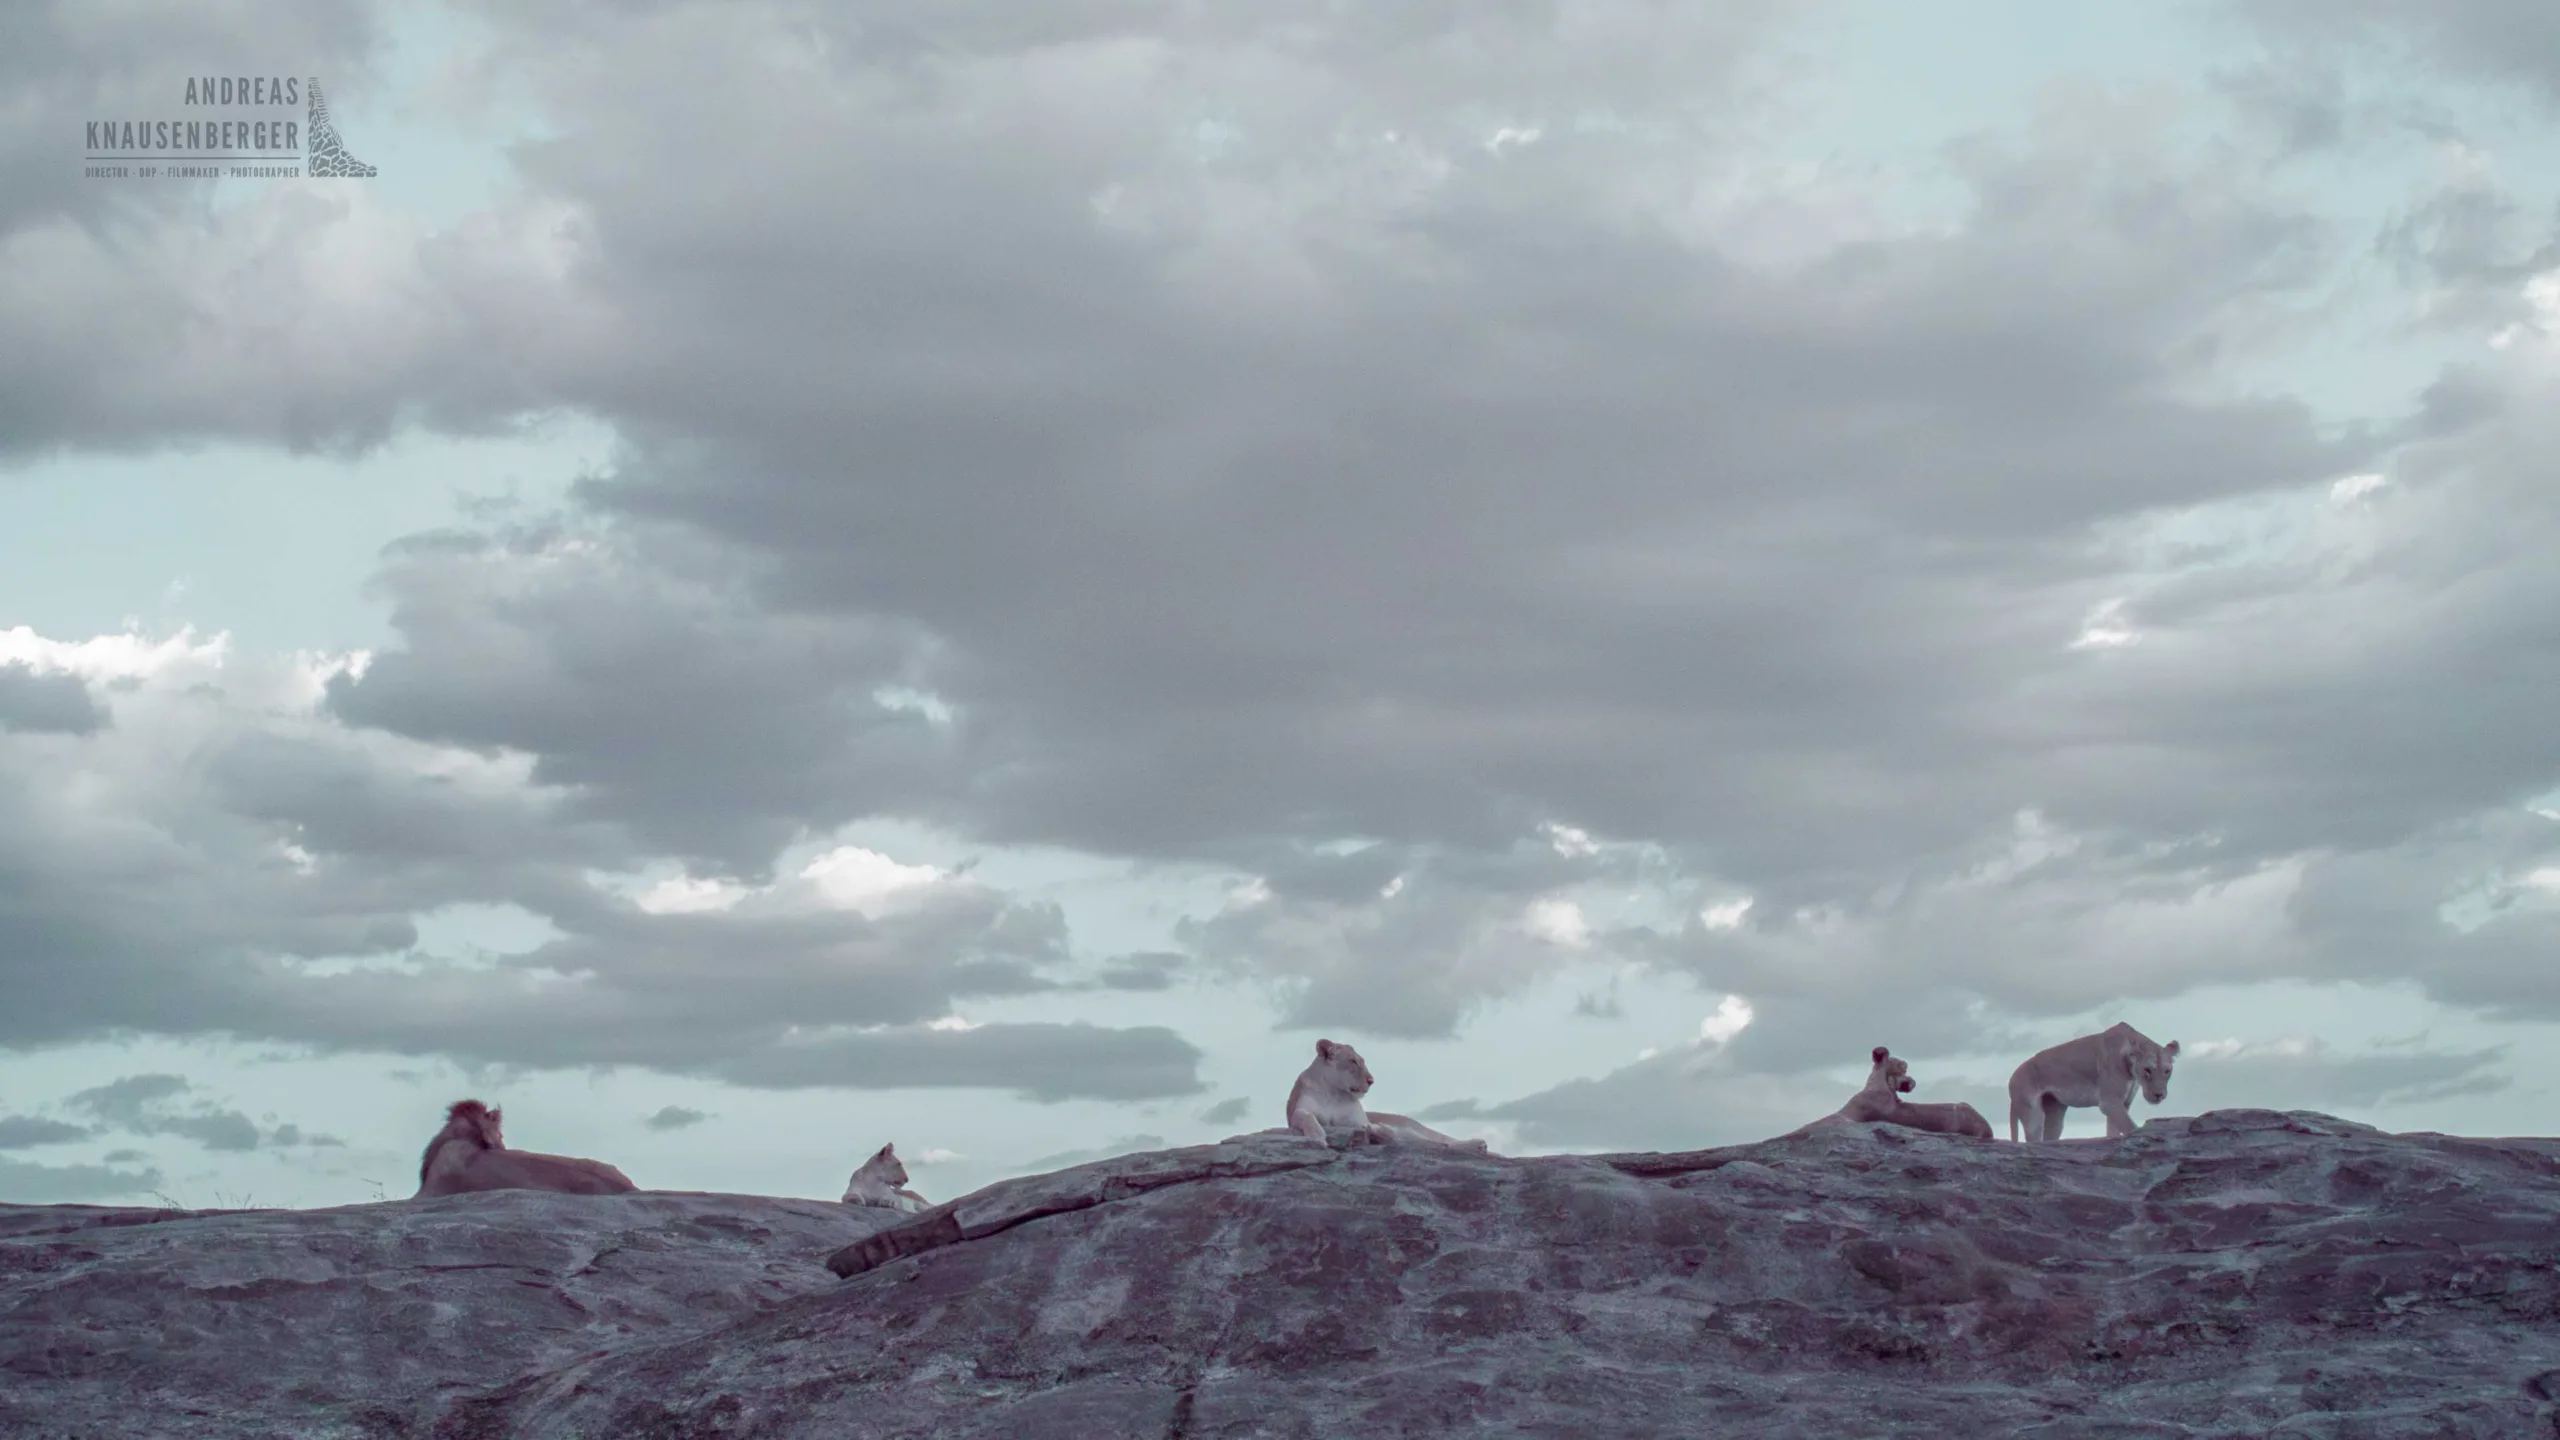
The lens I use is extremely sharp around f/7.1, so nearly all my photos were taken at that aperture. I typically chose shutter speeds between 1/160 s and 1/200 s, which was fast enough to avoid motion blur for wider shots and slow-moving animals. Only once, while photographing lions playing in the evening, did I wish I’d used a faster shutter speed. It was already quite dark, and at ISO 3200, I had reached the limits of what was possible.
White Balance & Manual Focus
Depending on your camera, you’ll need to find a white balance setting that suits your personal preference and gives foliage the closest appearance to white. In my case, I settled on 6400 K and –50 tint, and I never changed it in-camera so that all photos would have the same baseline in post-processing.
The autofocus on the Z Cam E2 isn’t very accurate, so I manually focused on all my shots. I used focus peaking on my SmallHD monitor along with some of the camera’s focus tools. Focusing wasn’t easy at first, the image on the monitor was very red and flat in contrast. With practice, though, I developed a good feeling for what was in focus.
If your camera has focus-assist tools, experiment with their settings for best results. Cameras with electronic viewfinders (EVFs) can make focusing much easier compared to external monitors.
Finding interesting subjects & the perfect time of the day!
The biggest difference from traditional wildlife photography is that you’ll often shoot with wider lenses than usual. But I must admit, using a wide lens opened up my portfolio in general—I normally tended to use my 500 mm f/4 prime lens to get as close as possible.
Here I want to give a shoutout to my friend William Steel, an excellent wildlife photographer, who encouraged me to use wider lenses on photographic safaris. We even set ourselves fun challenges during guiding trips to force wider compositions.
Check out our Instagrams:
https://www.instagram.com/williamsteelphotography/
https://www.instagram.com/andreas_knausenberger/
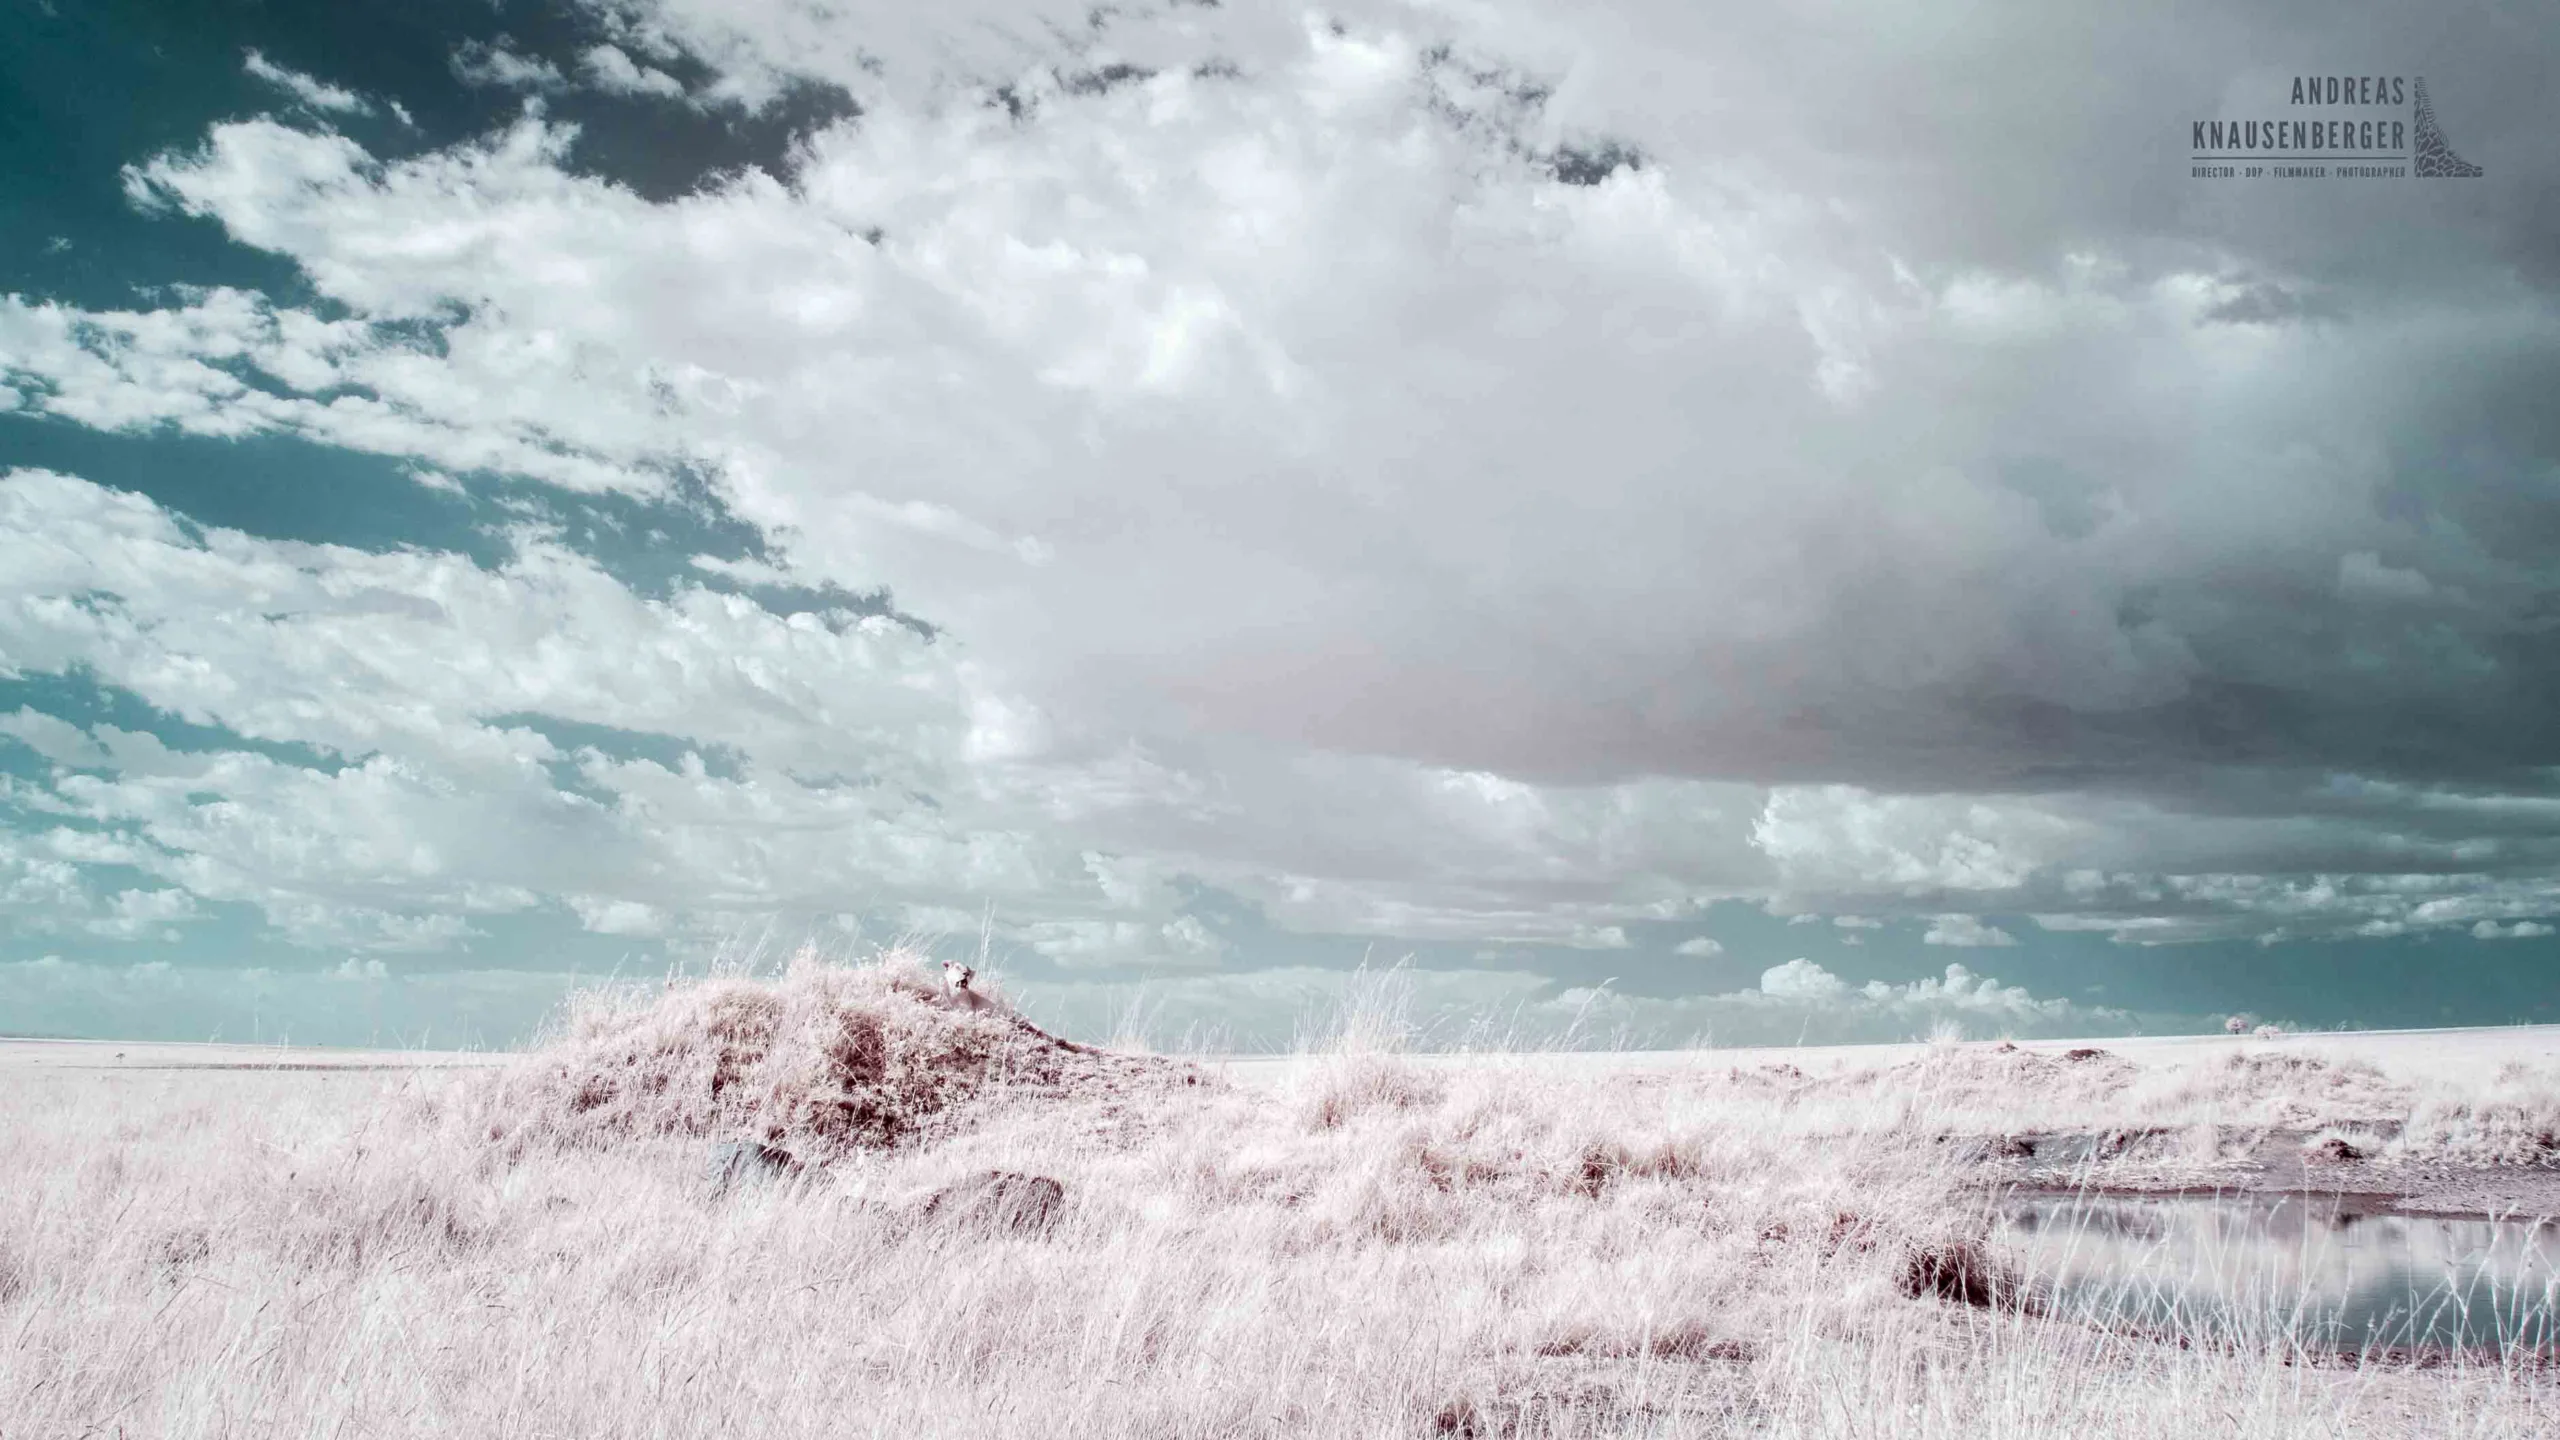
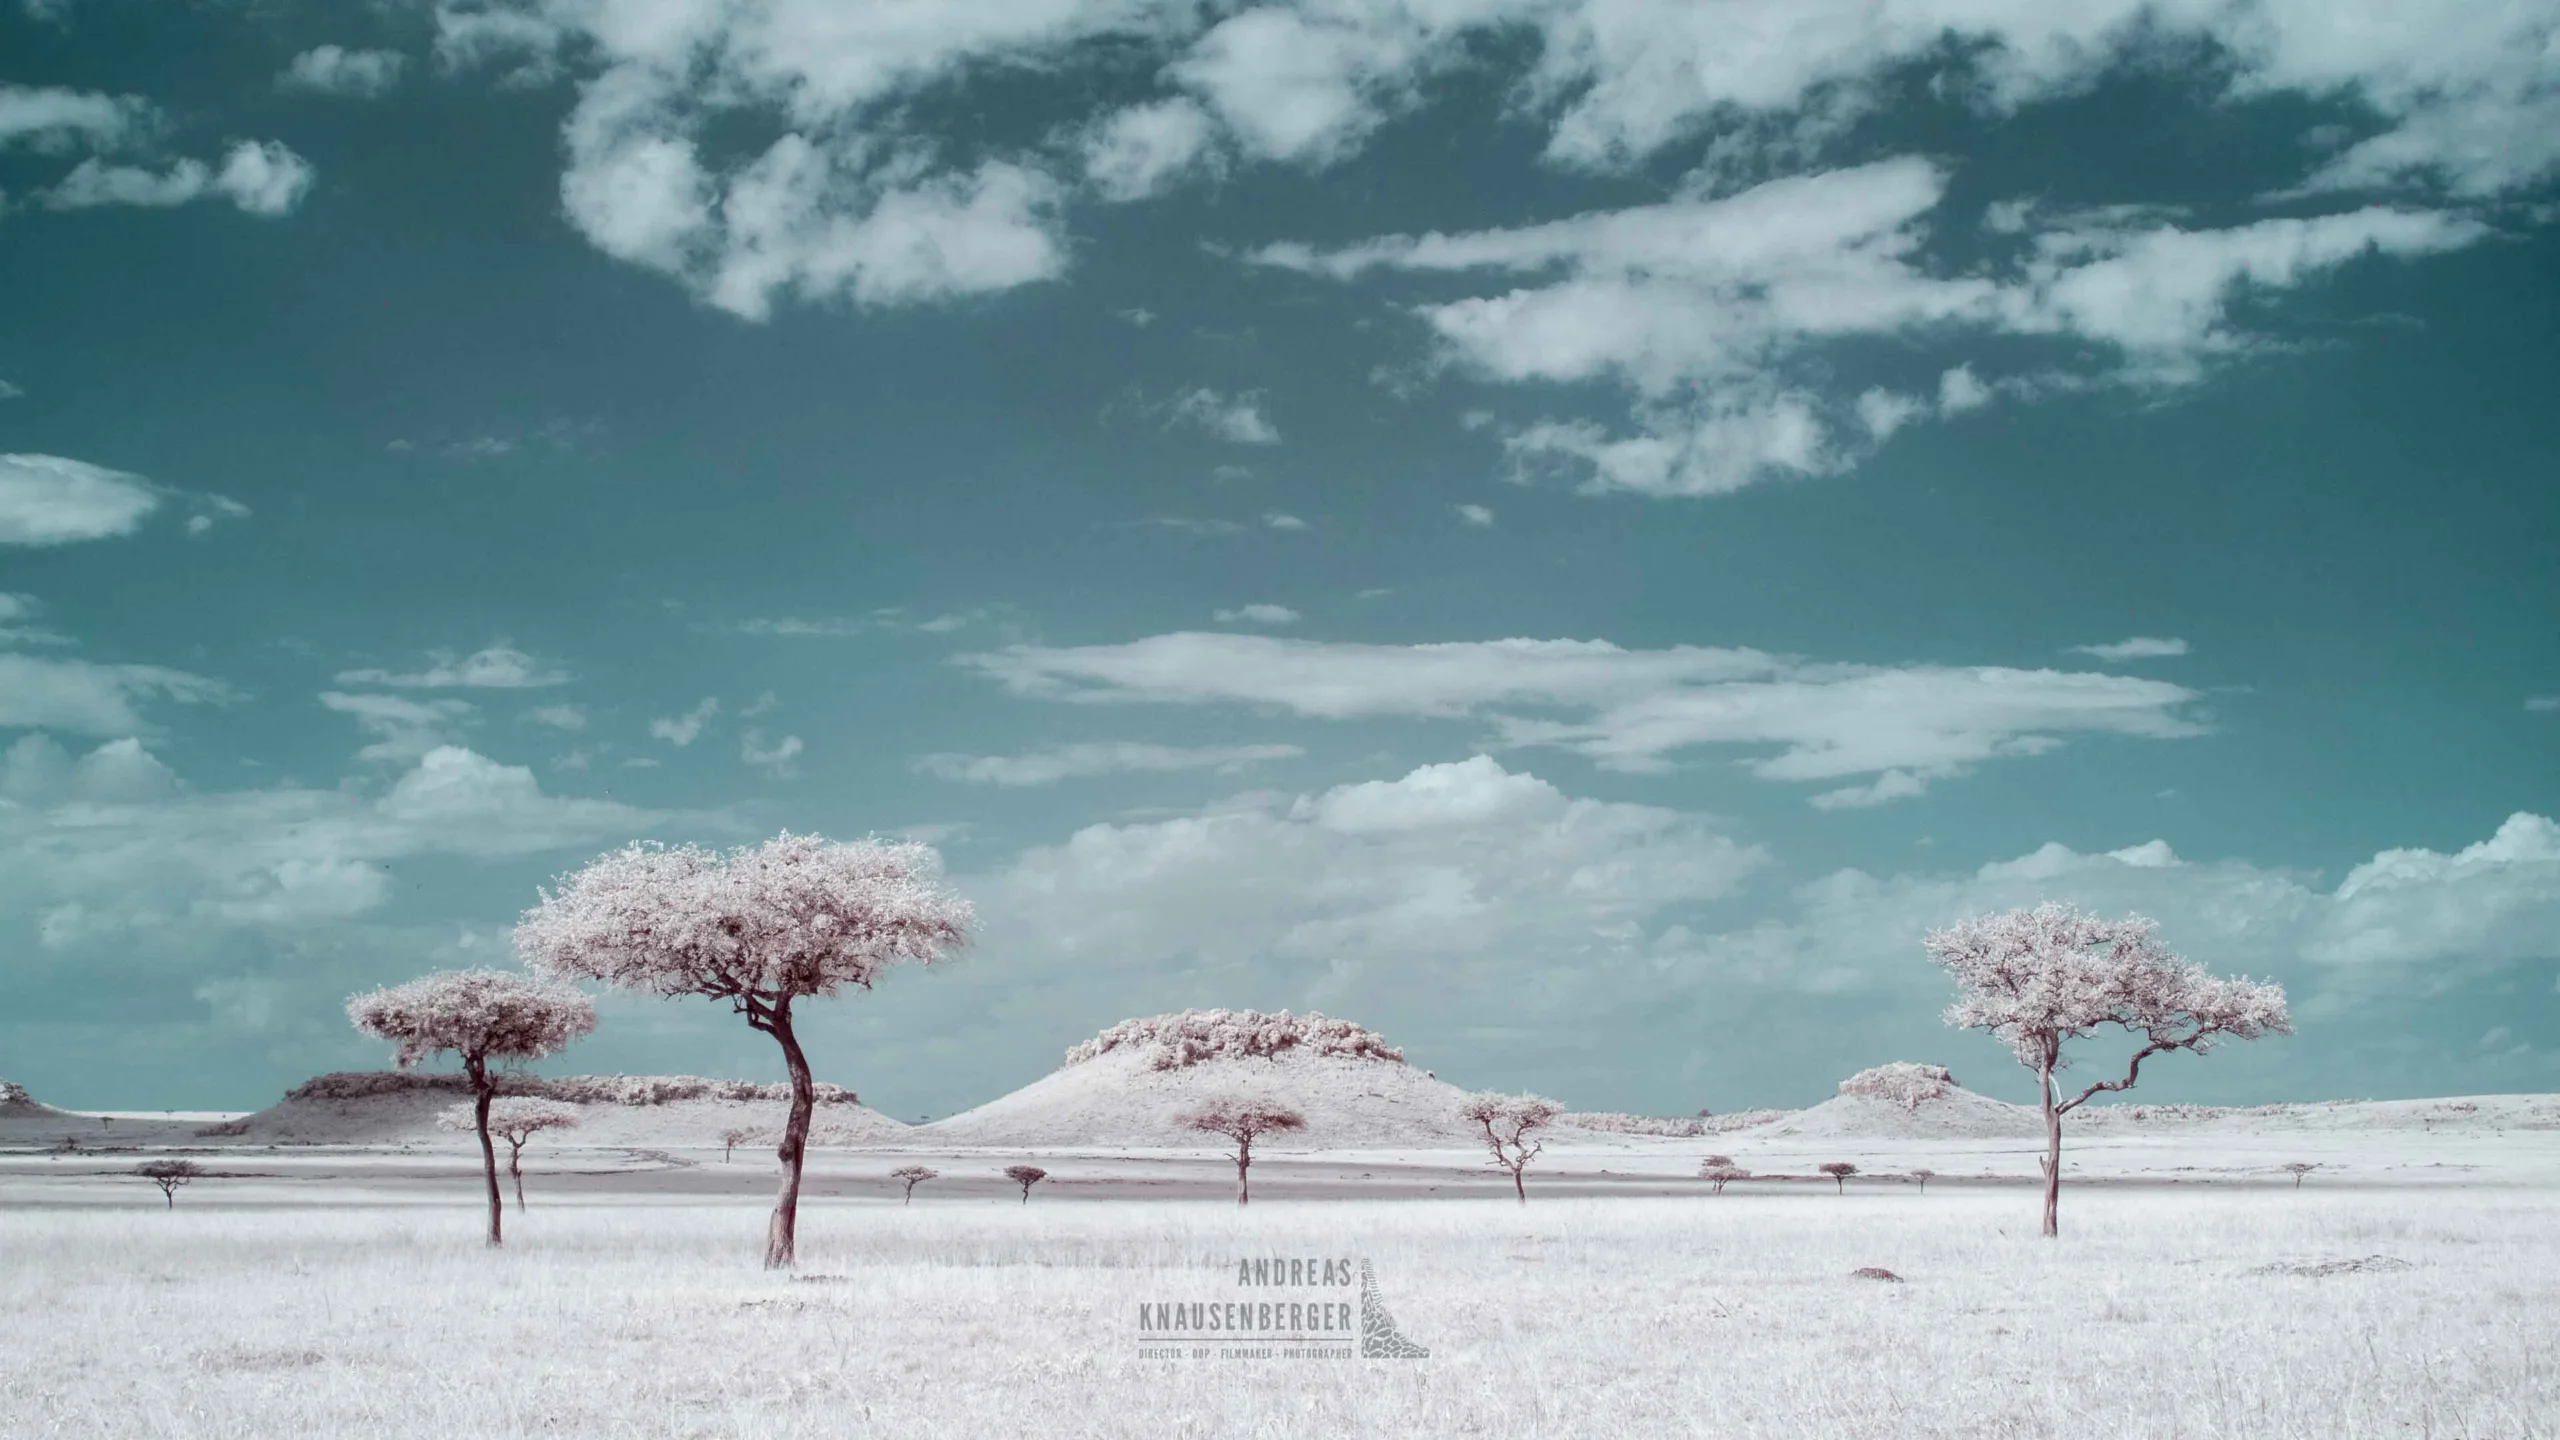
One thing I learned quickly: you want as much sunlight as possible! The harsher the light, the better the white foliage will stand out. Perfect—because in normal wildlife photography, harsh midday light is something you usually avoid. Infrared wildlife photography gives you opportunities to take beautiful photos even during the midday hours!
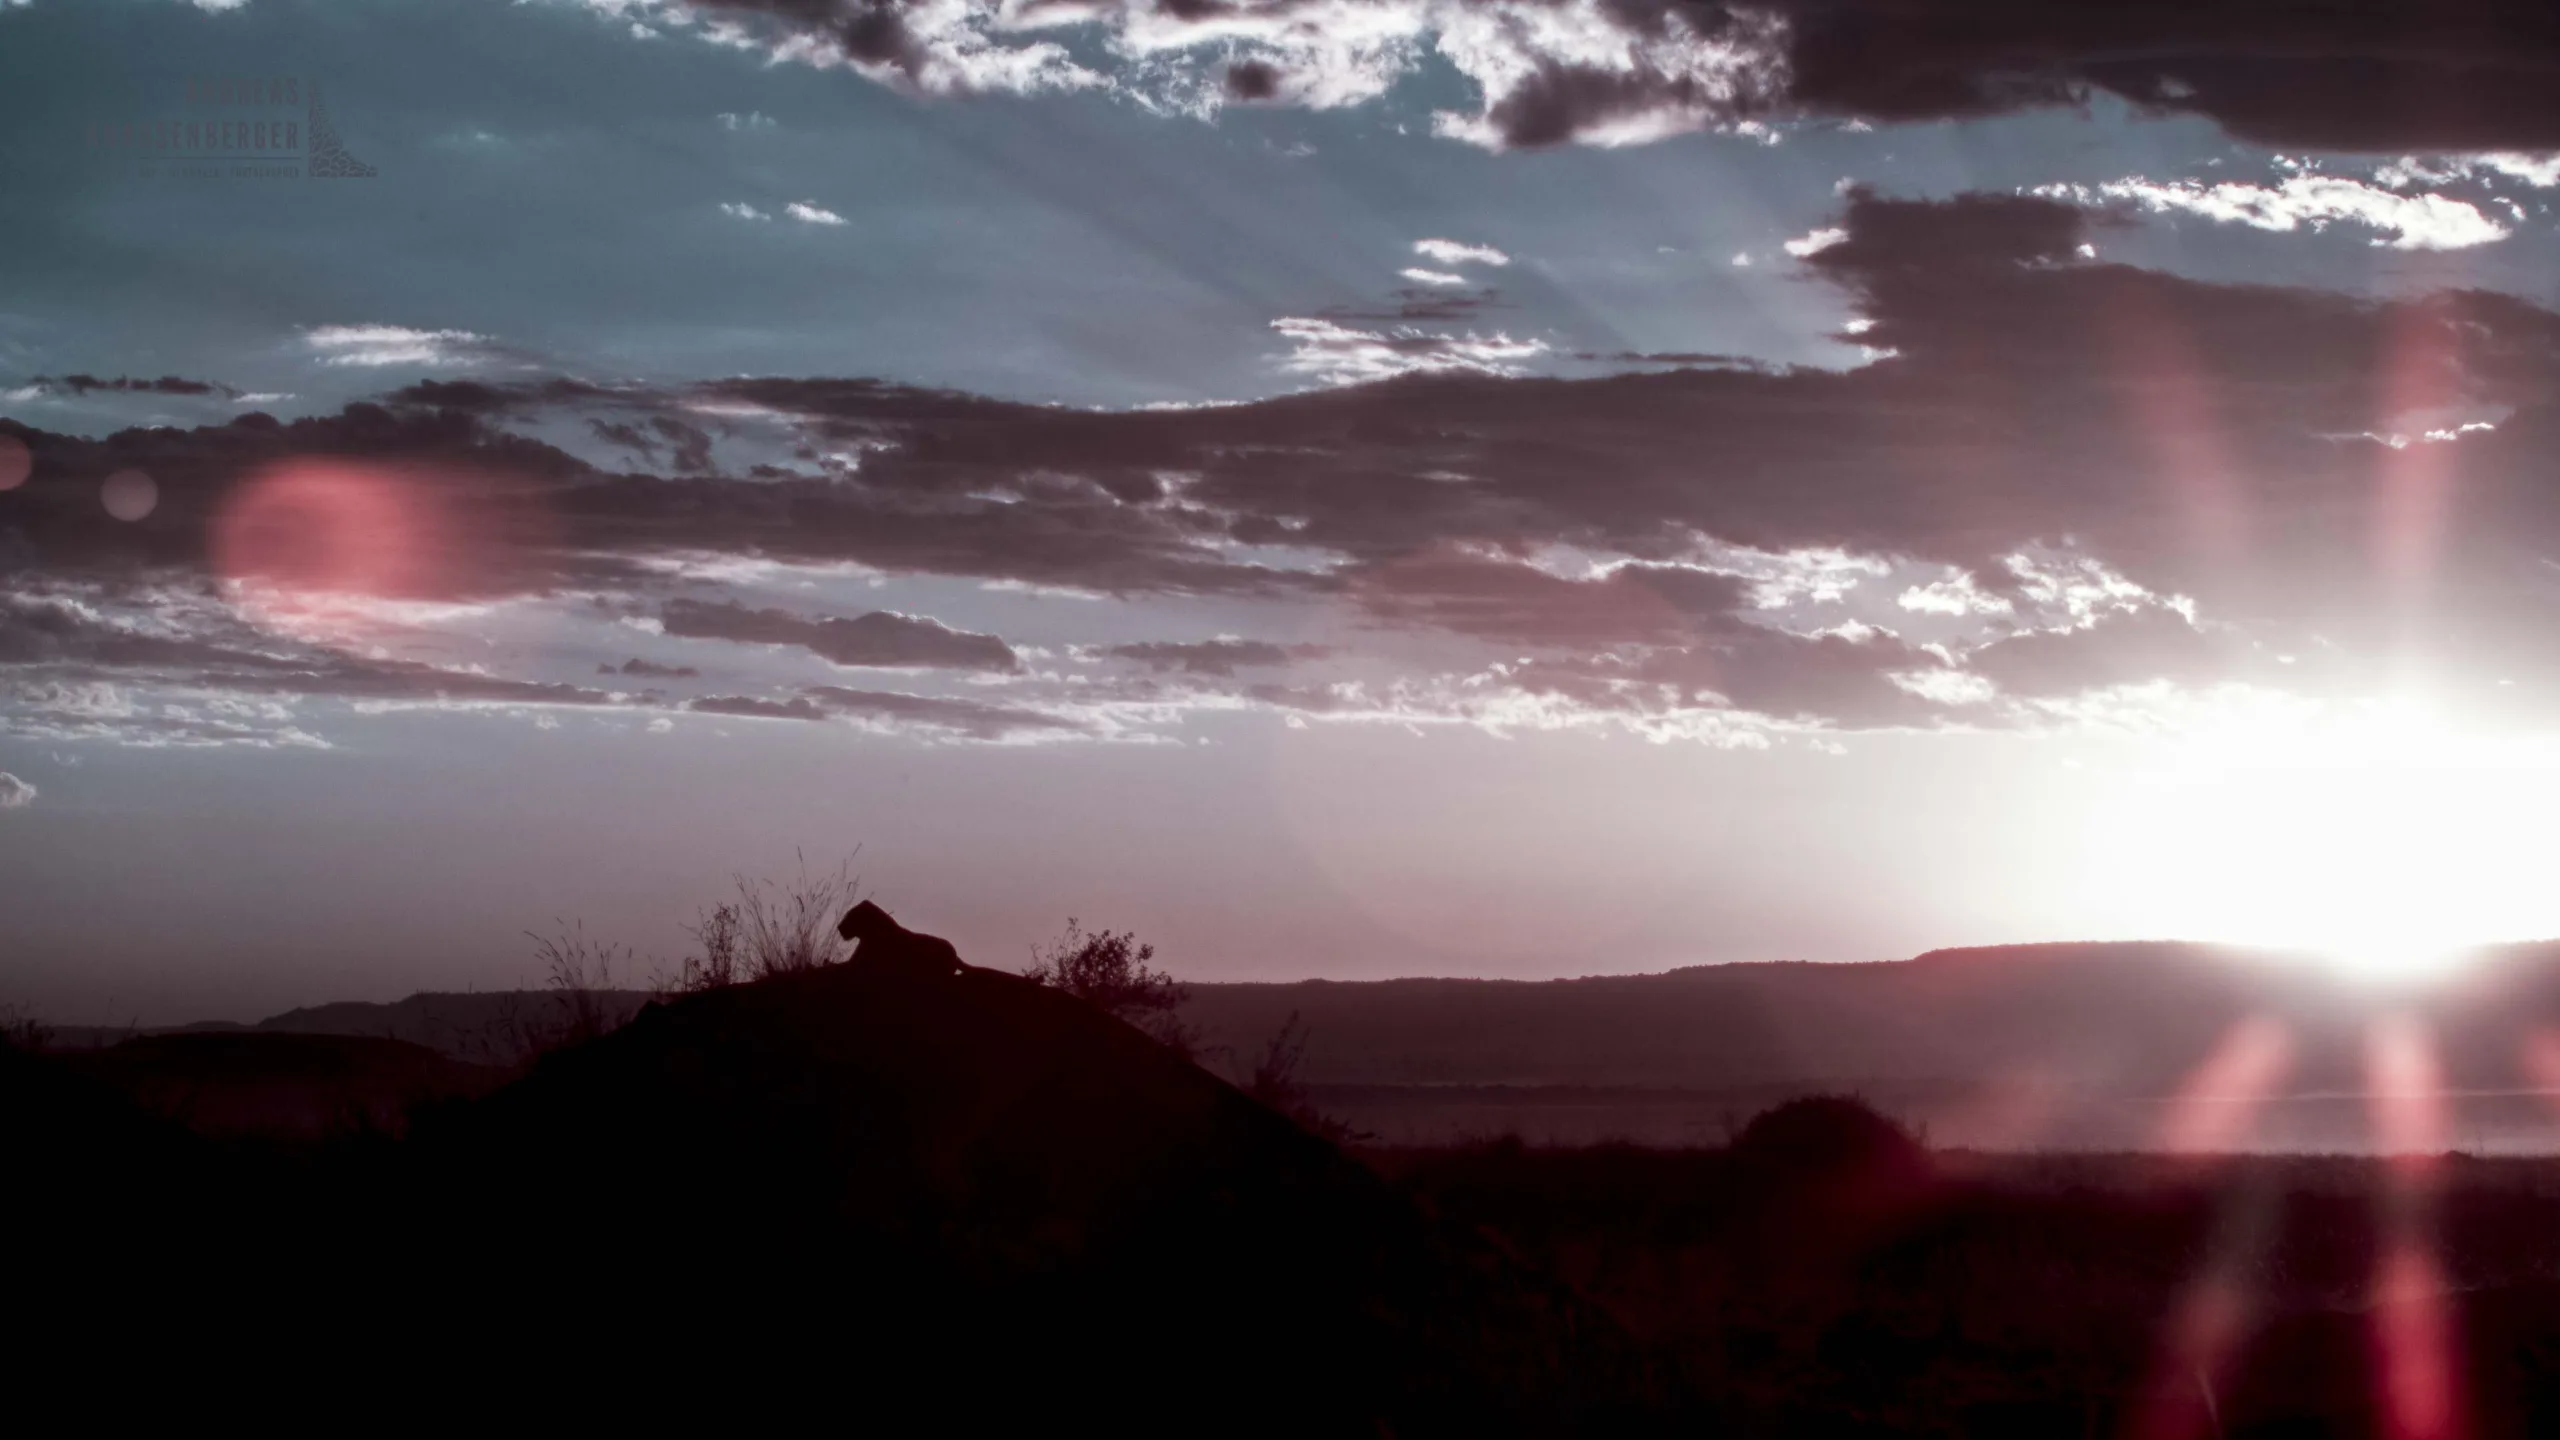
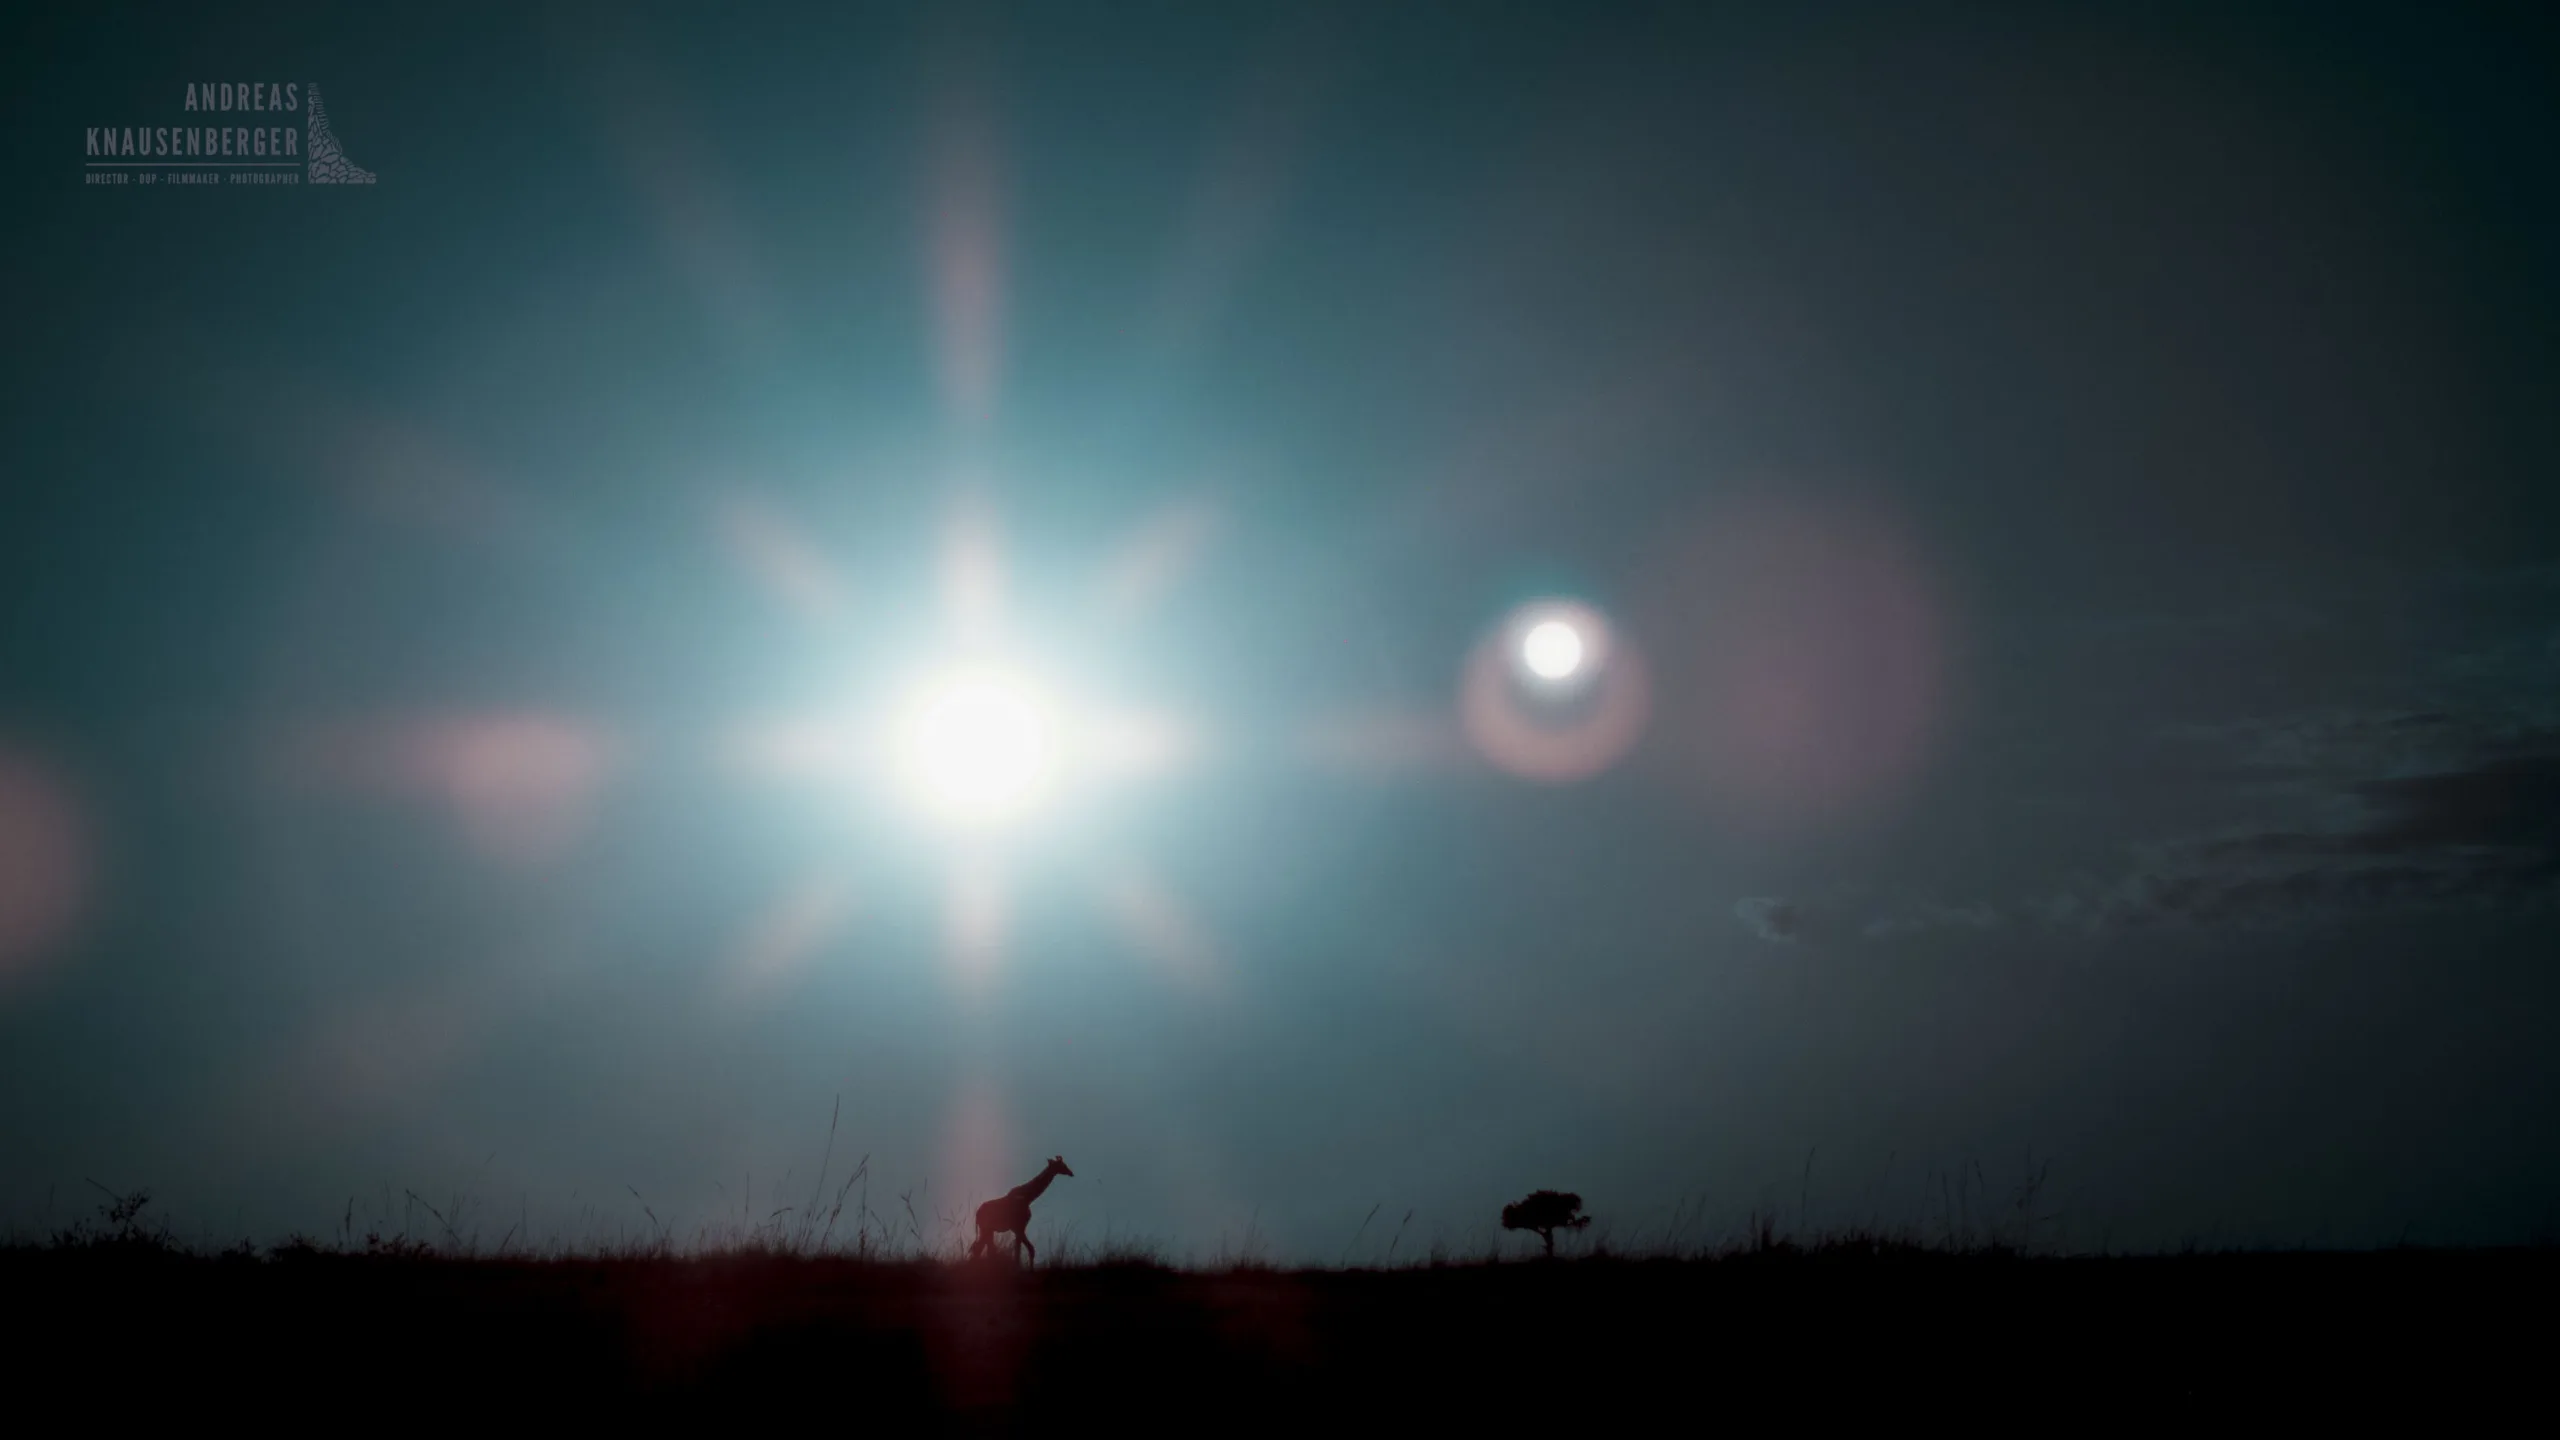
Sunsets and sunrises can look quite dull in IR compared to bright daylight—but they do produce fascinating lens flares, giving your images a futuristic look.
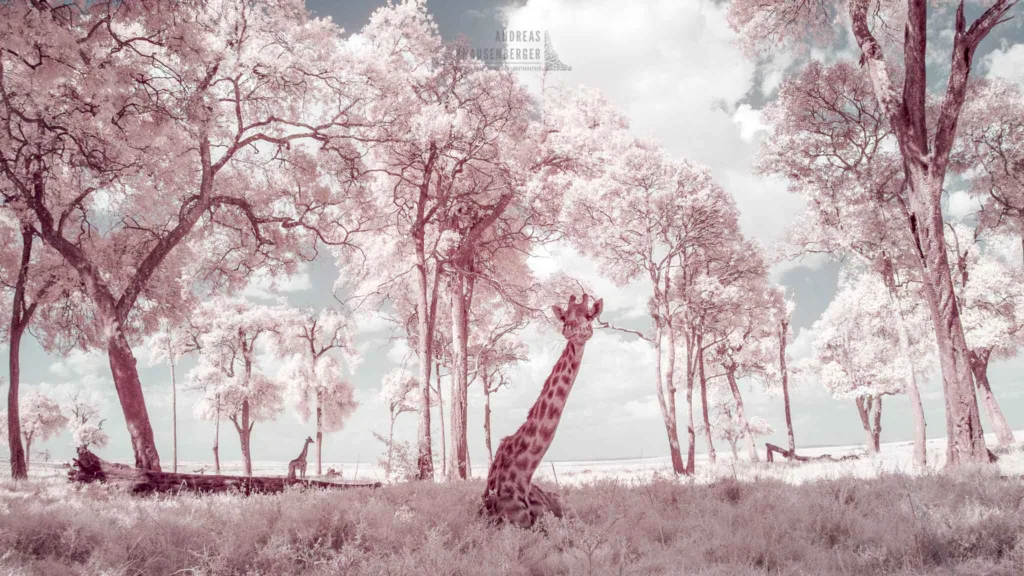
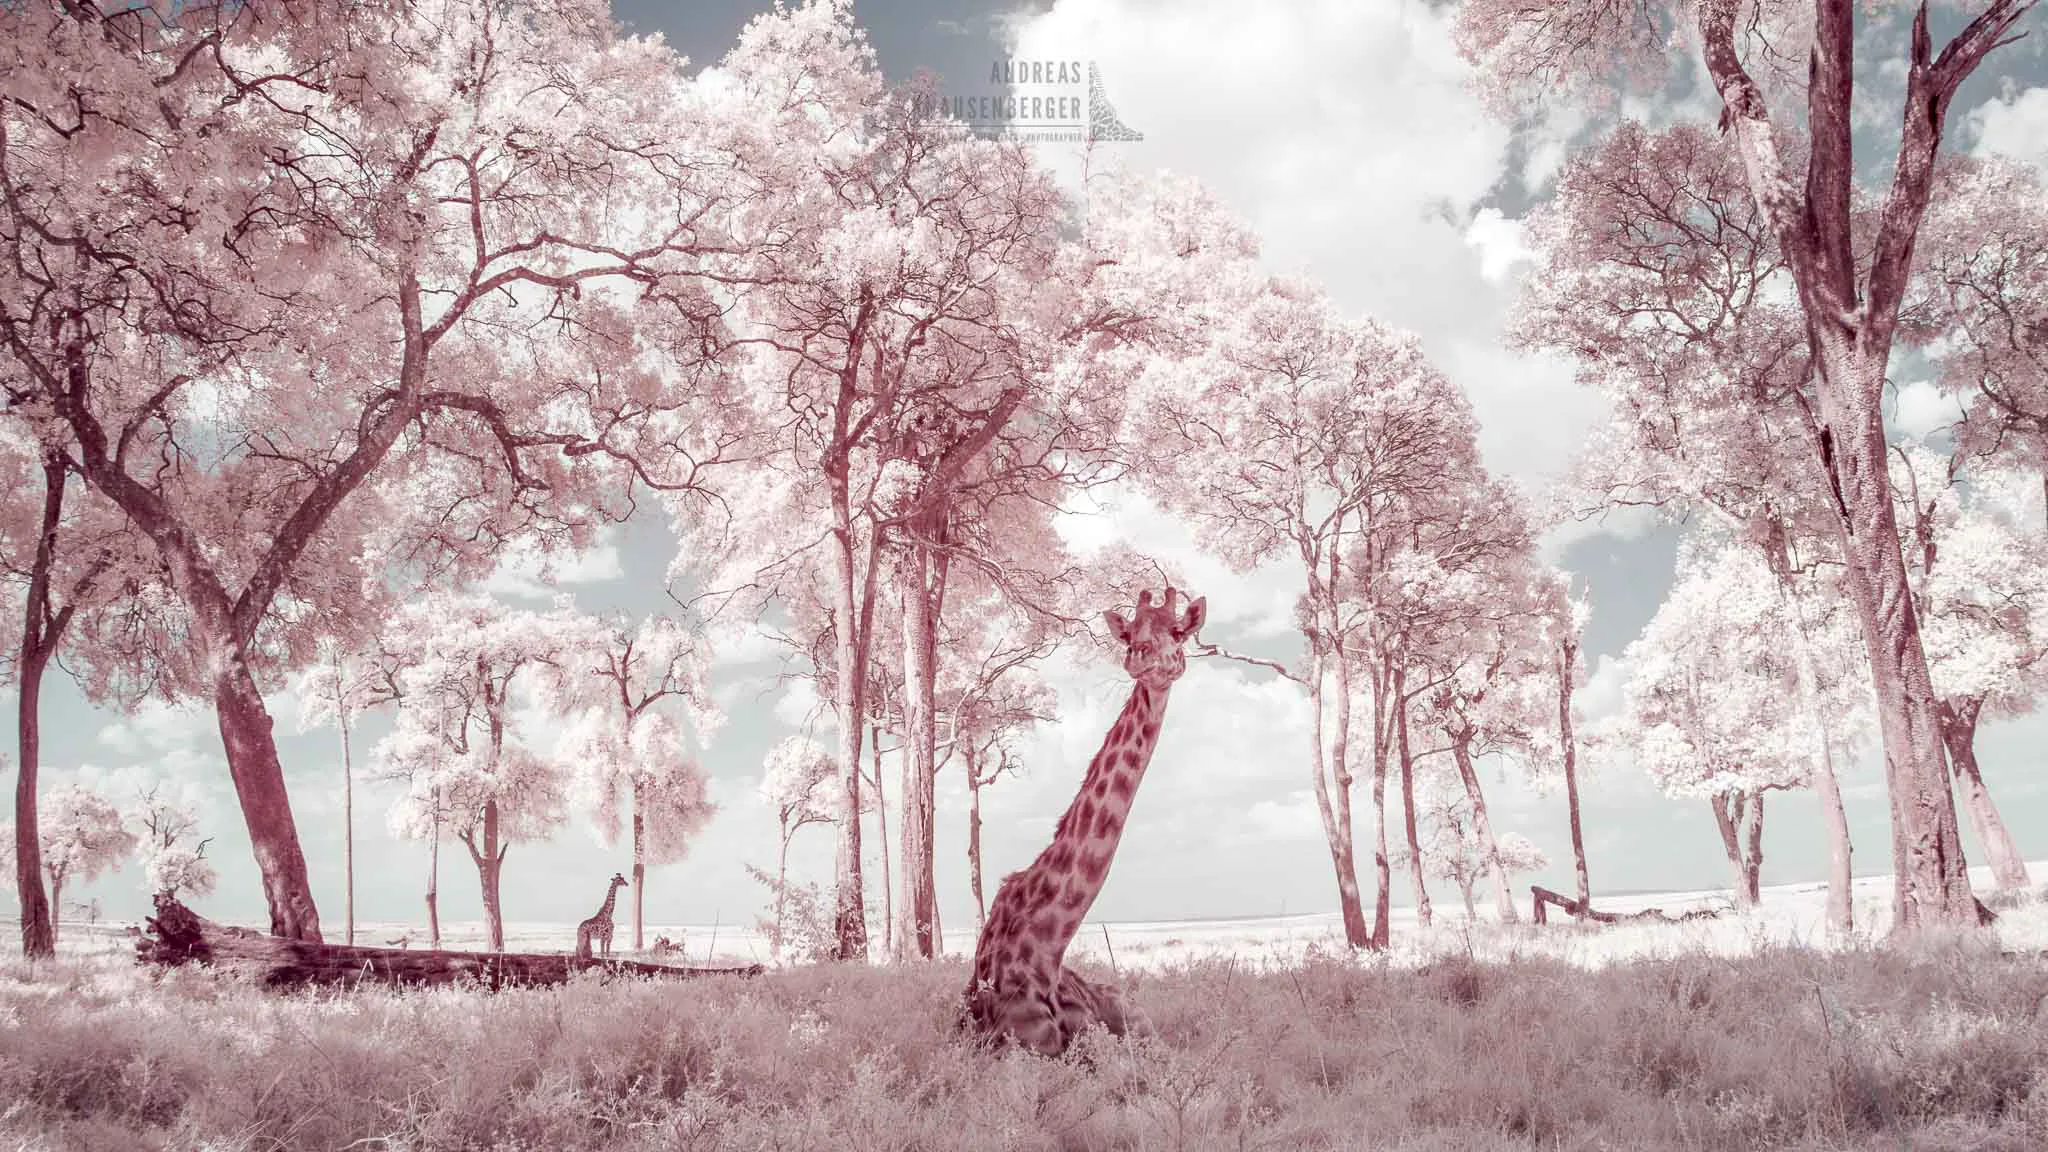
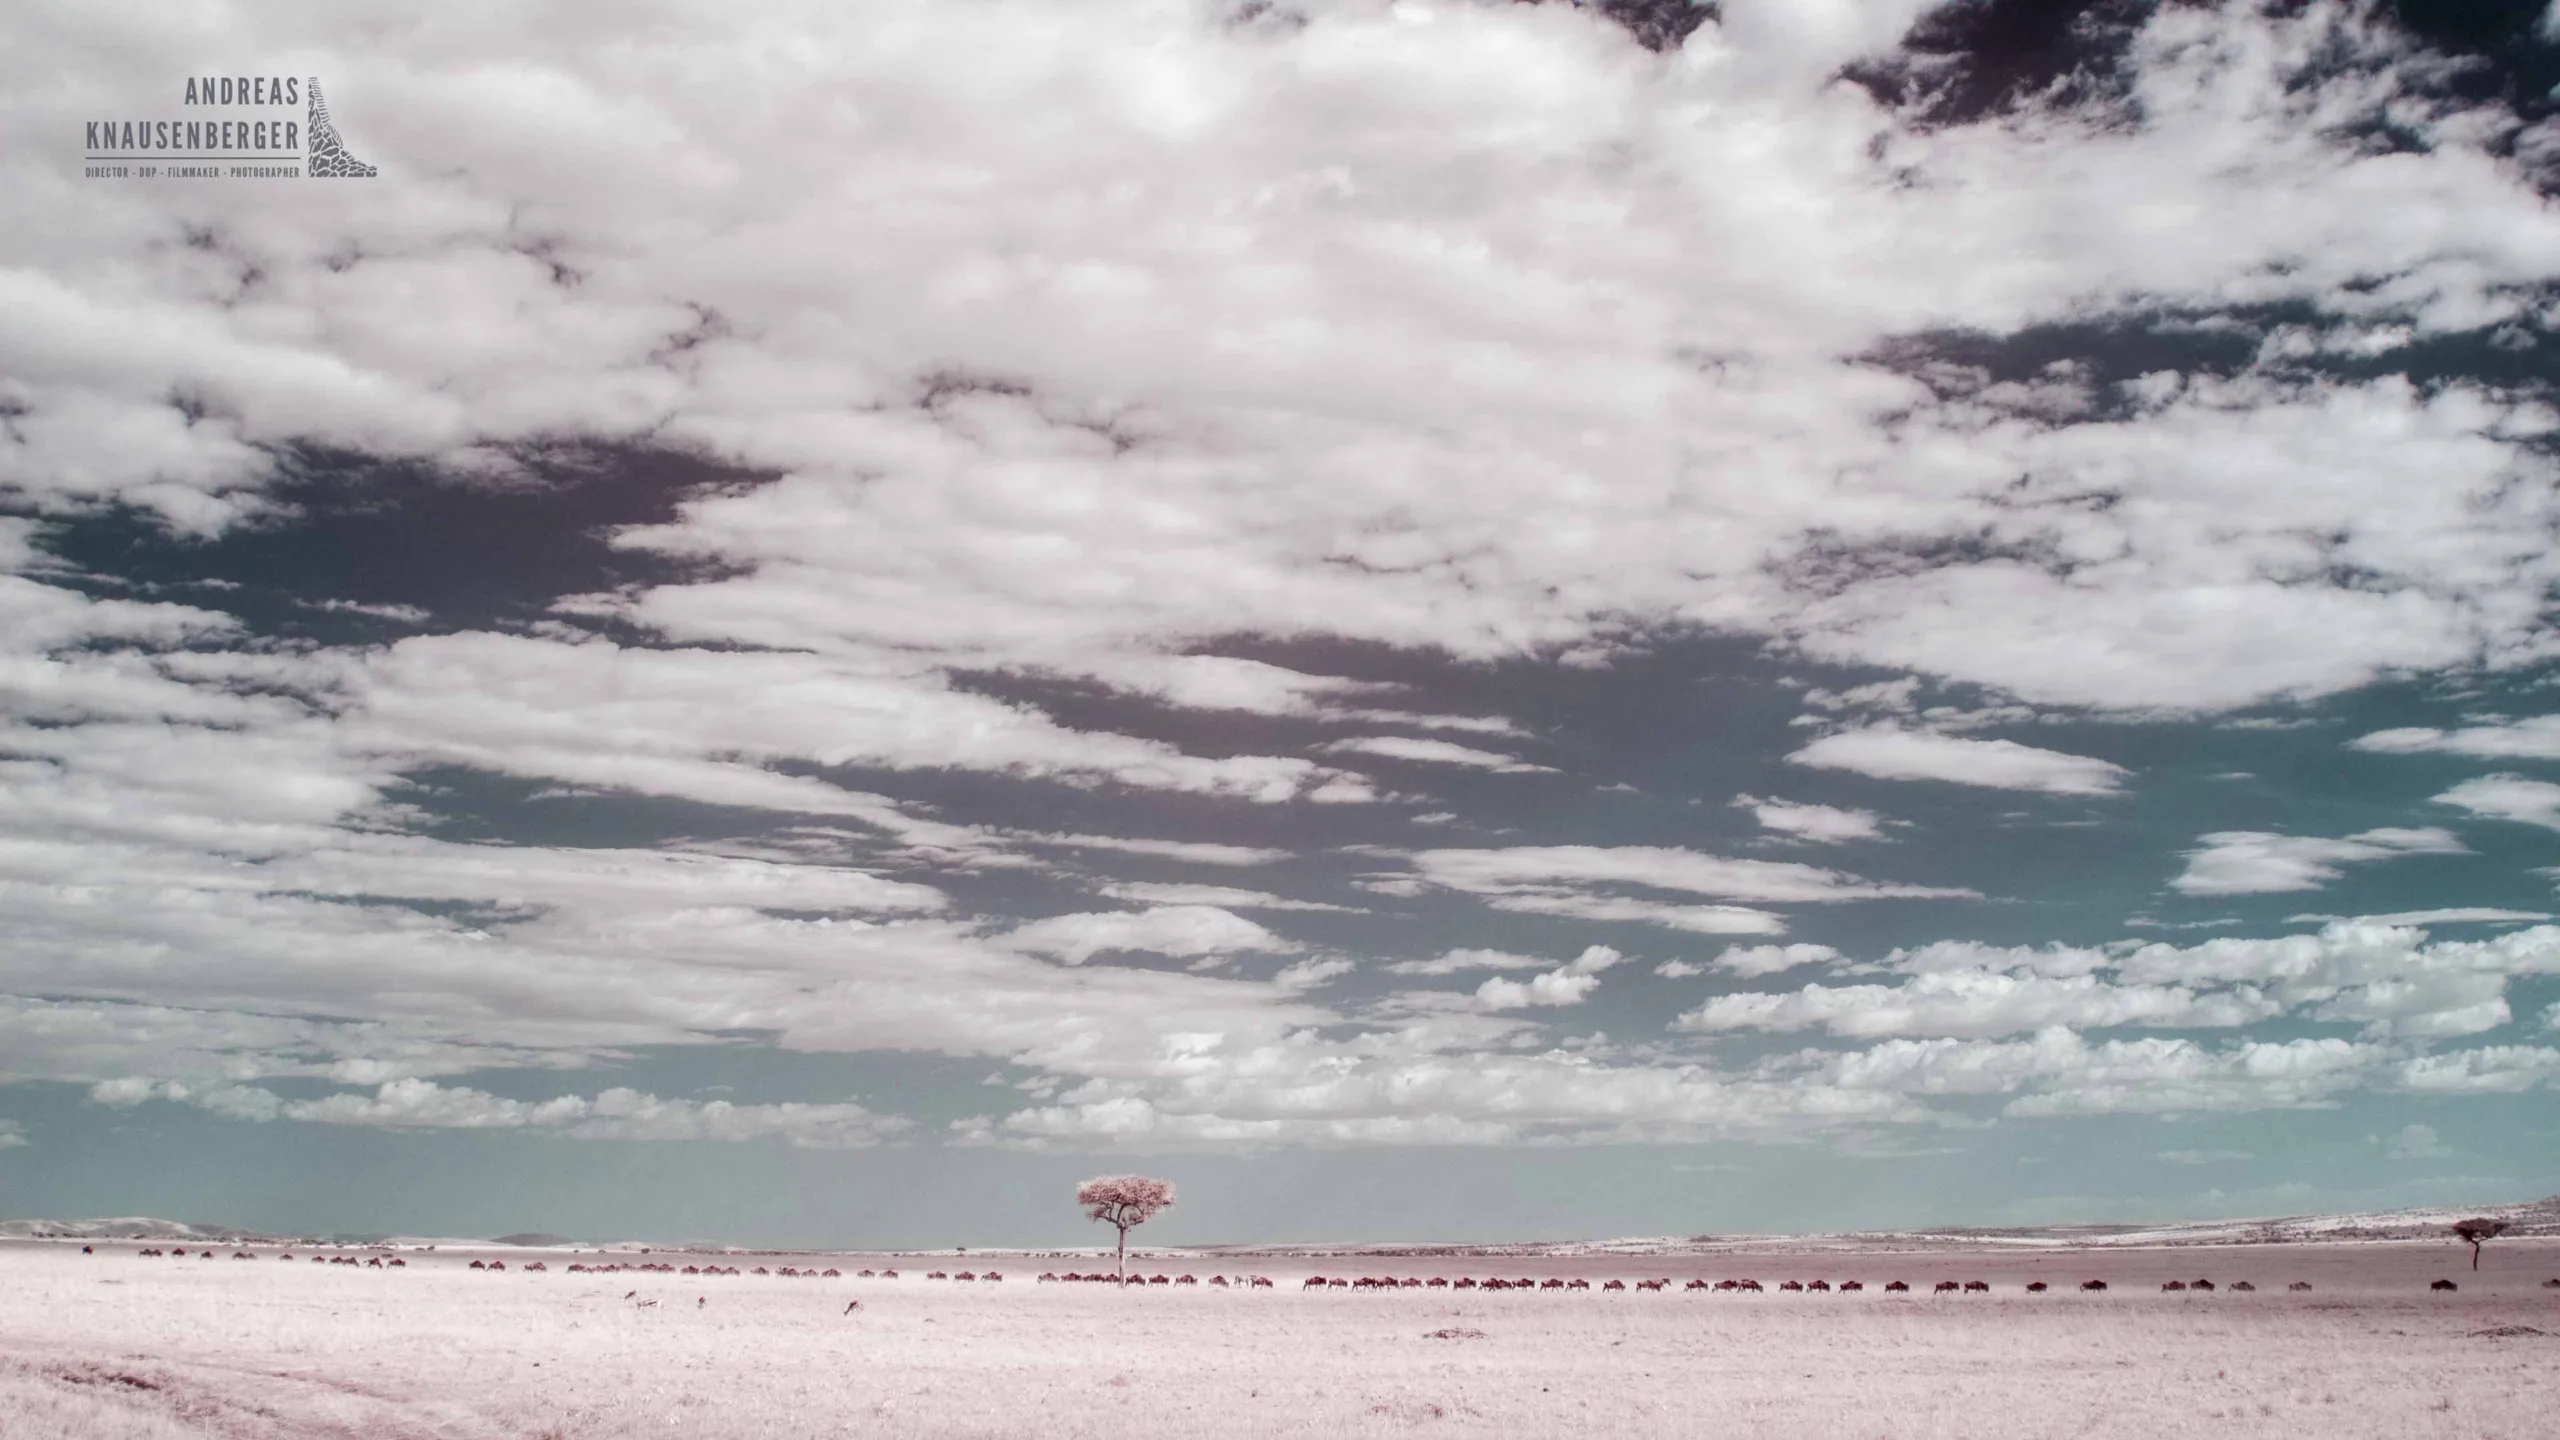
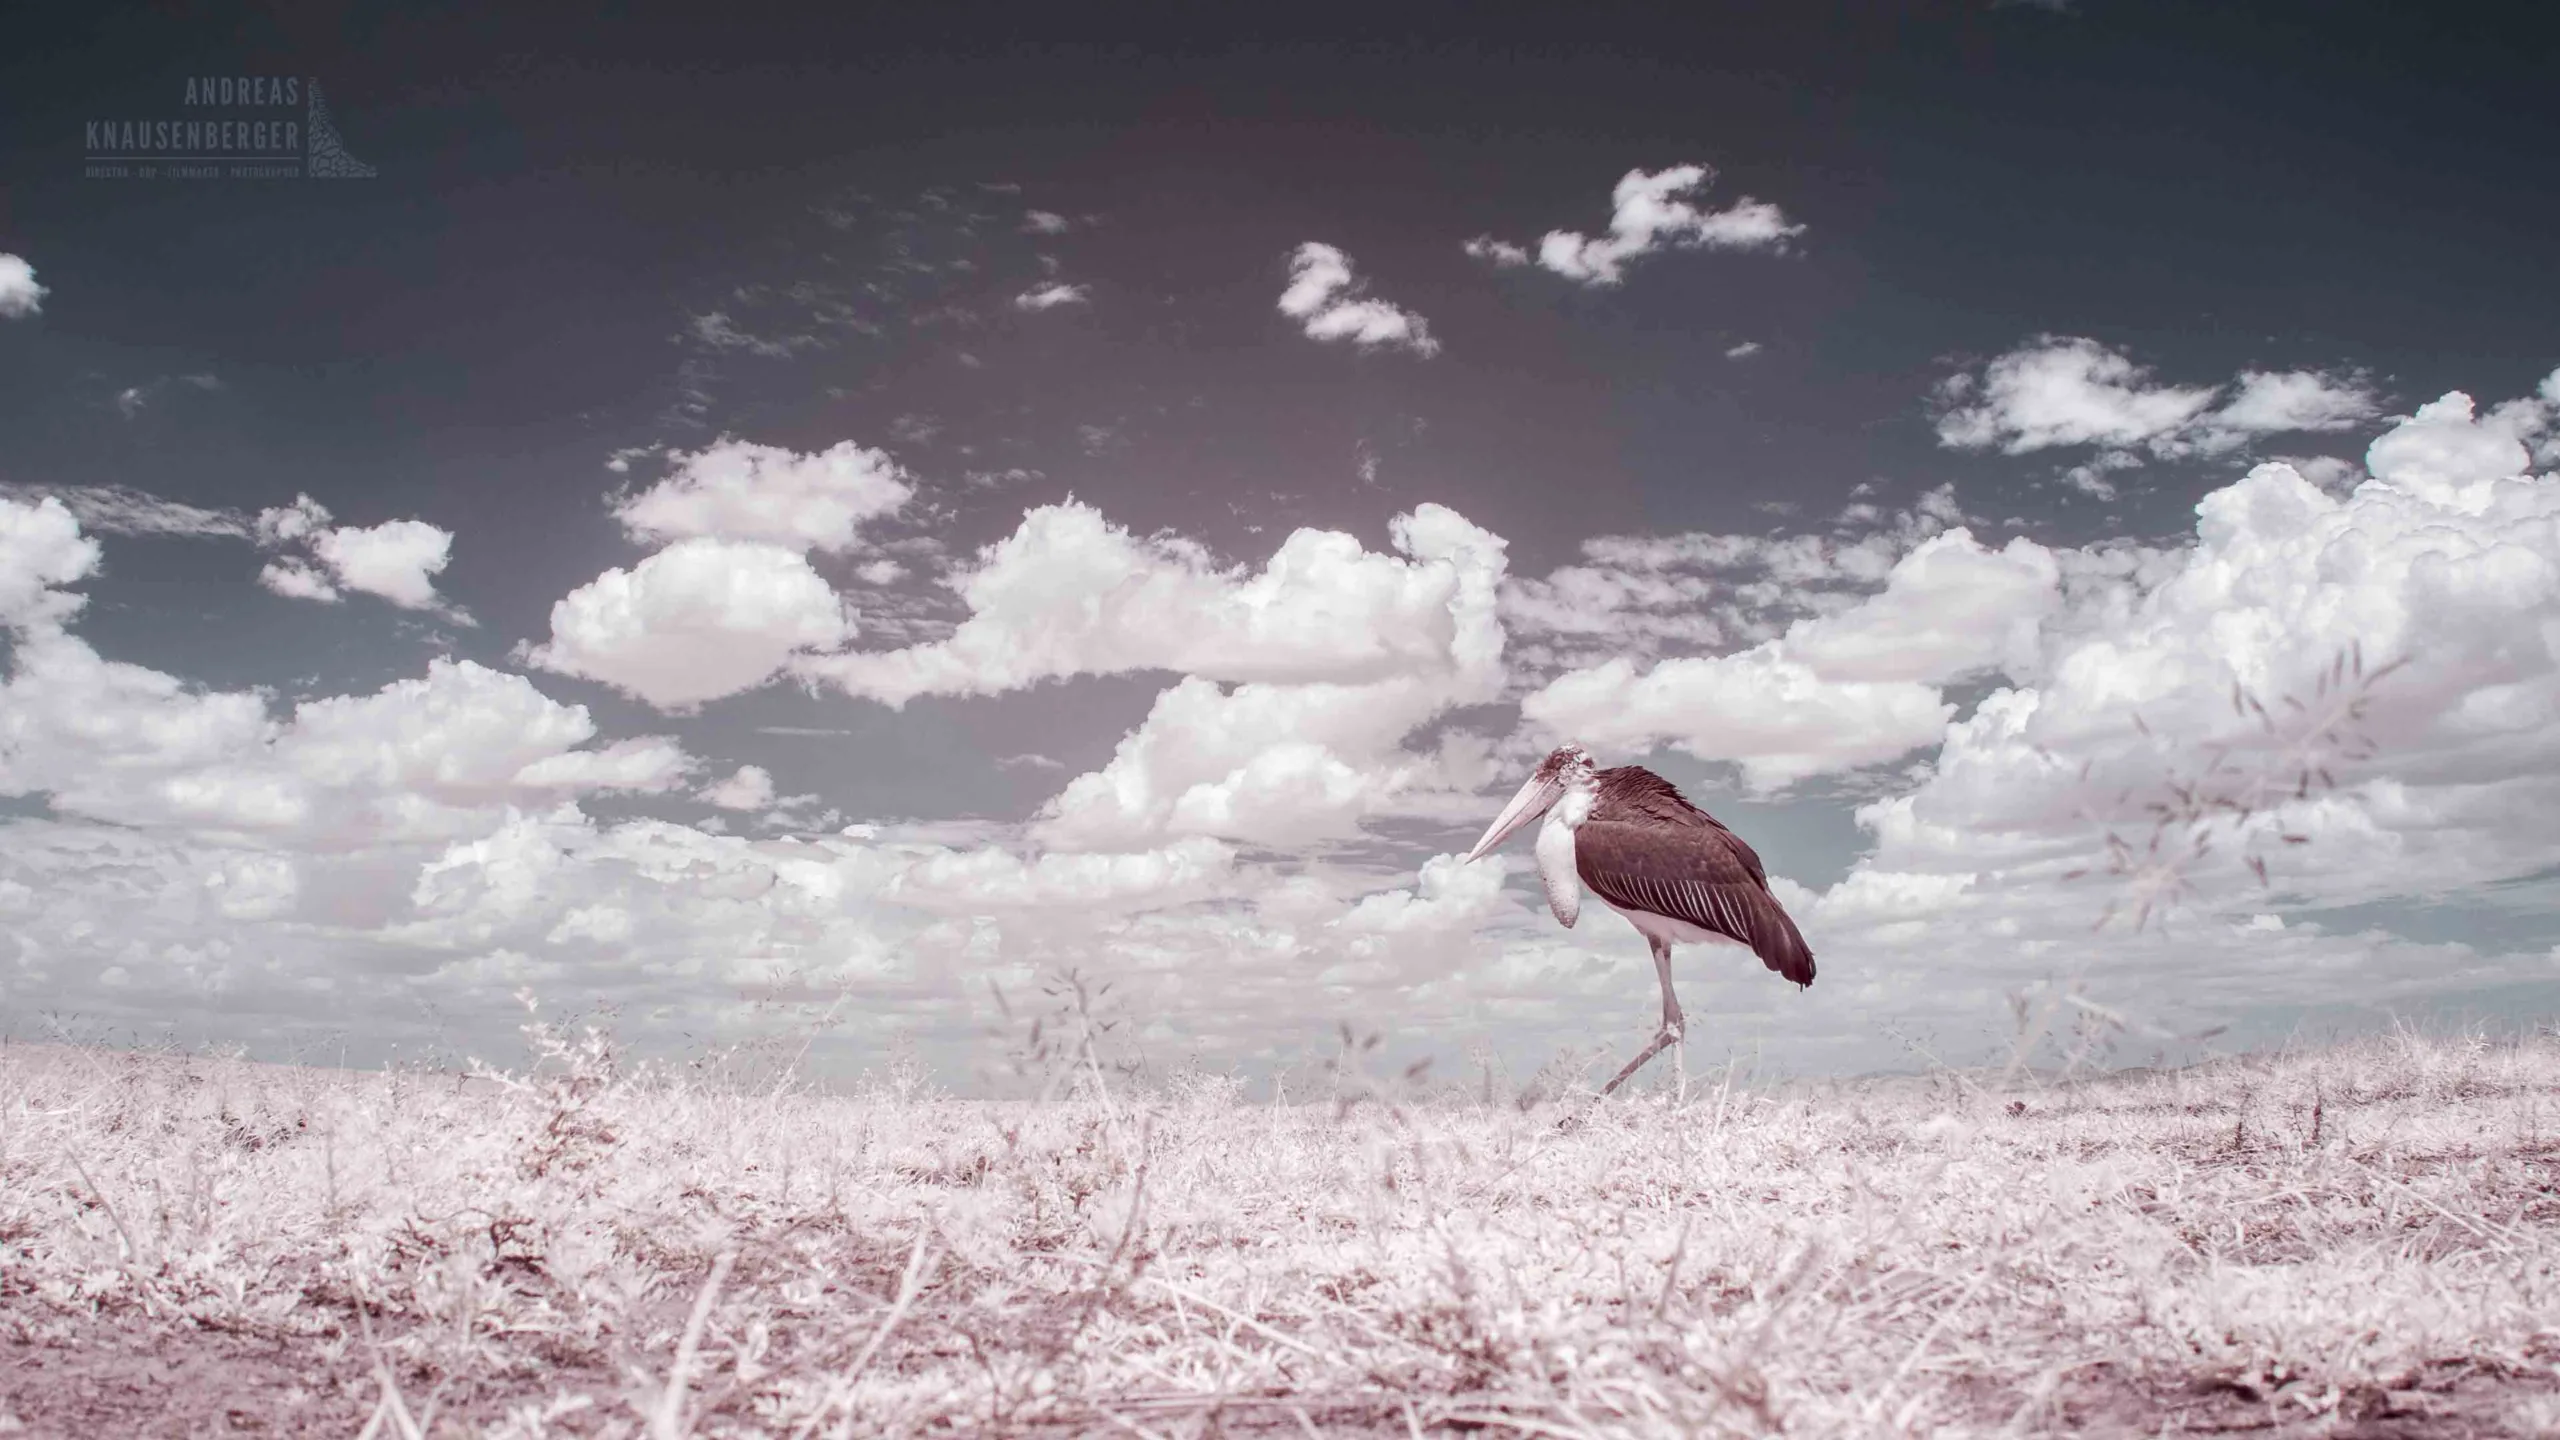
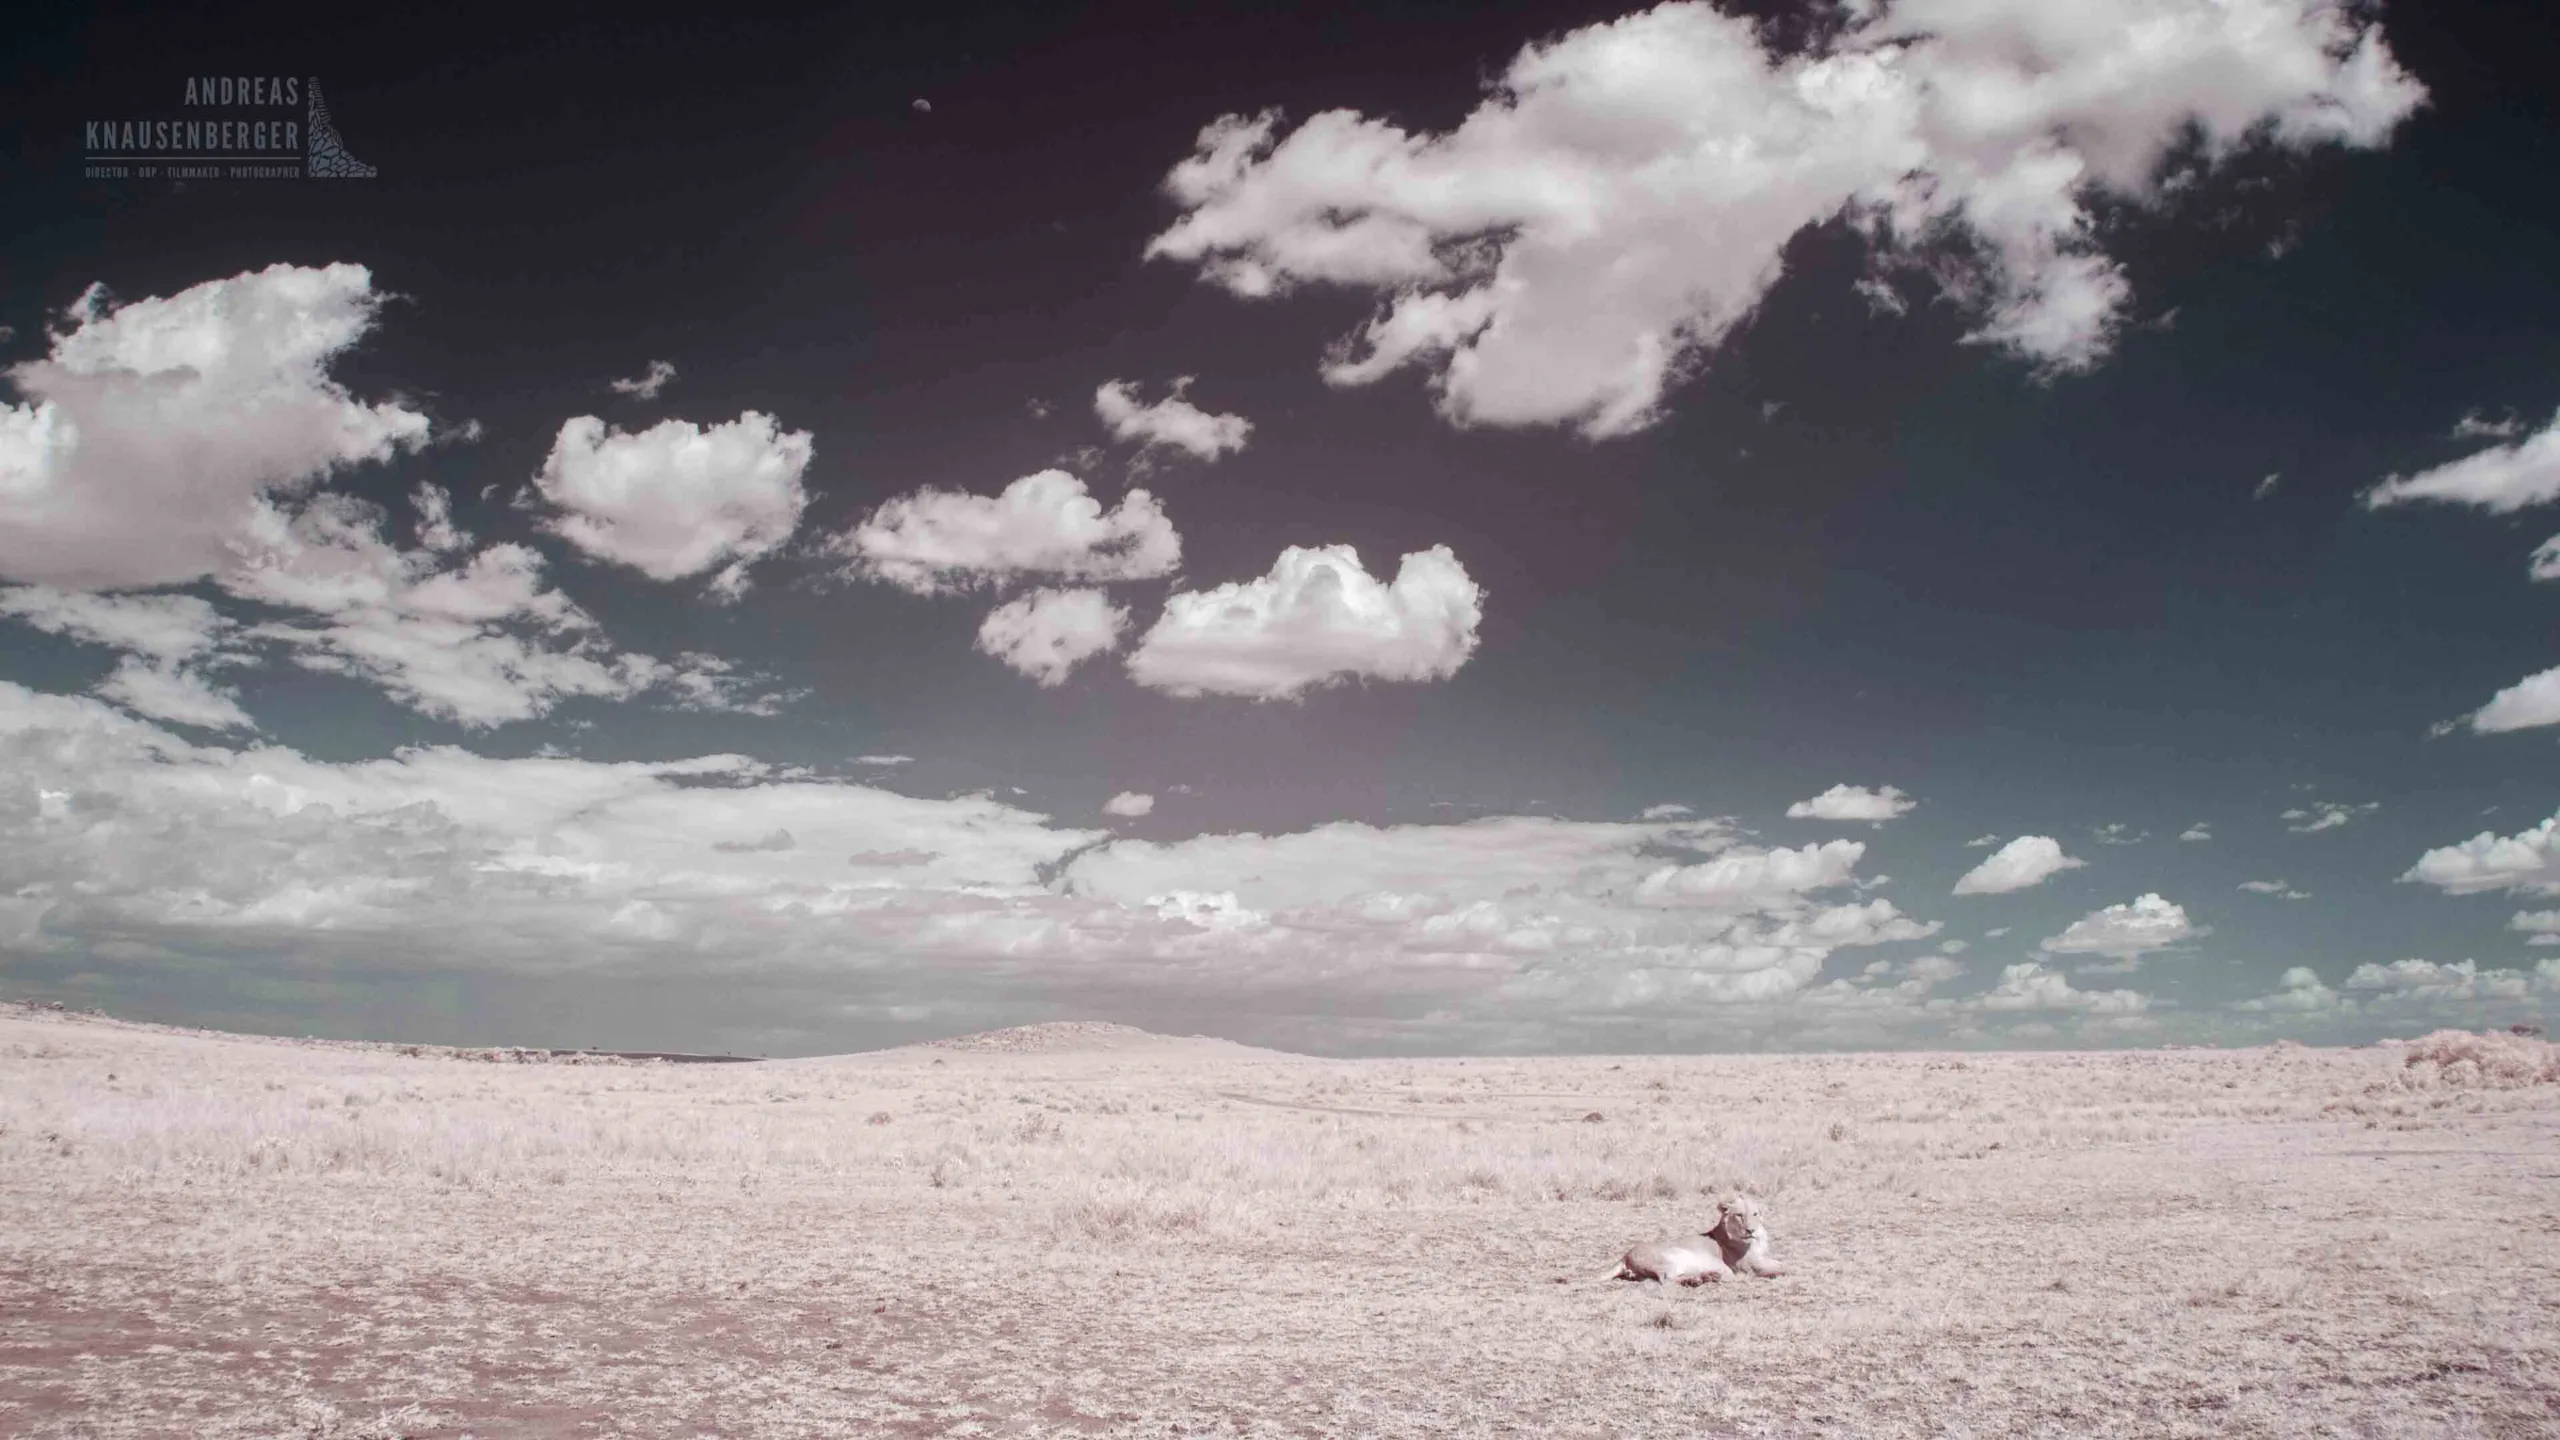
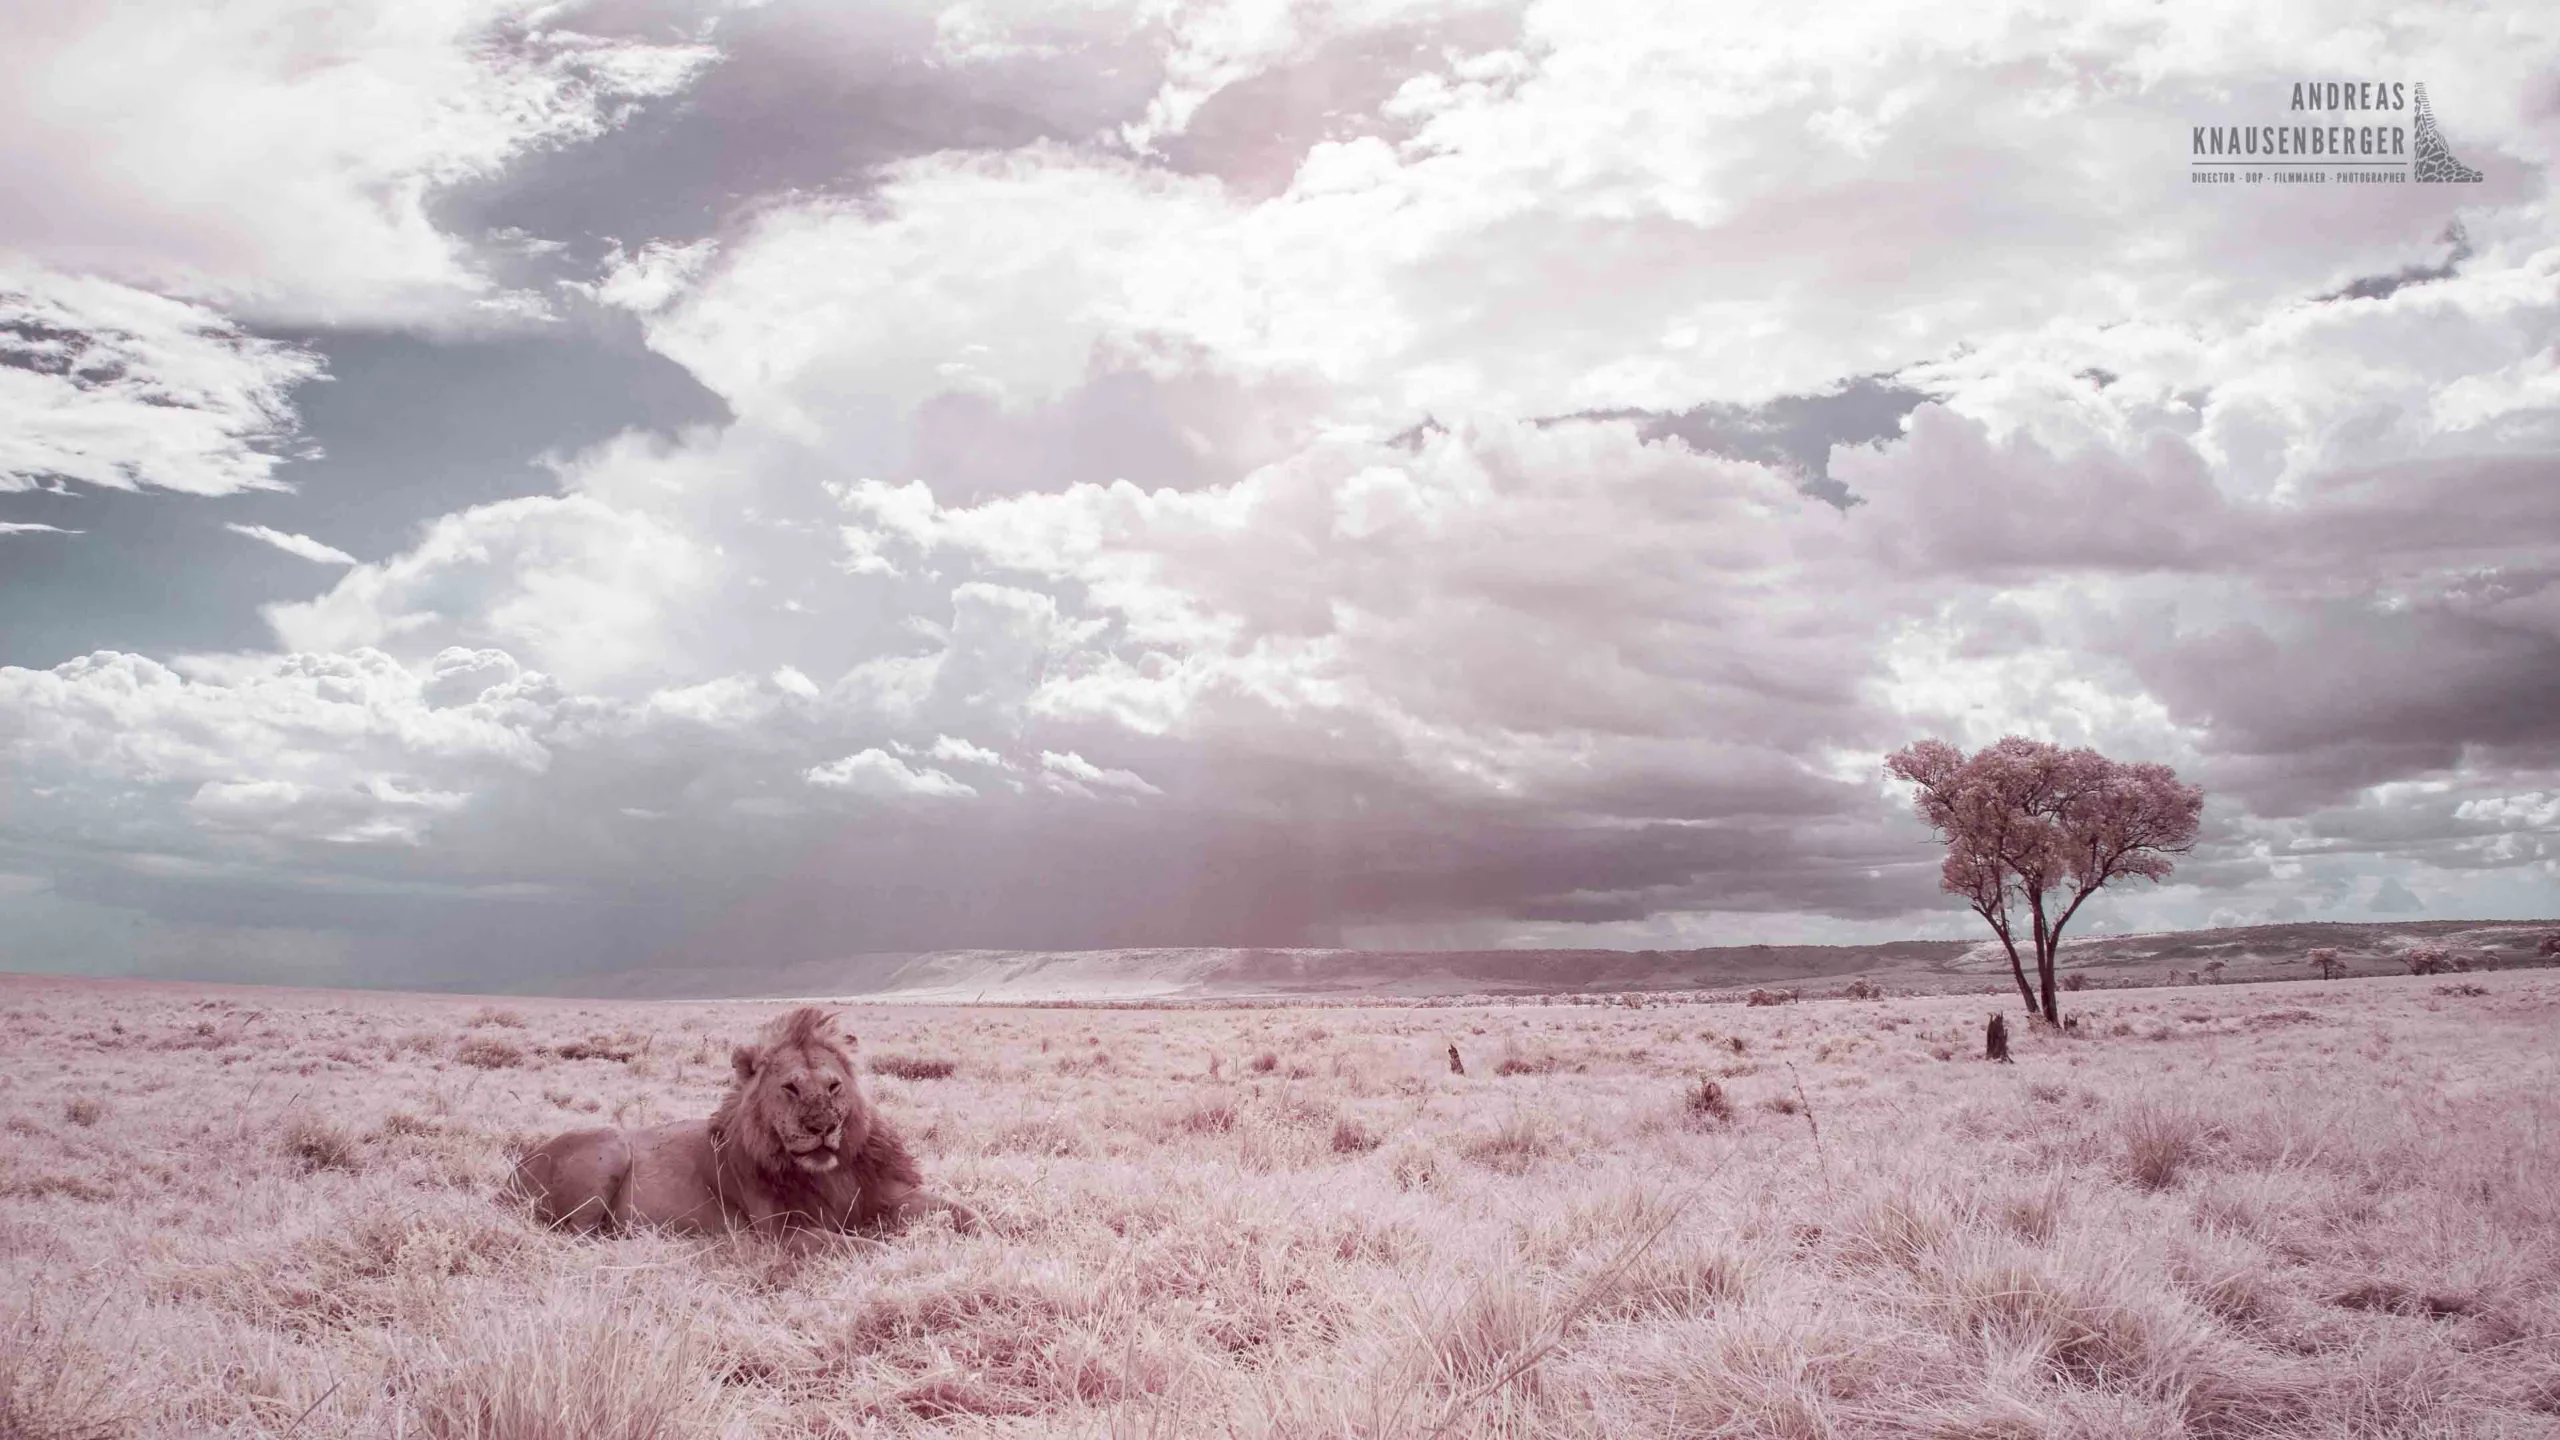
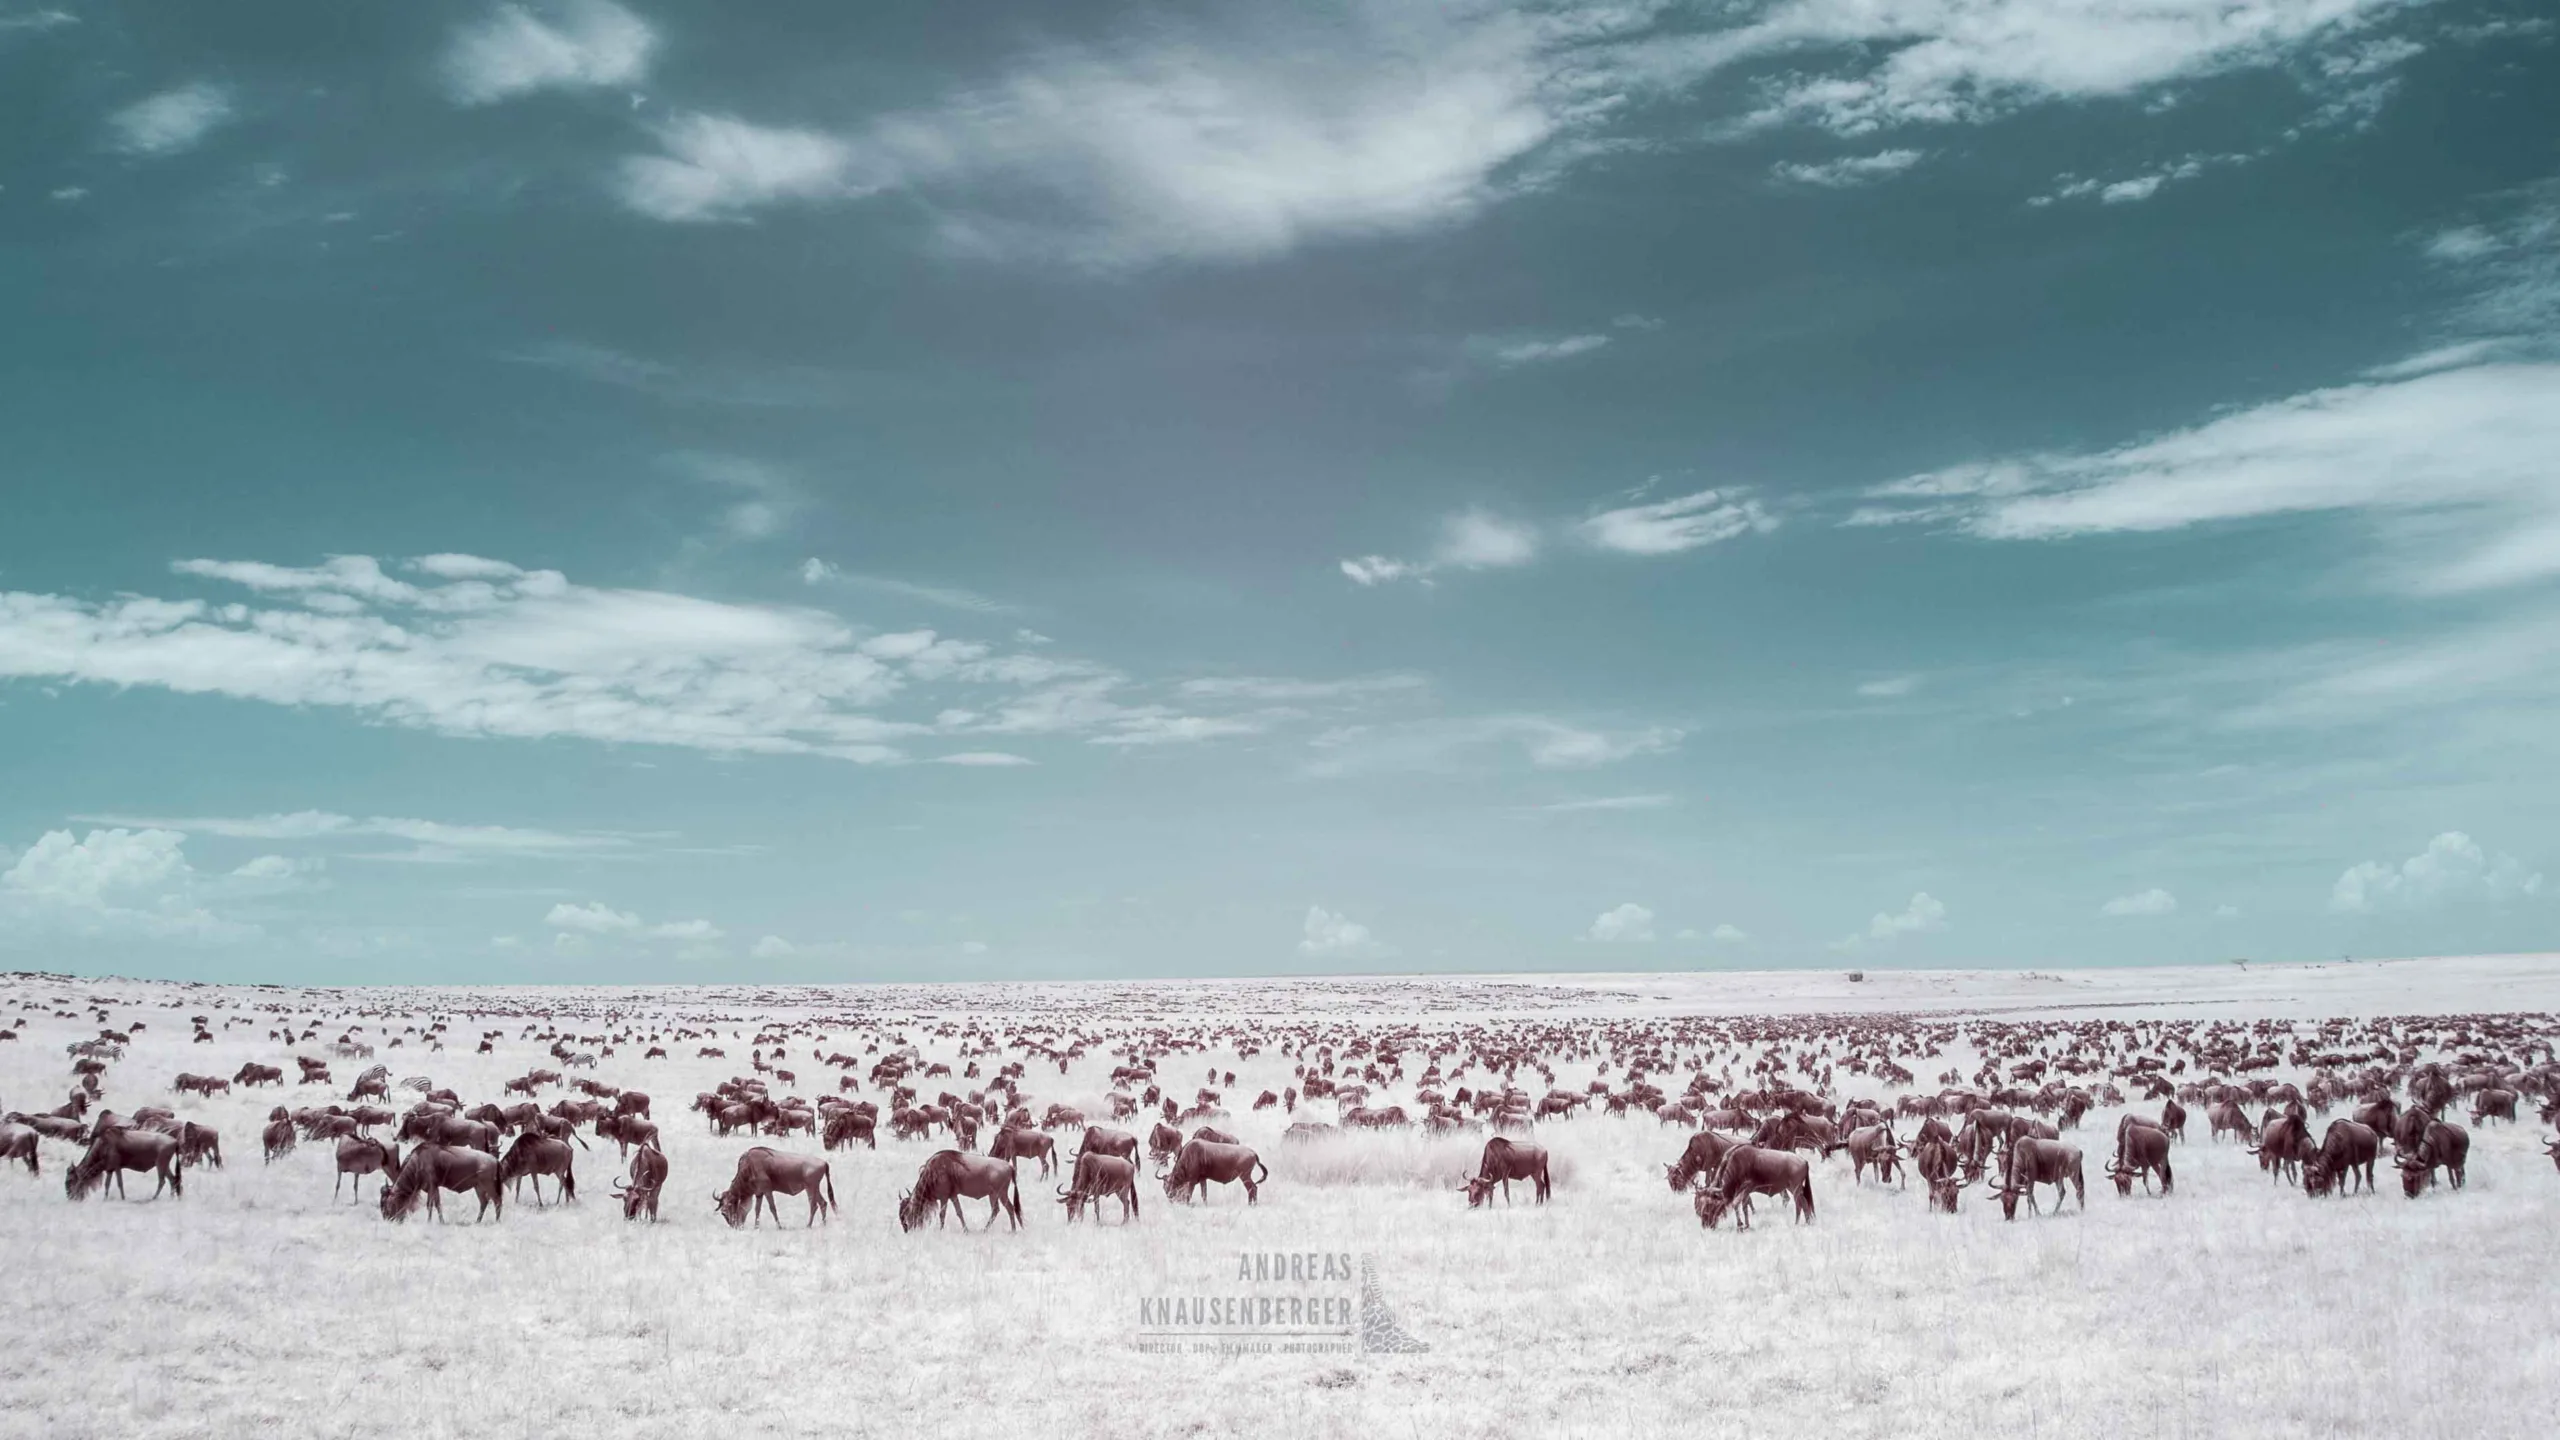
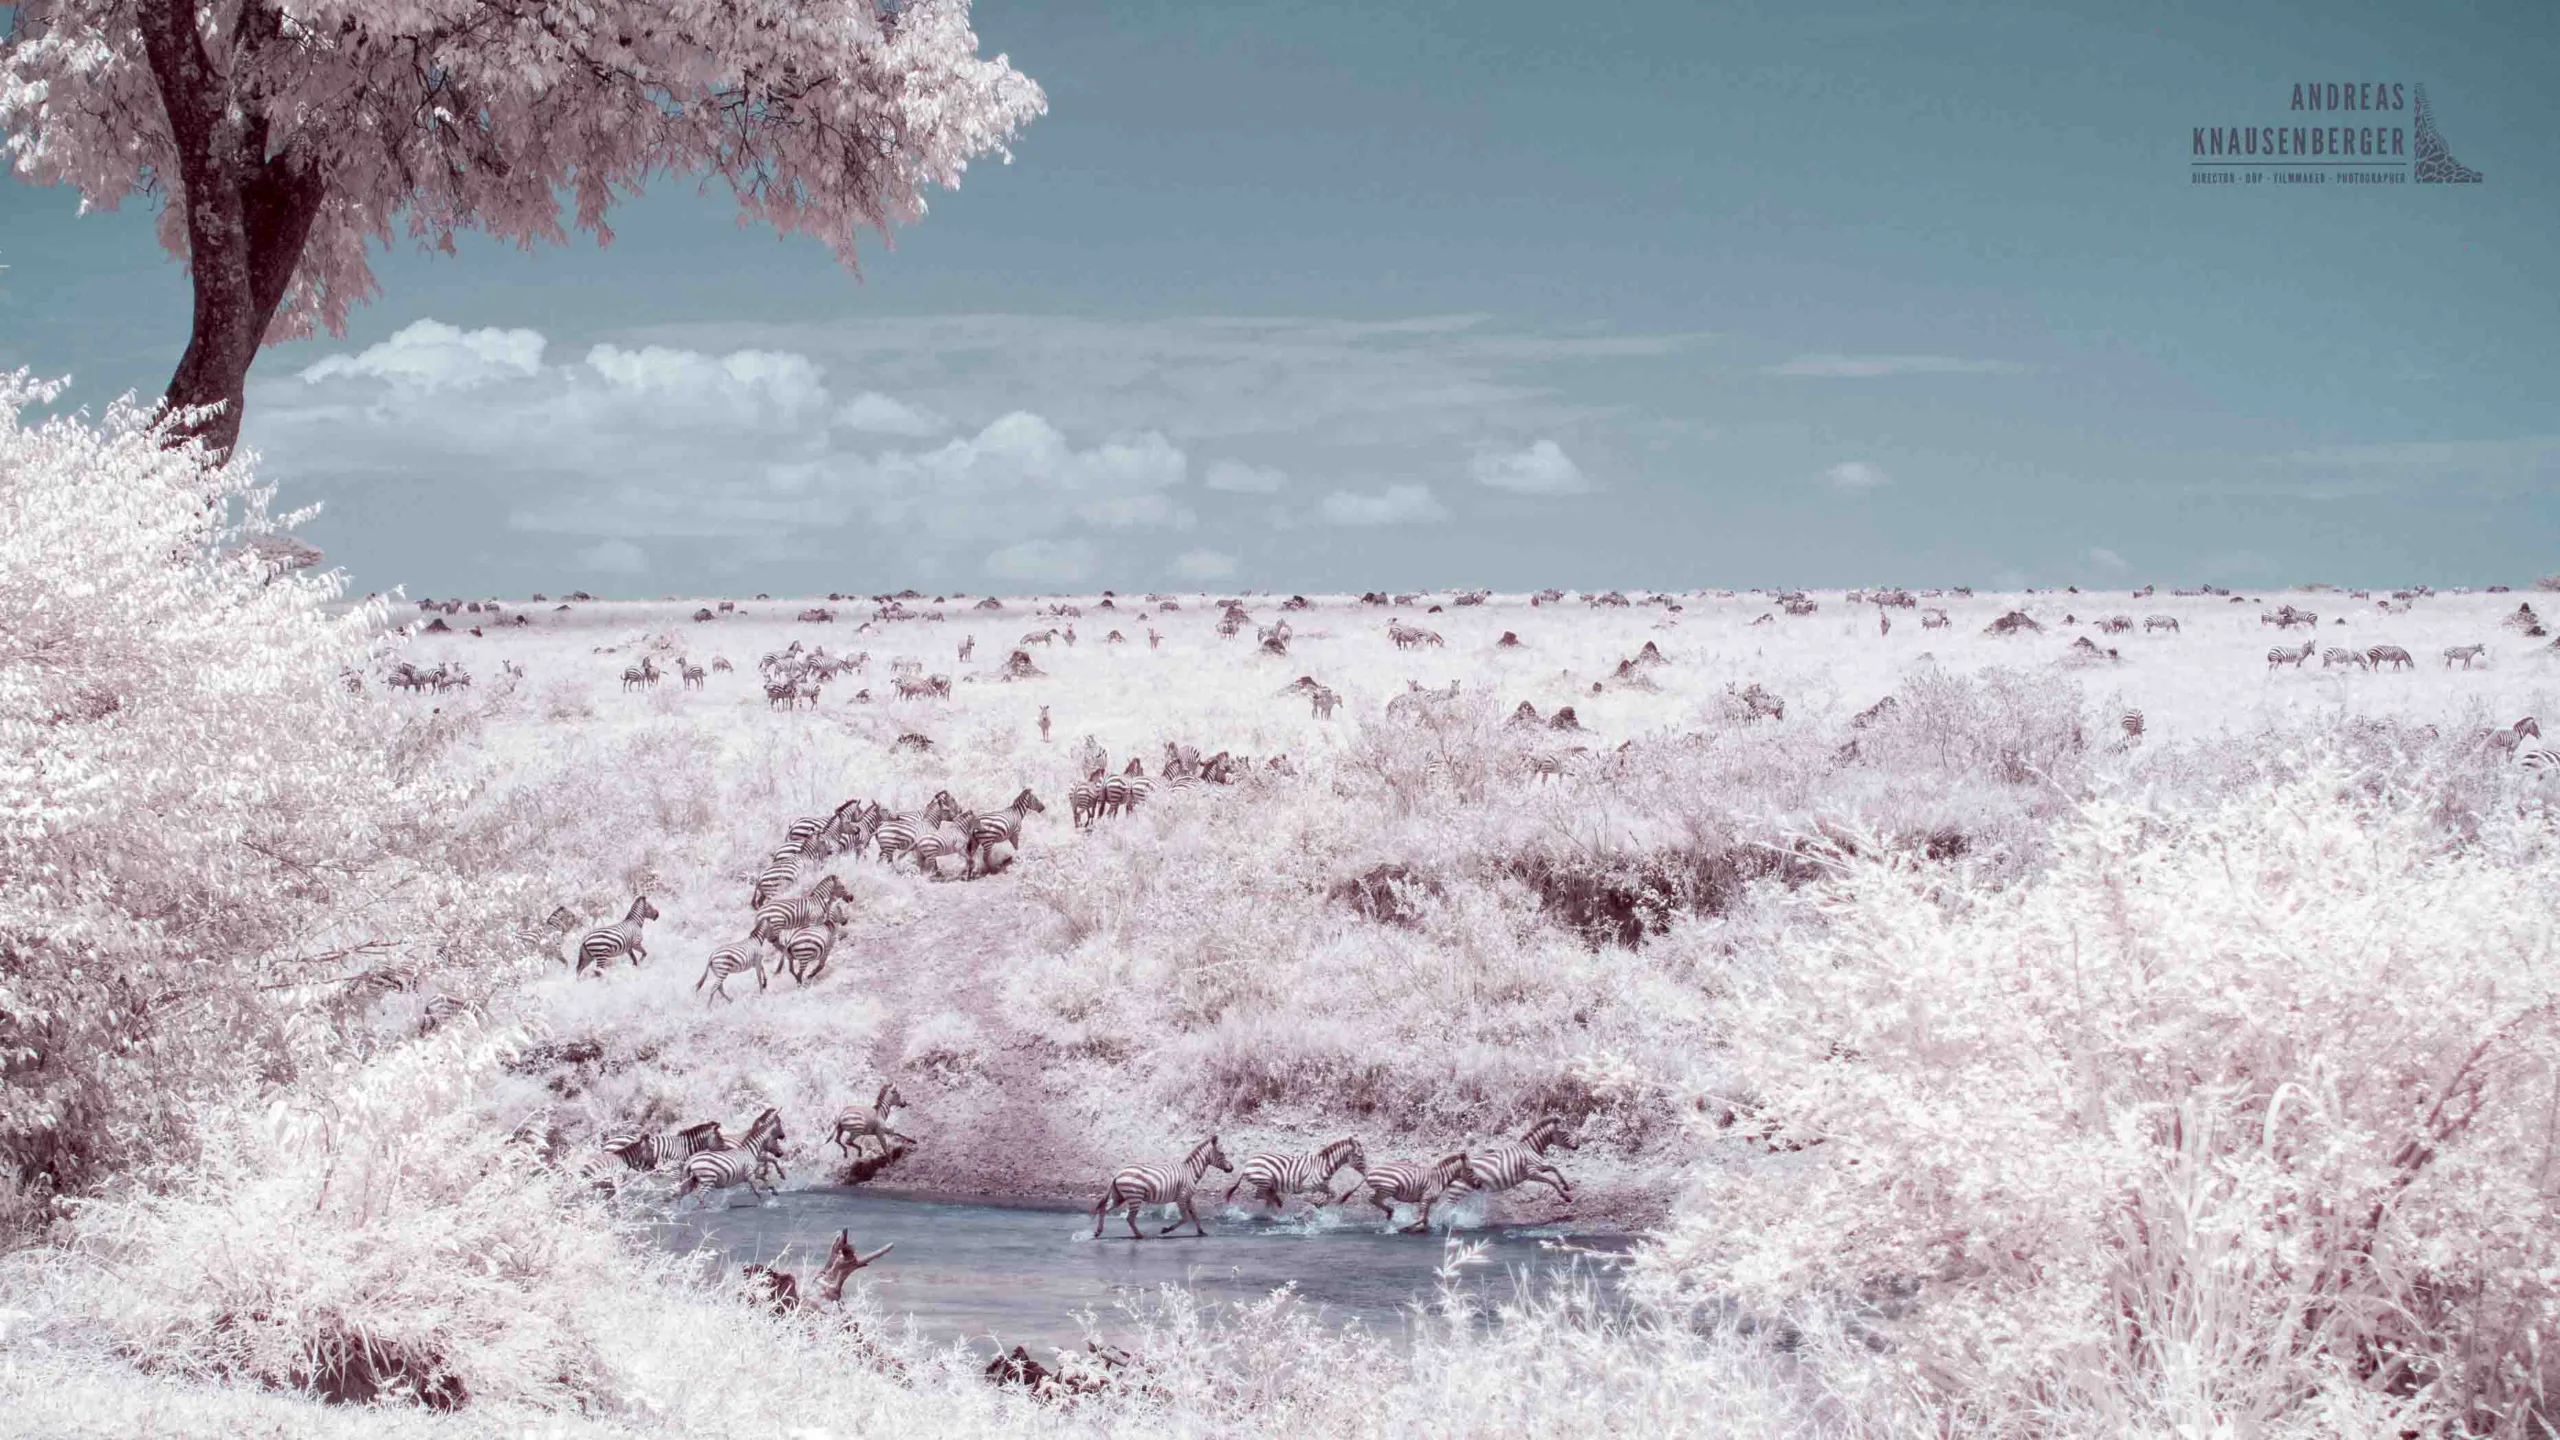
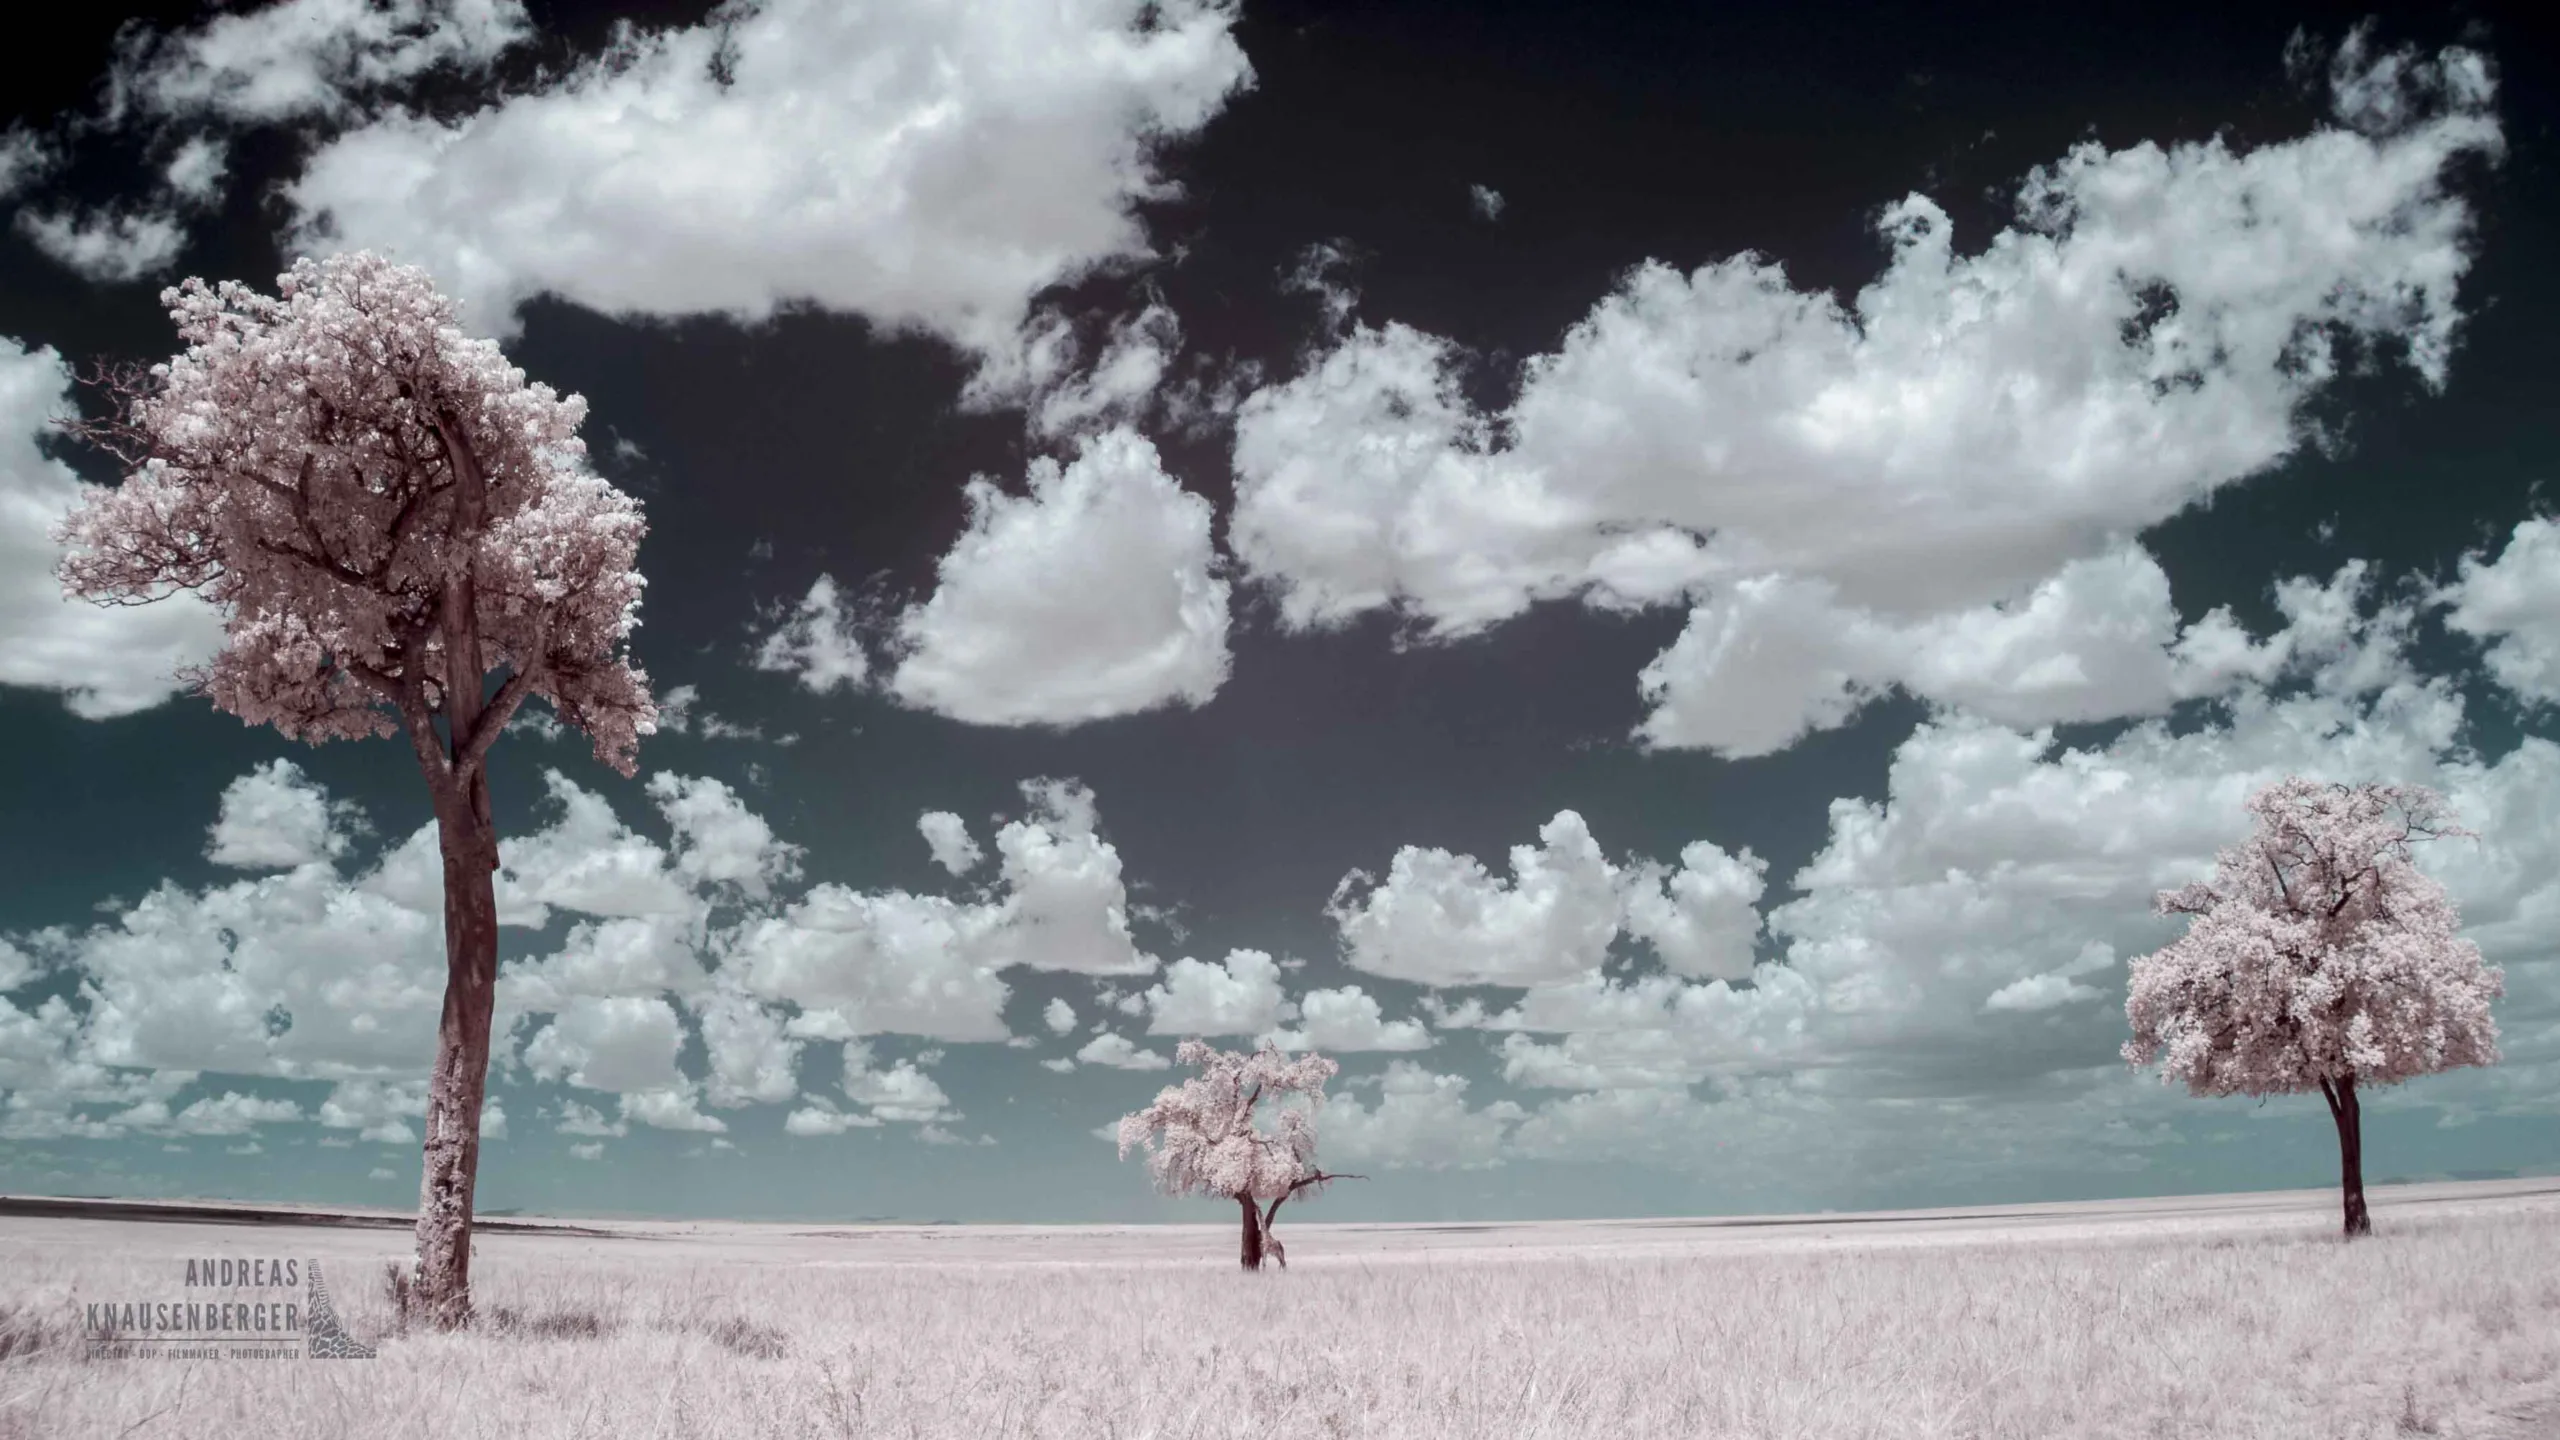
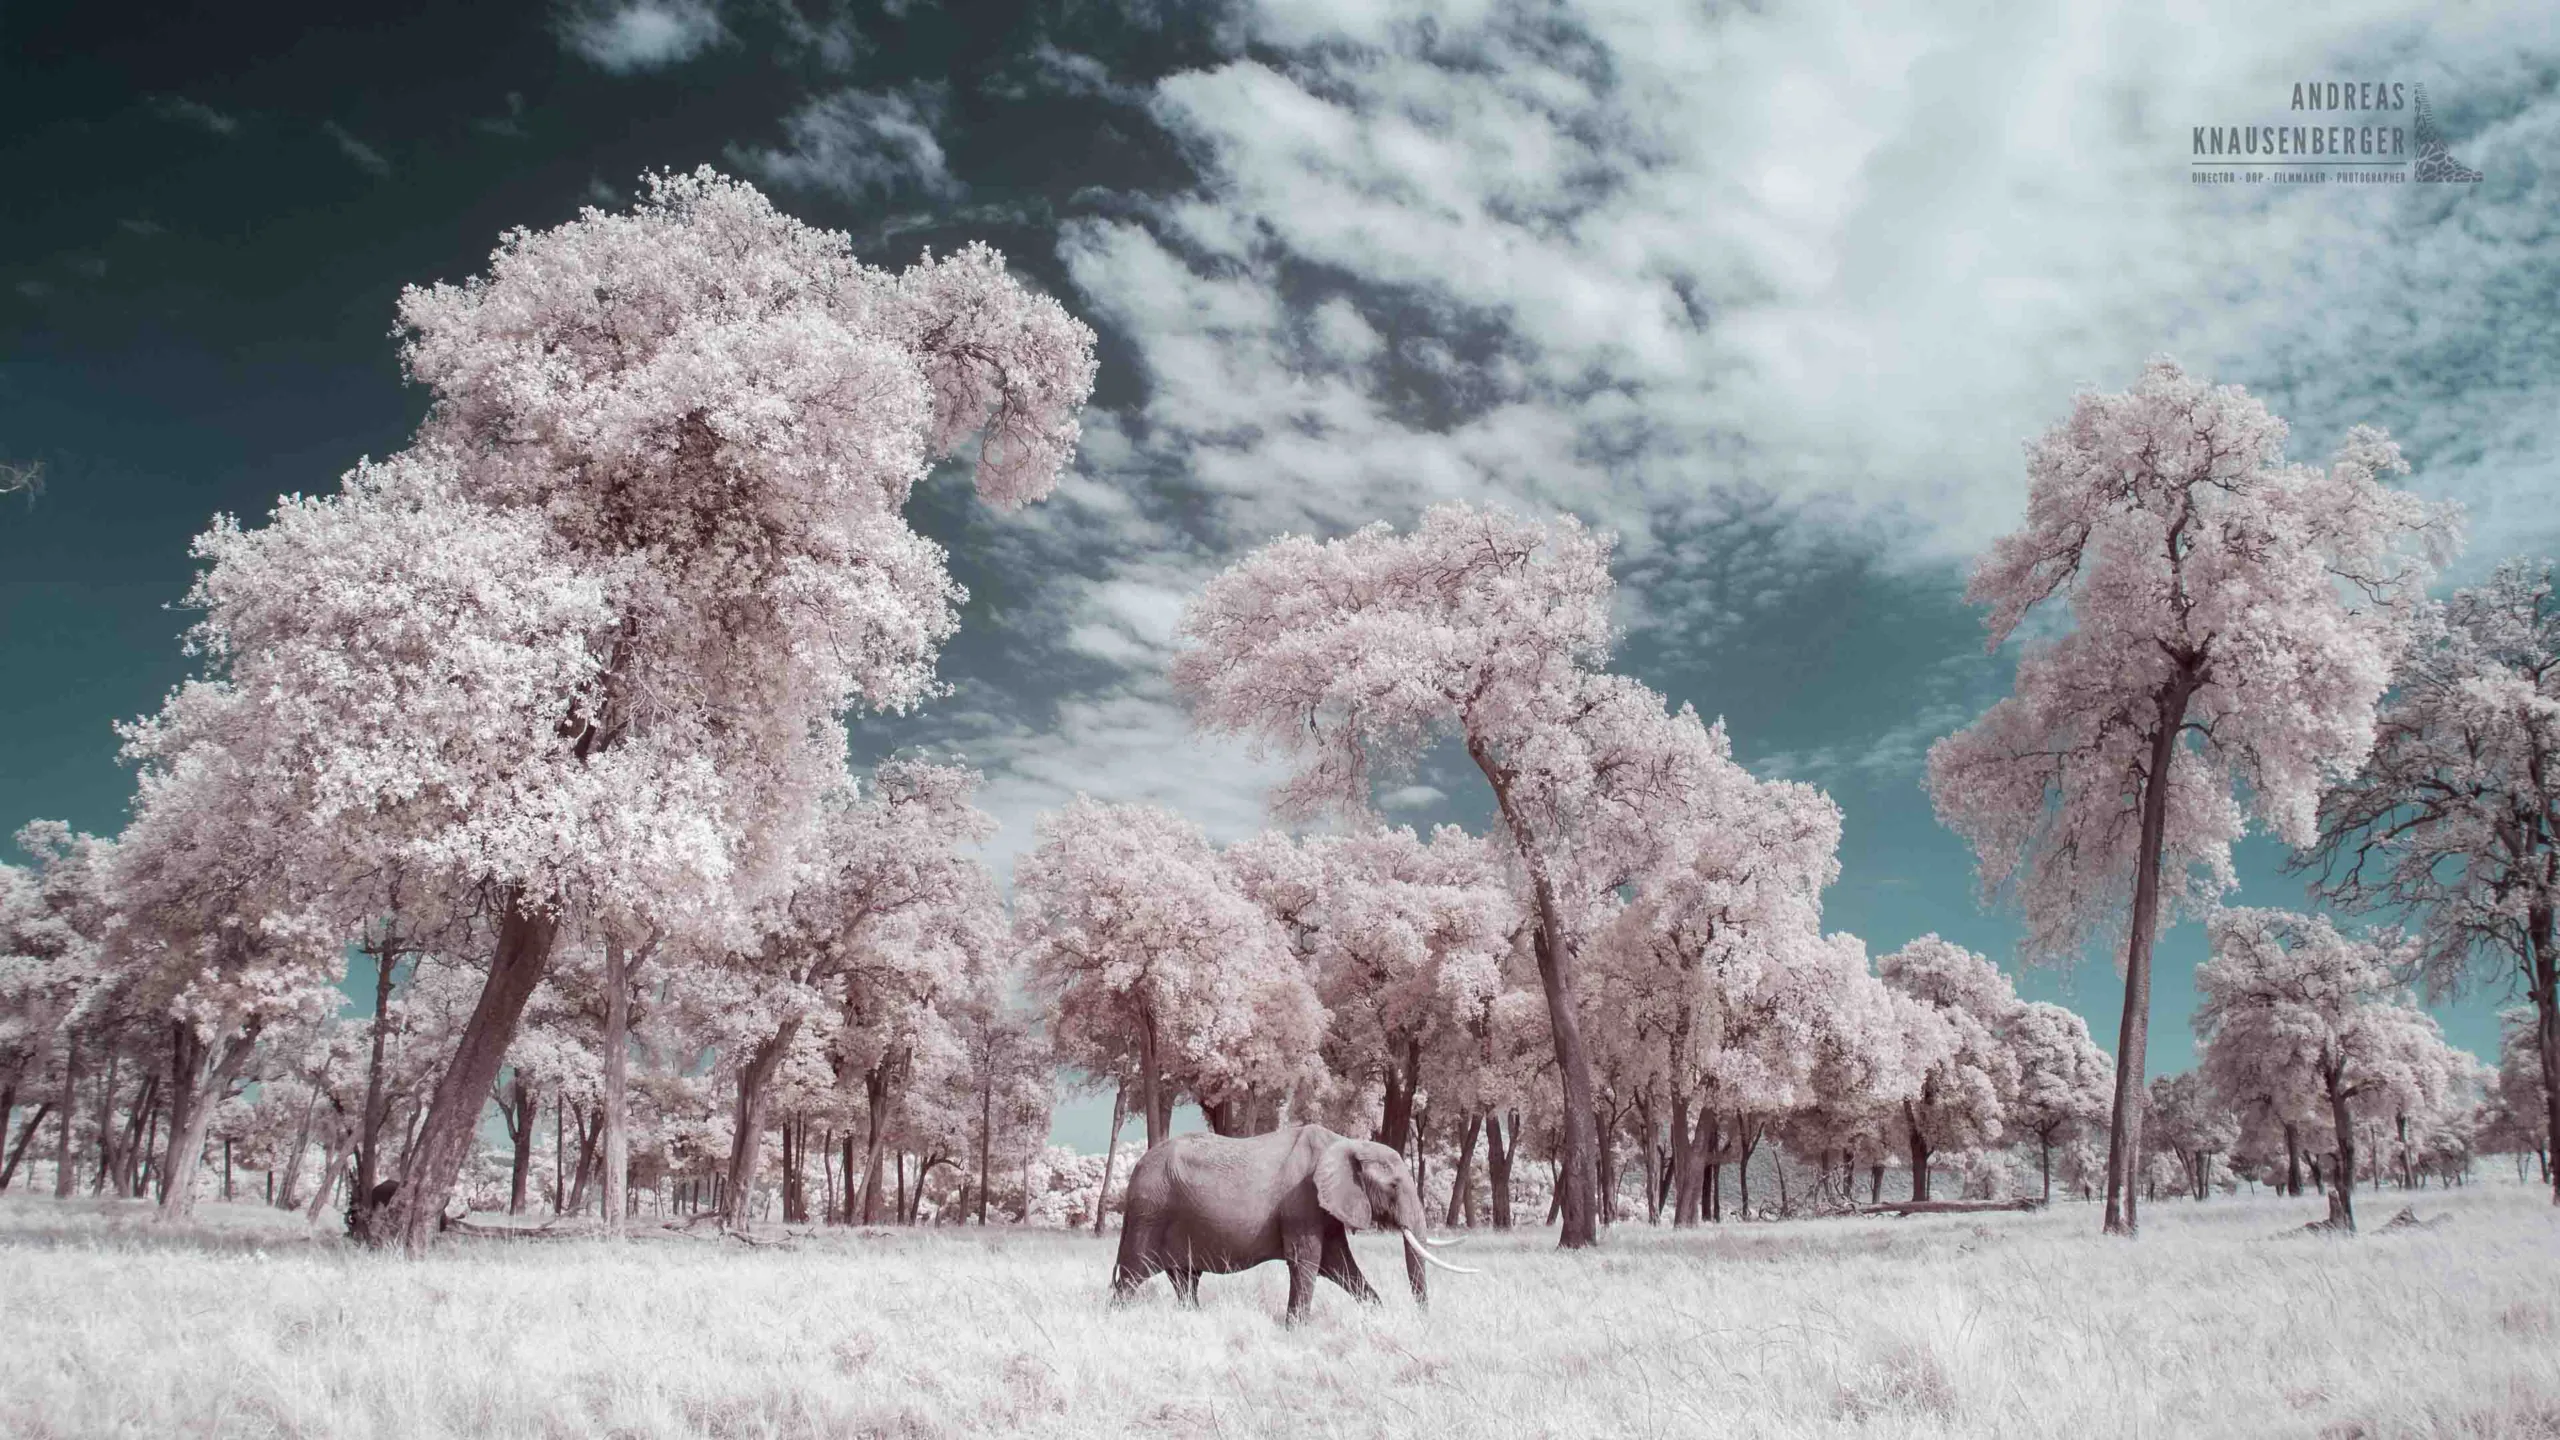
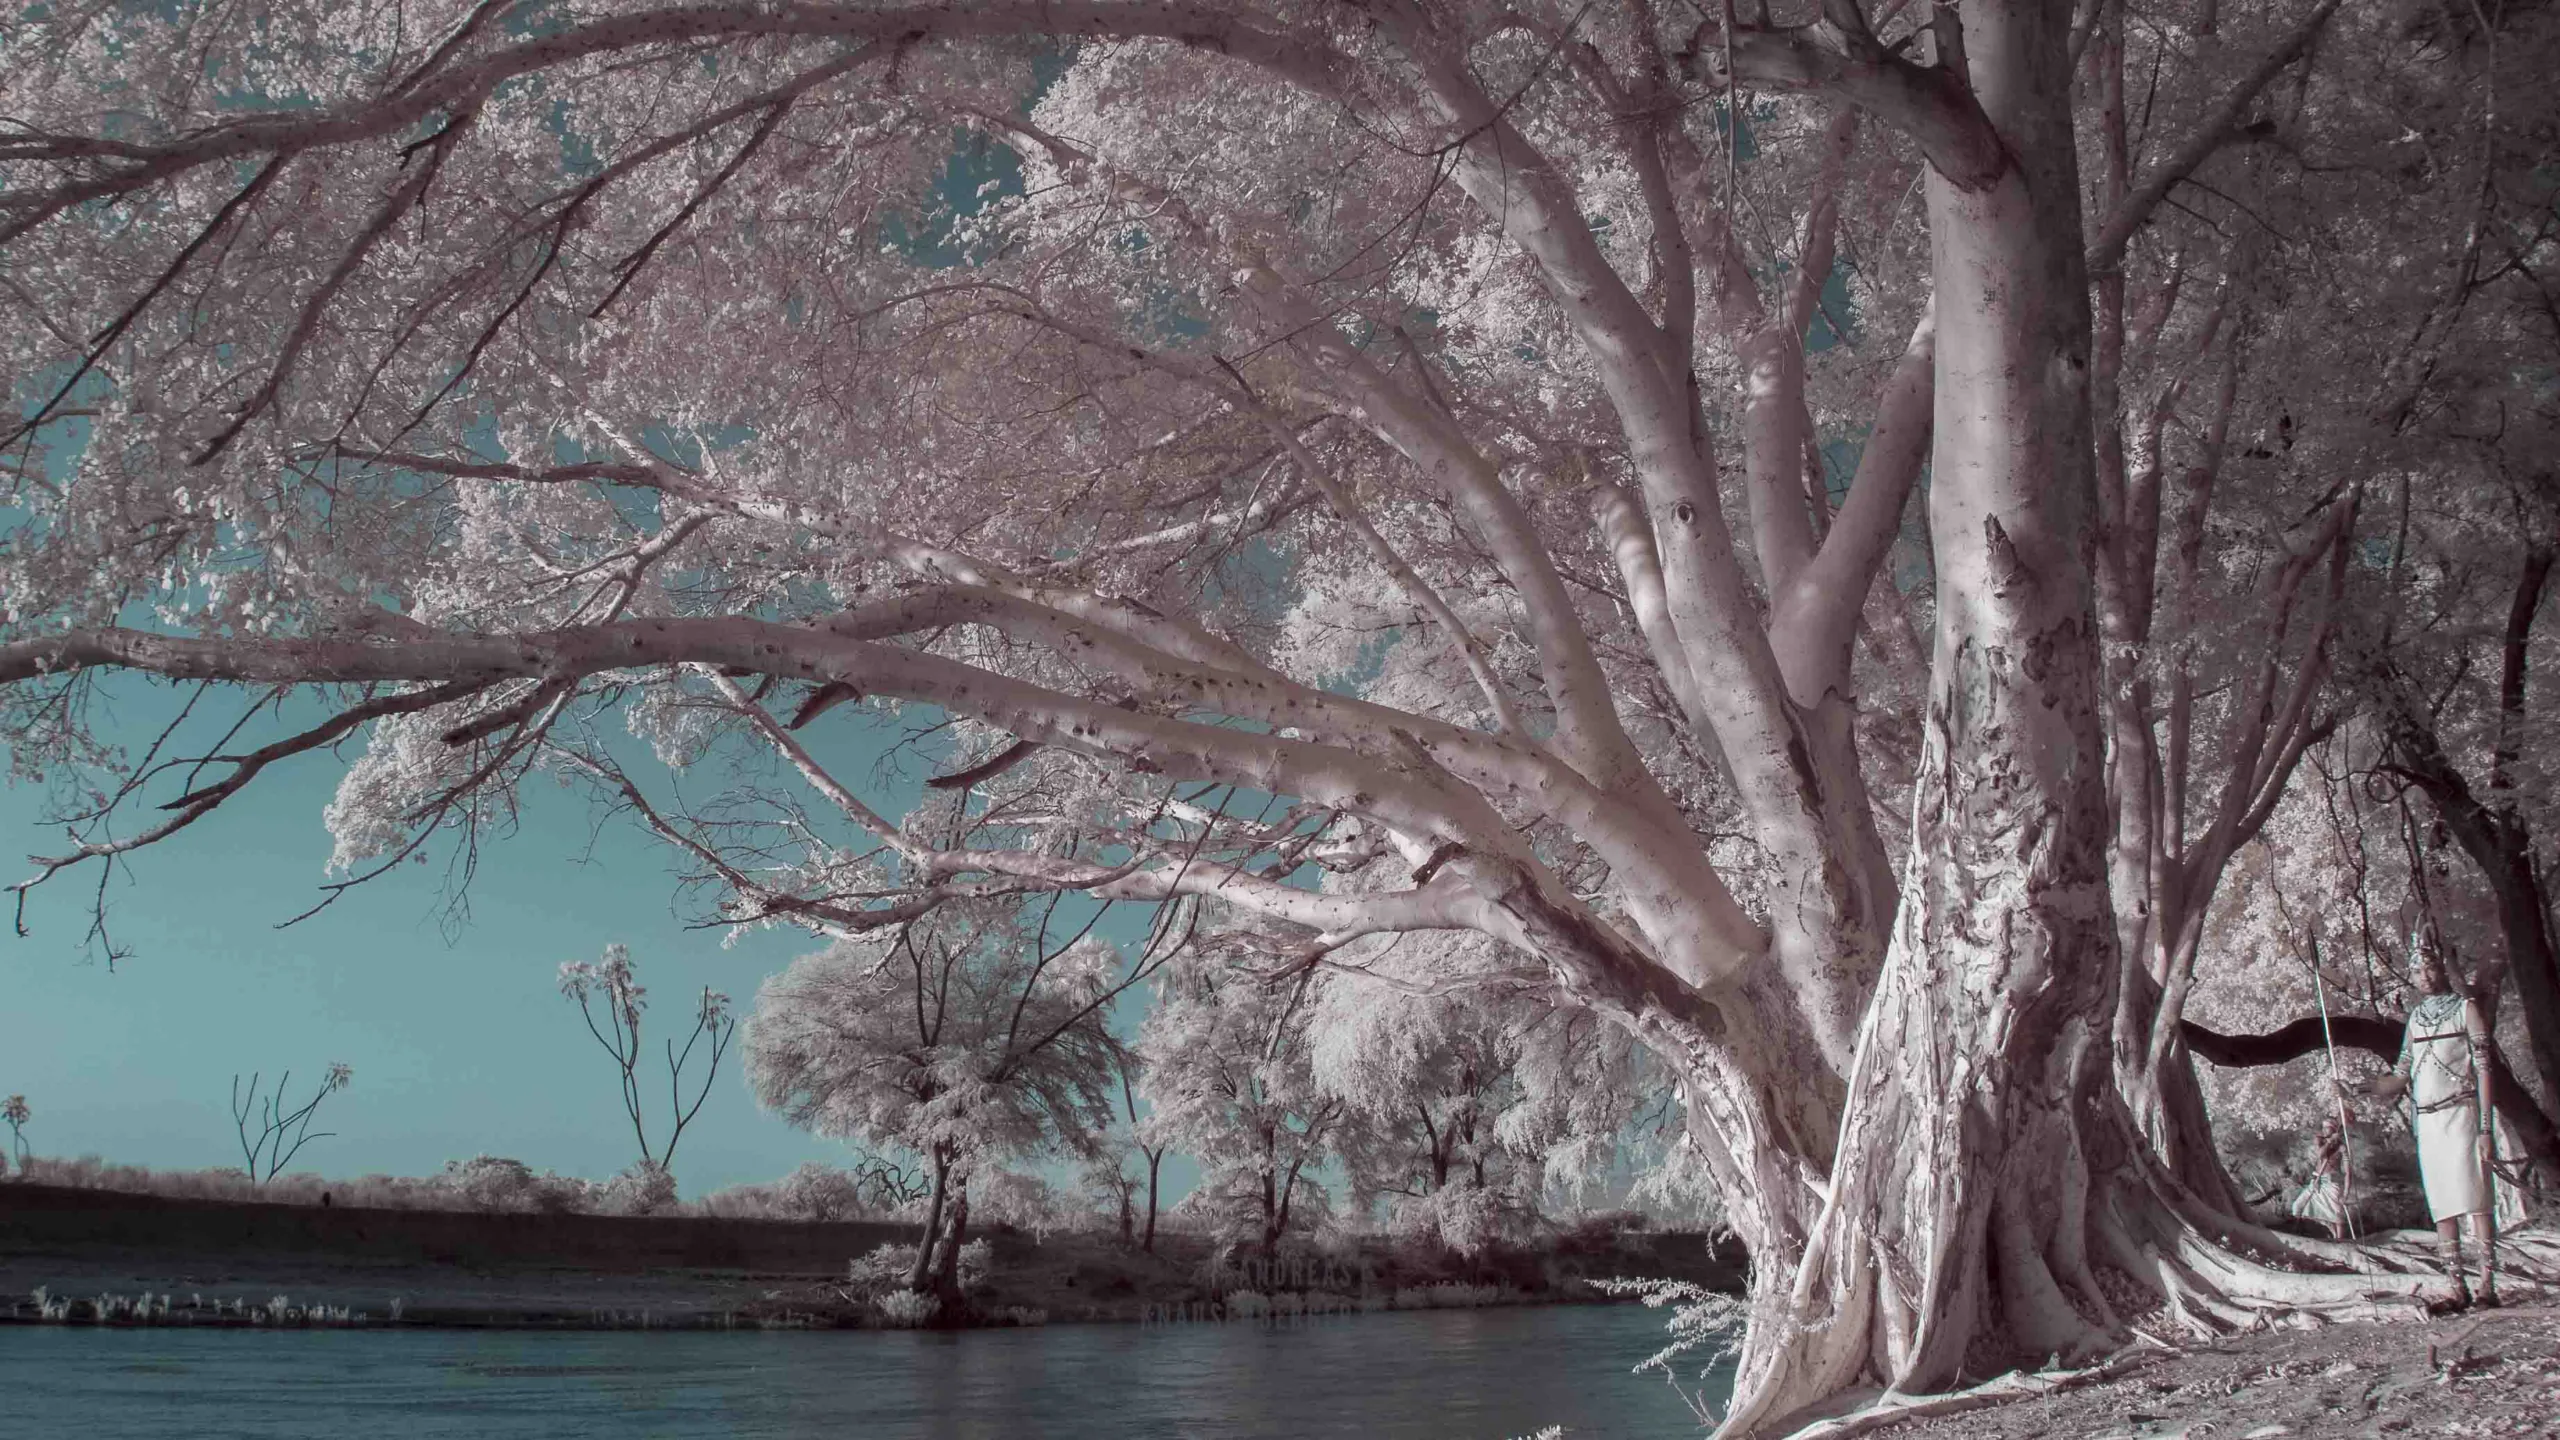
Infrared Wildlife Photography in the Masai Mara
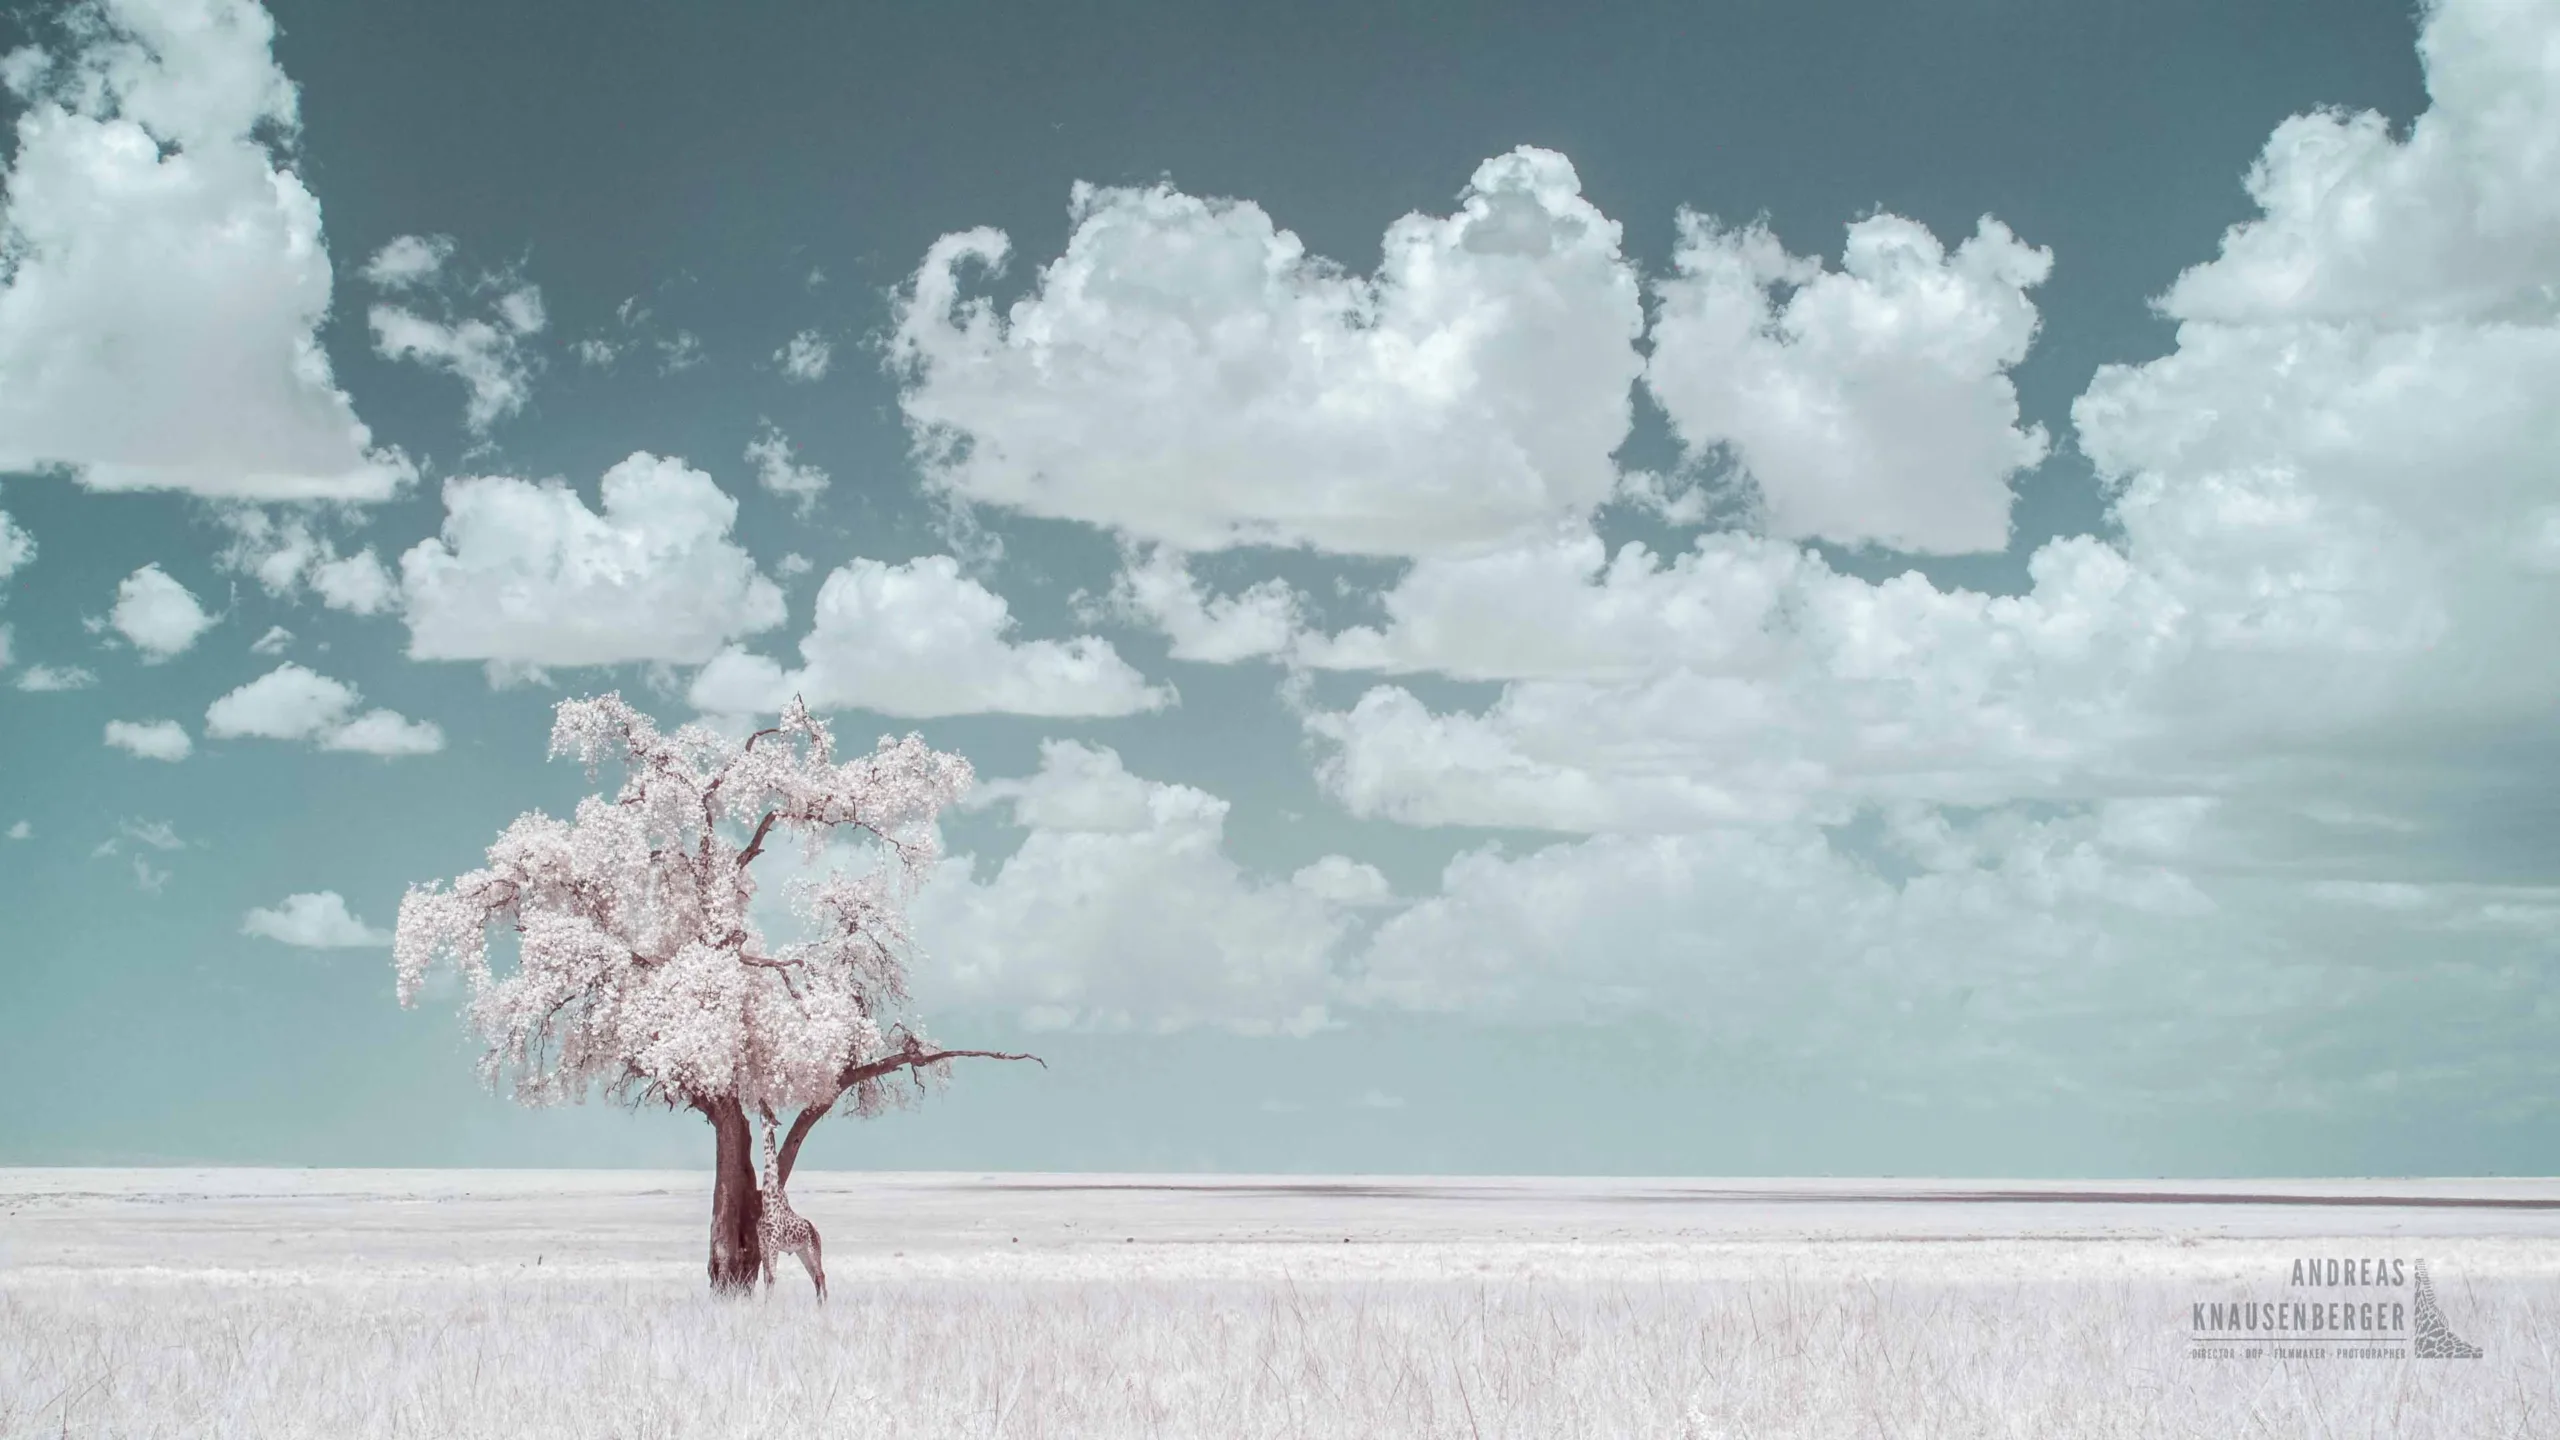
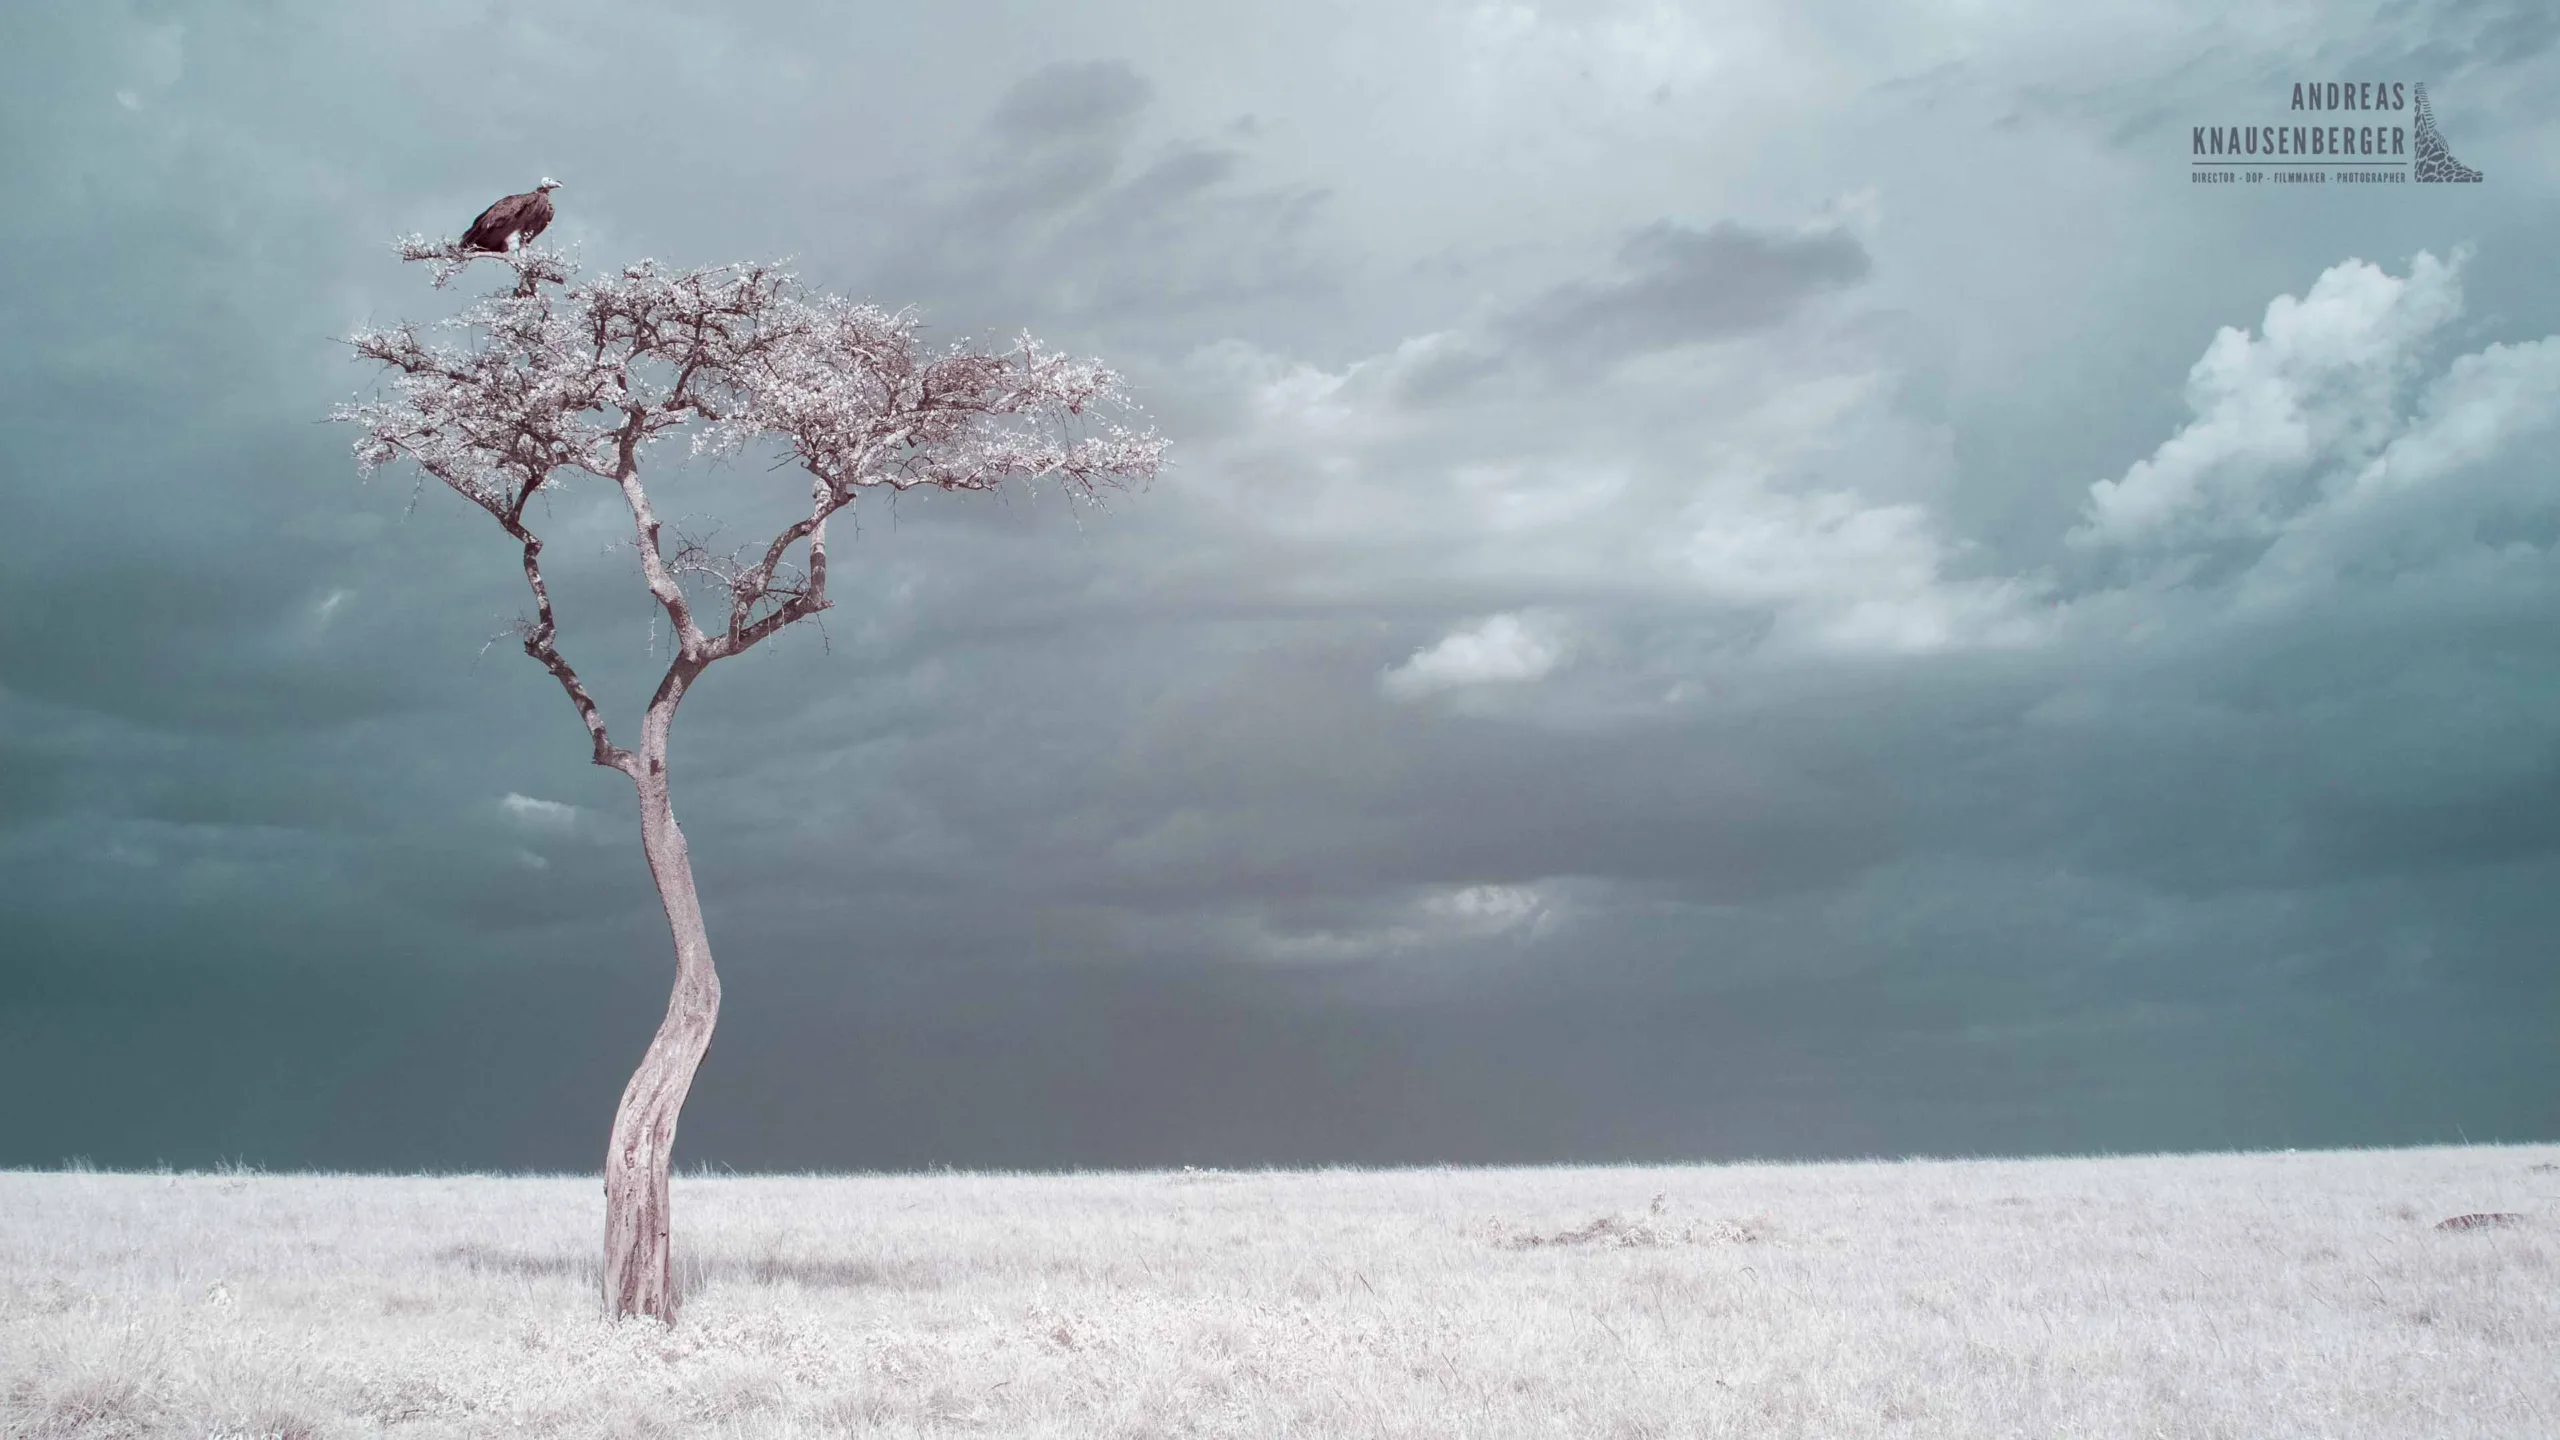
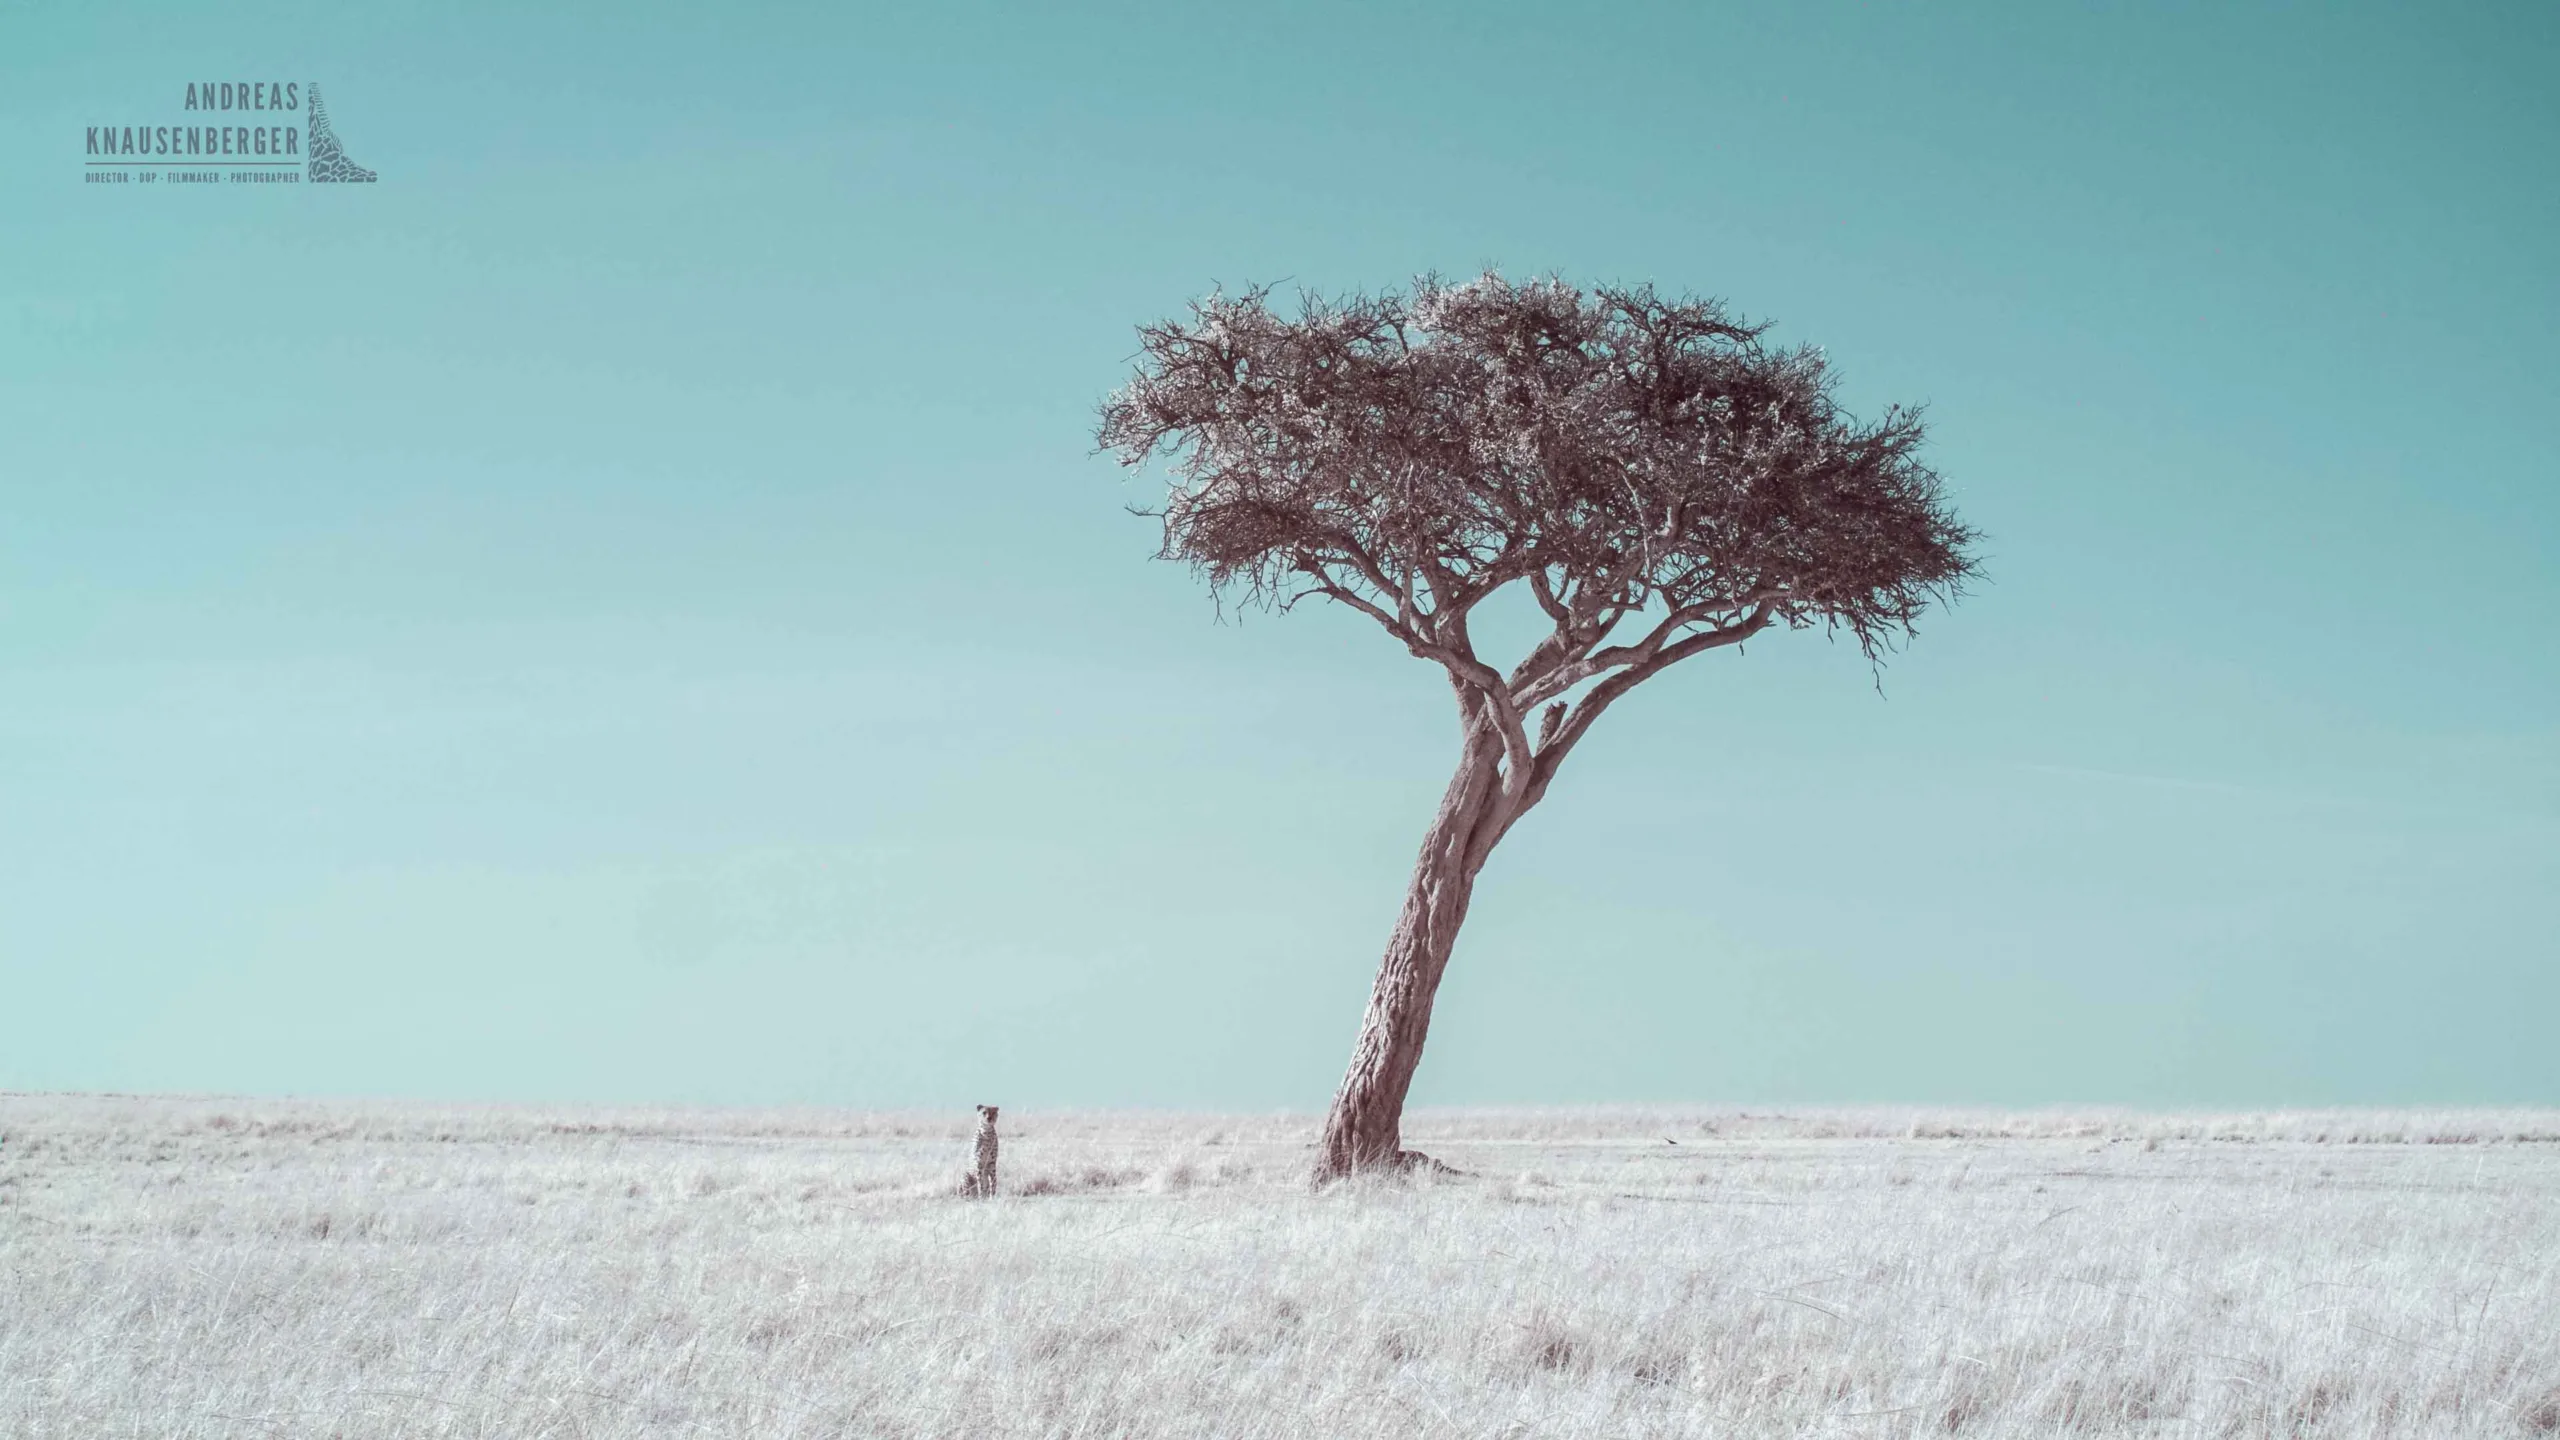
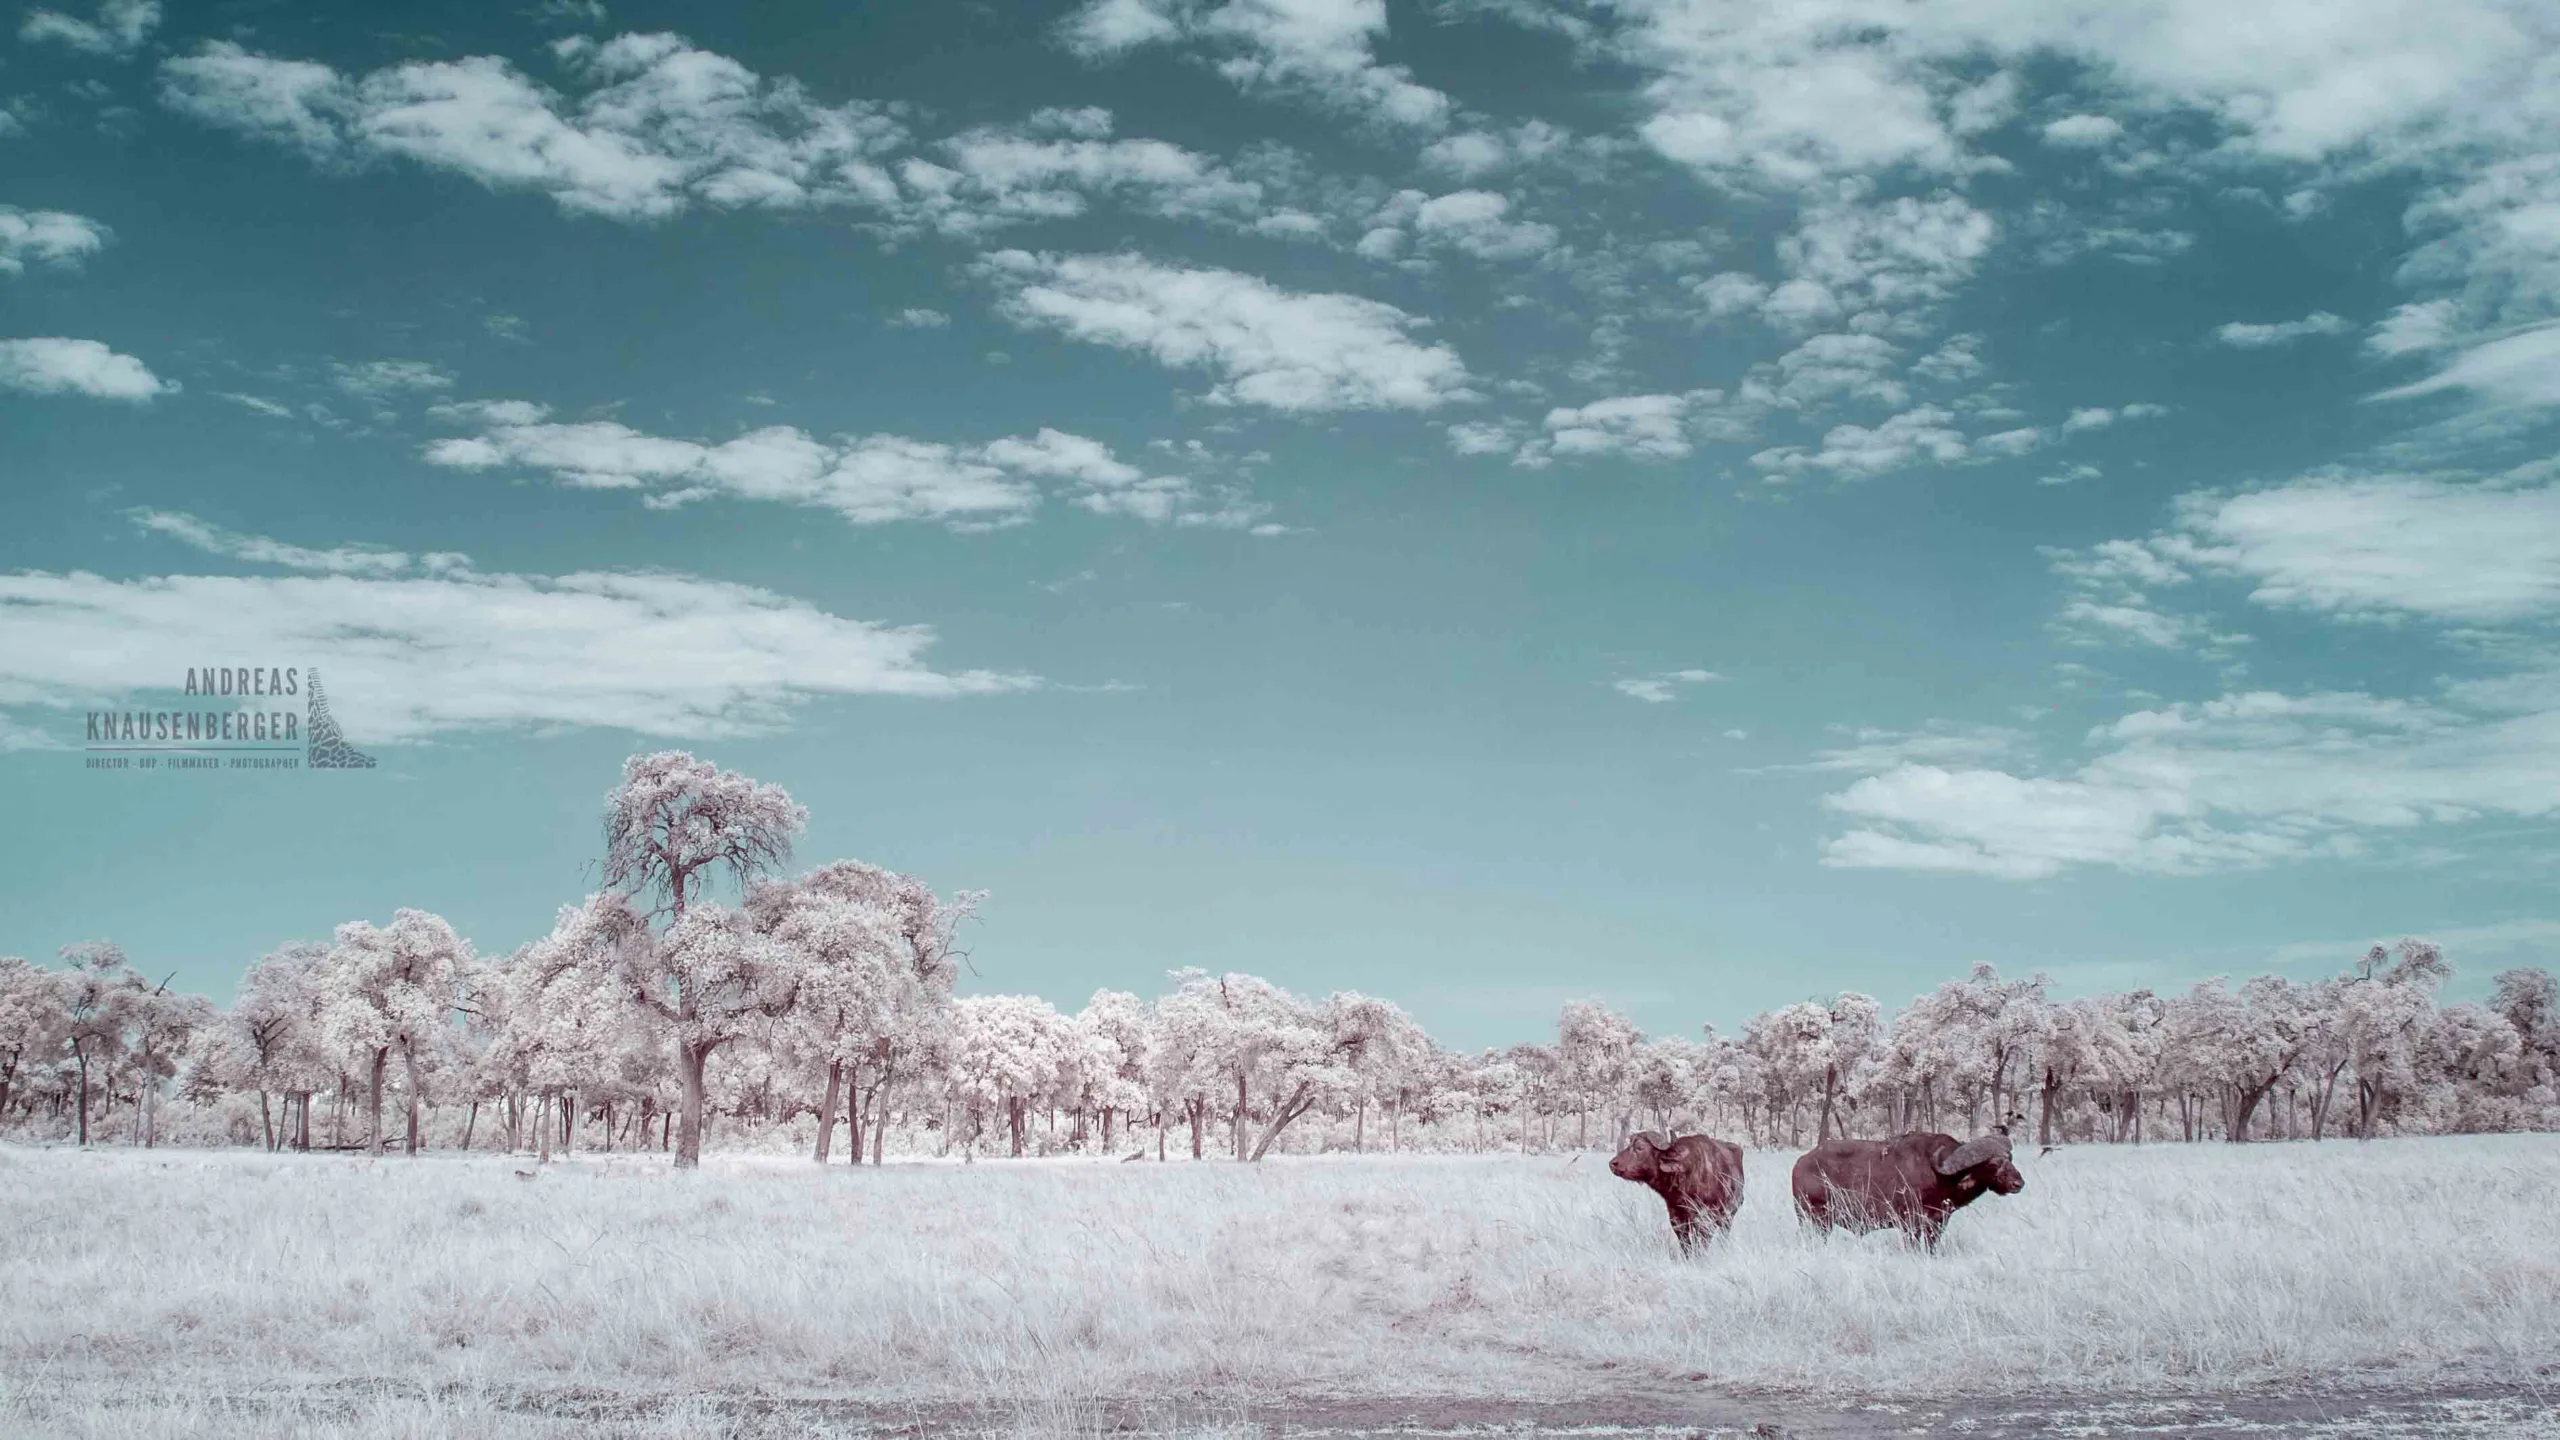
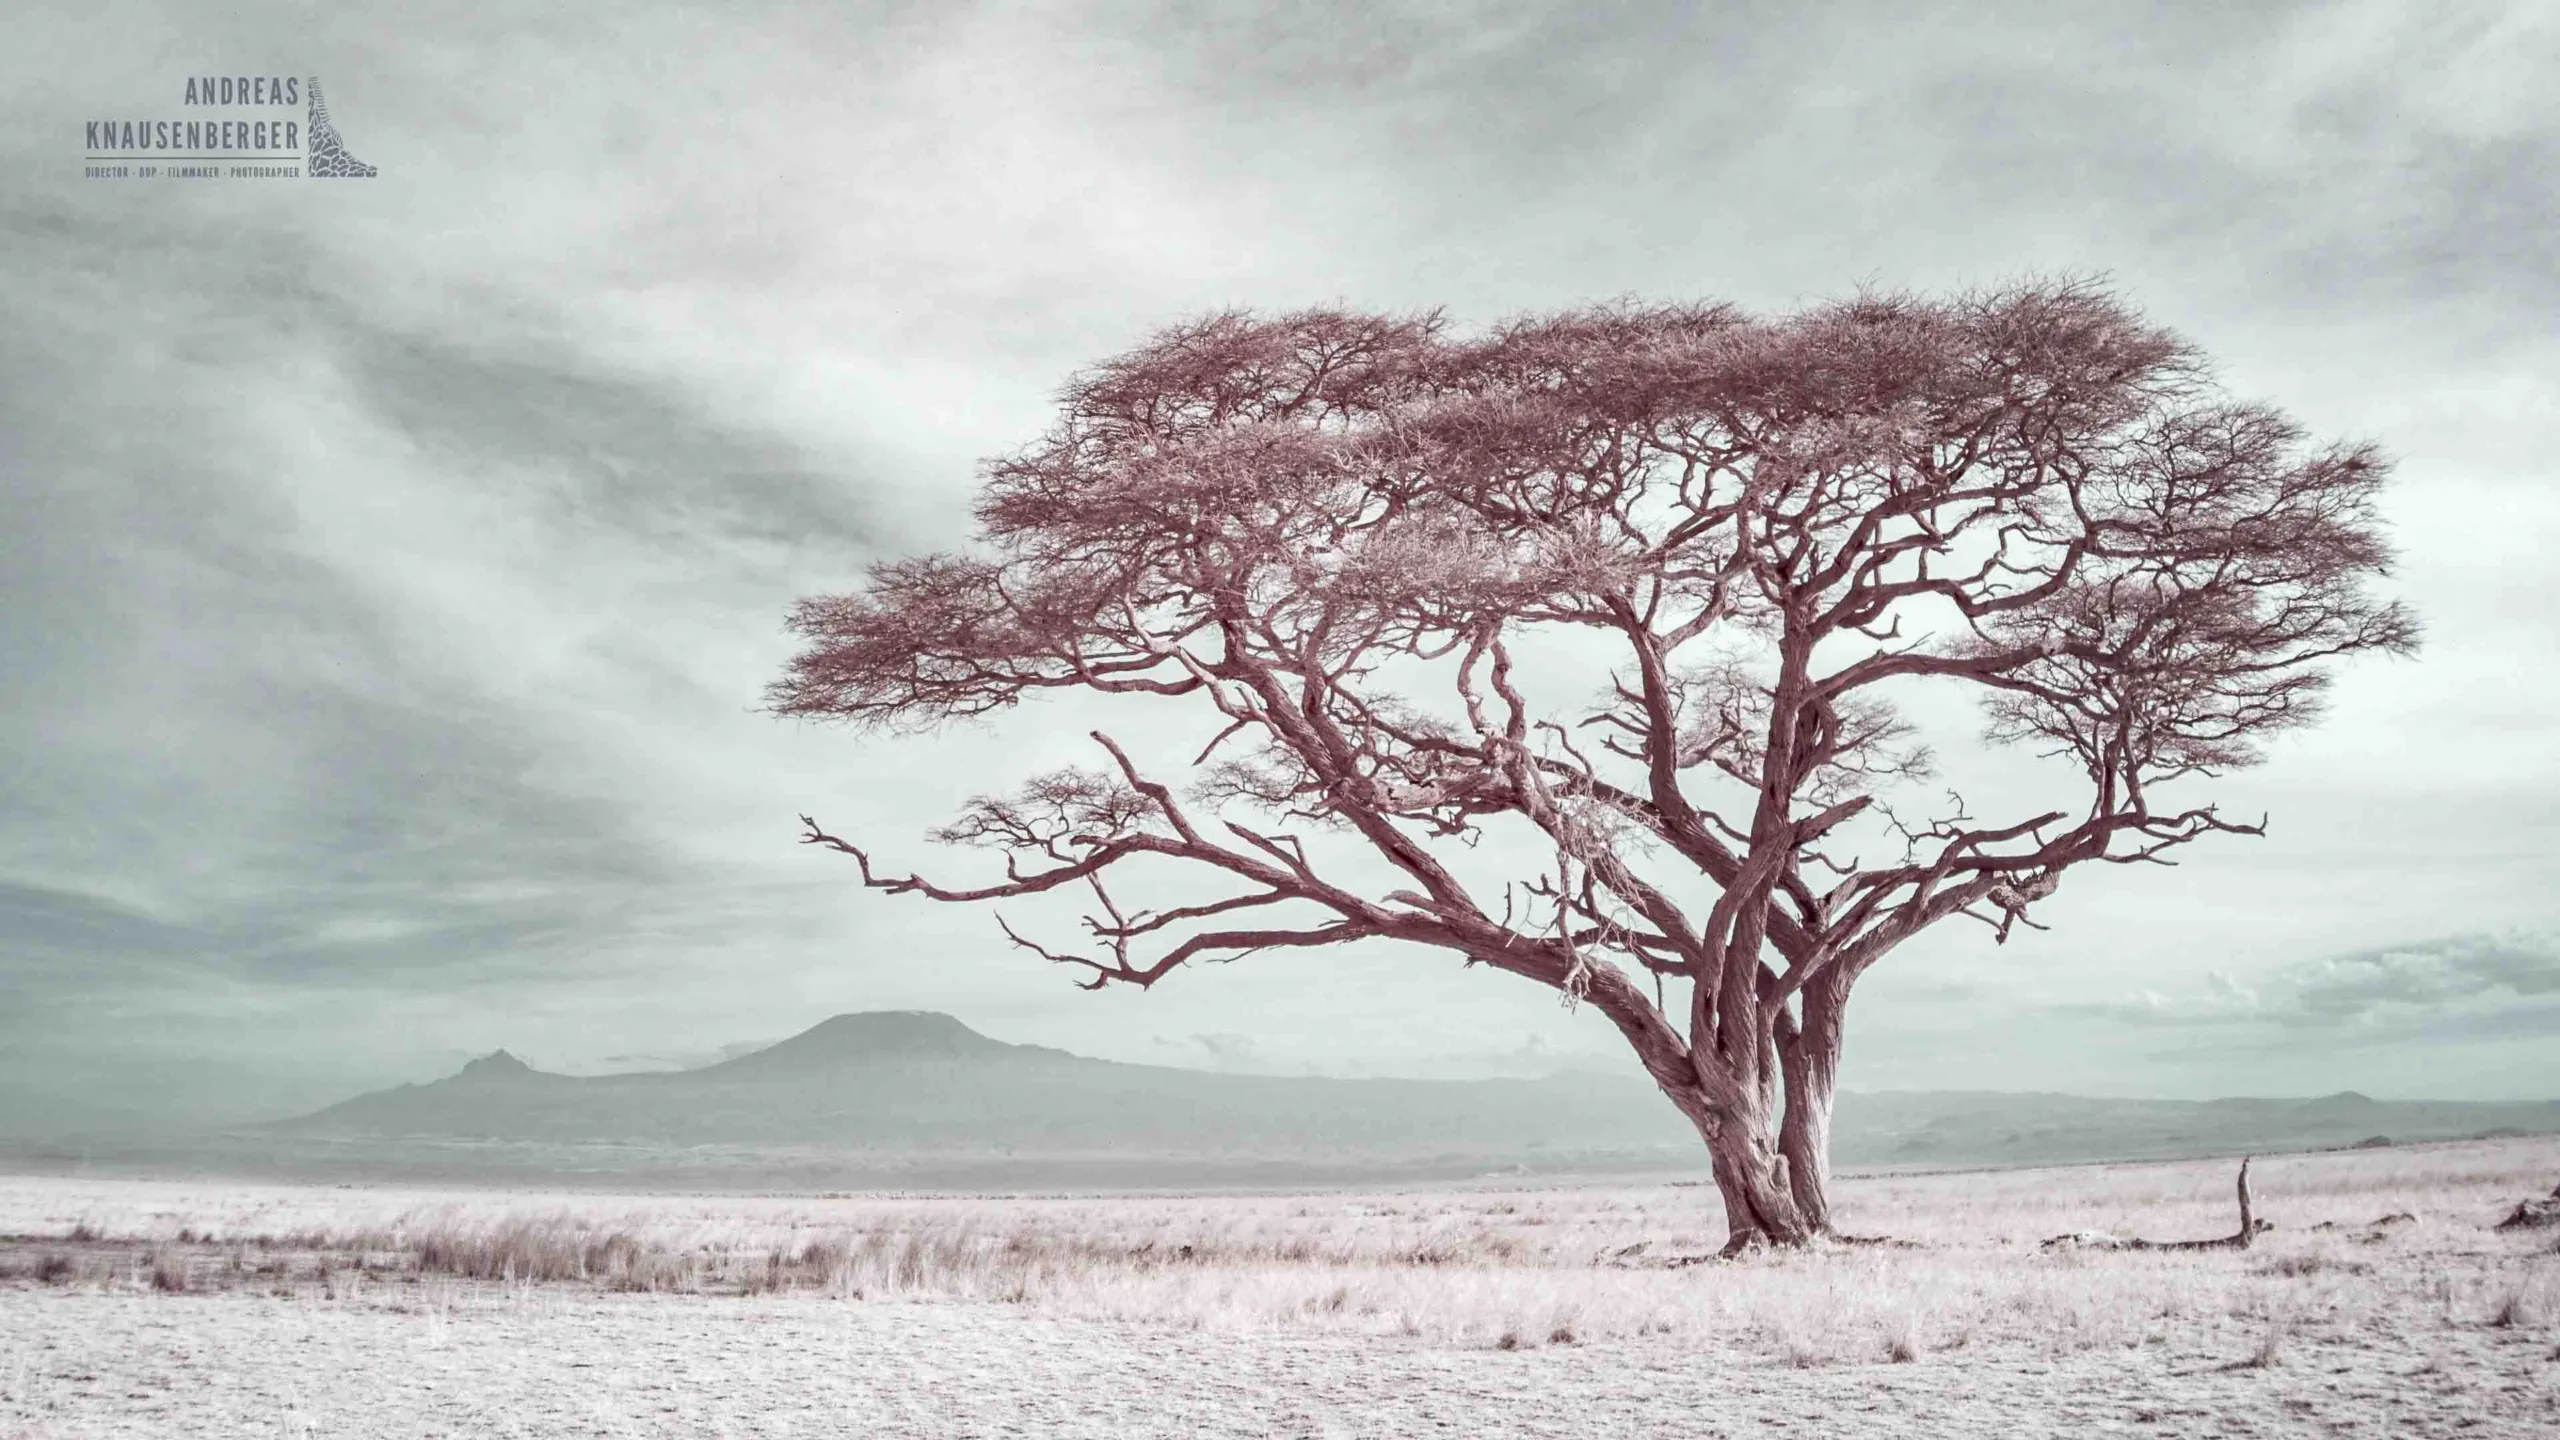
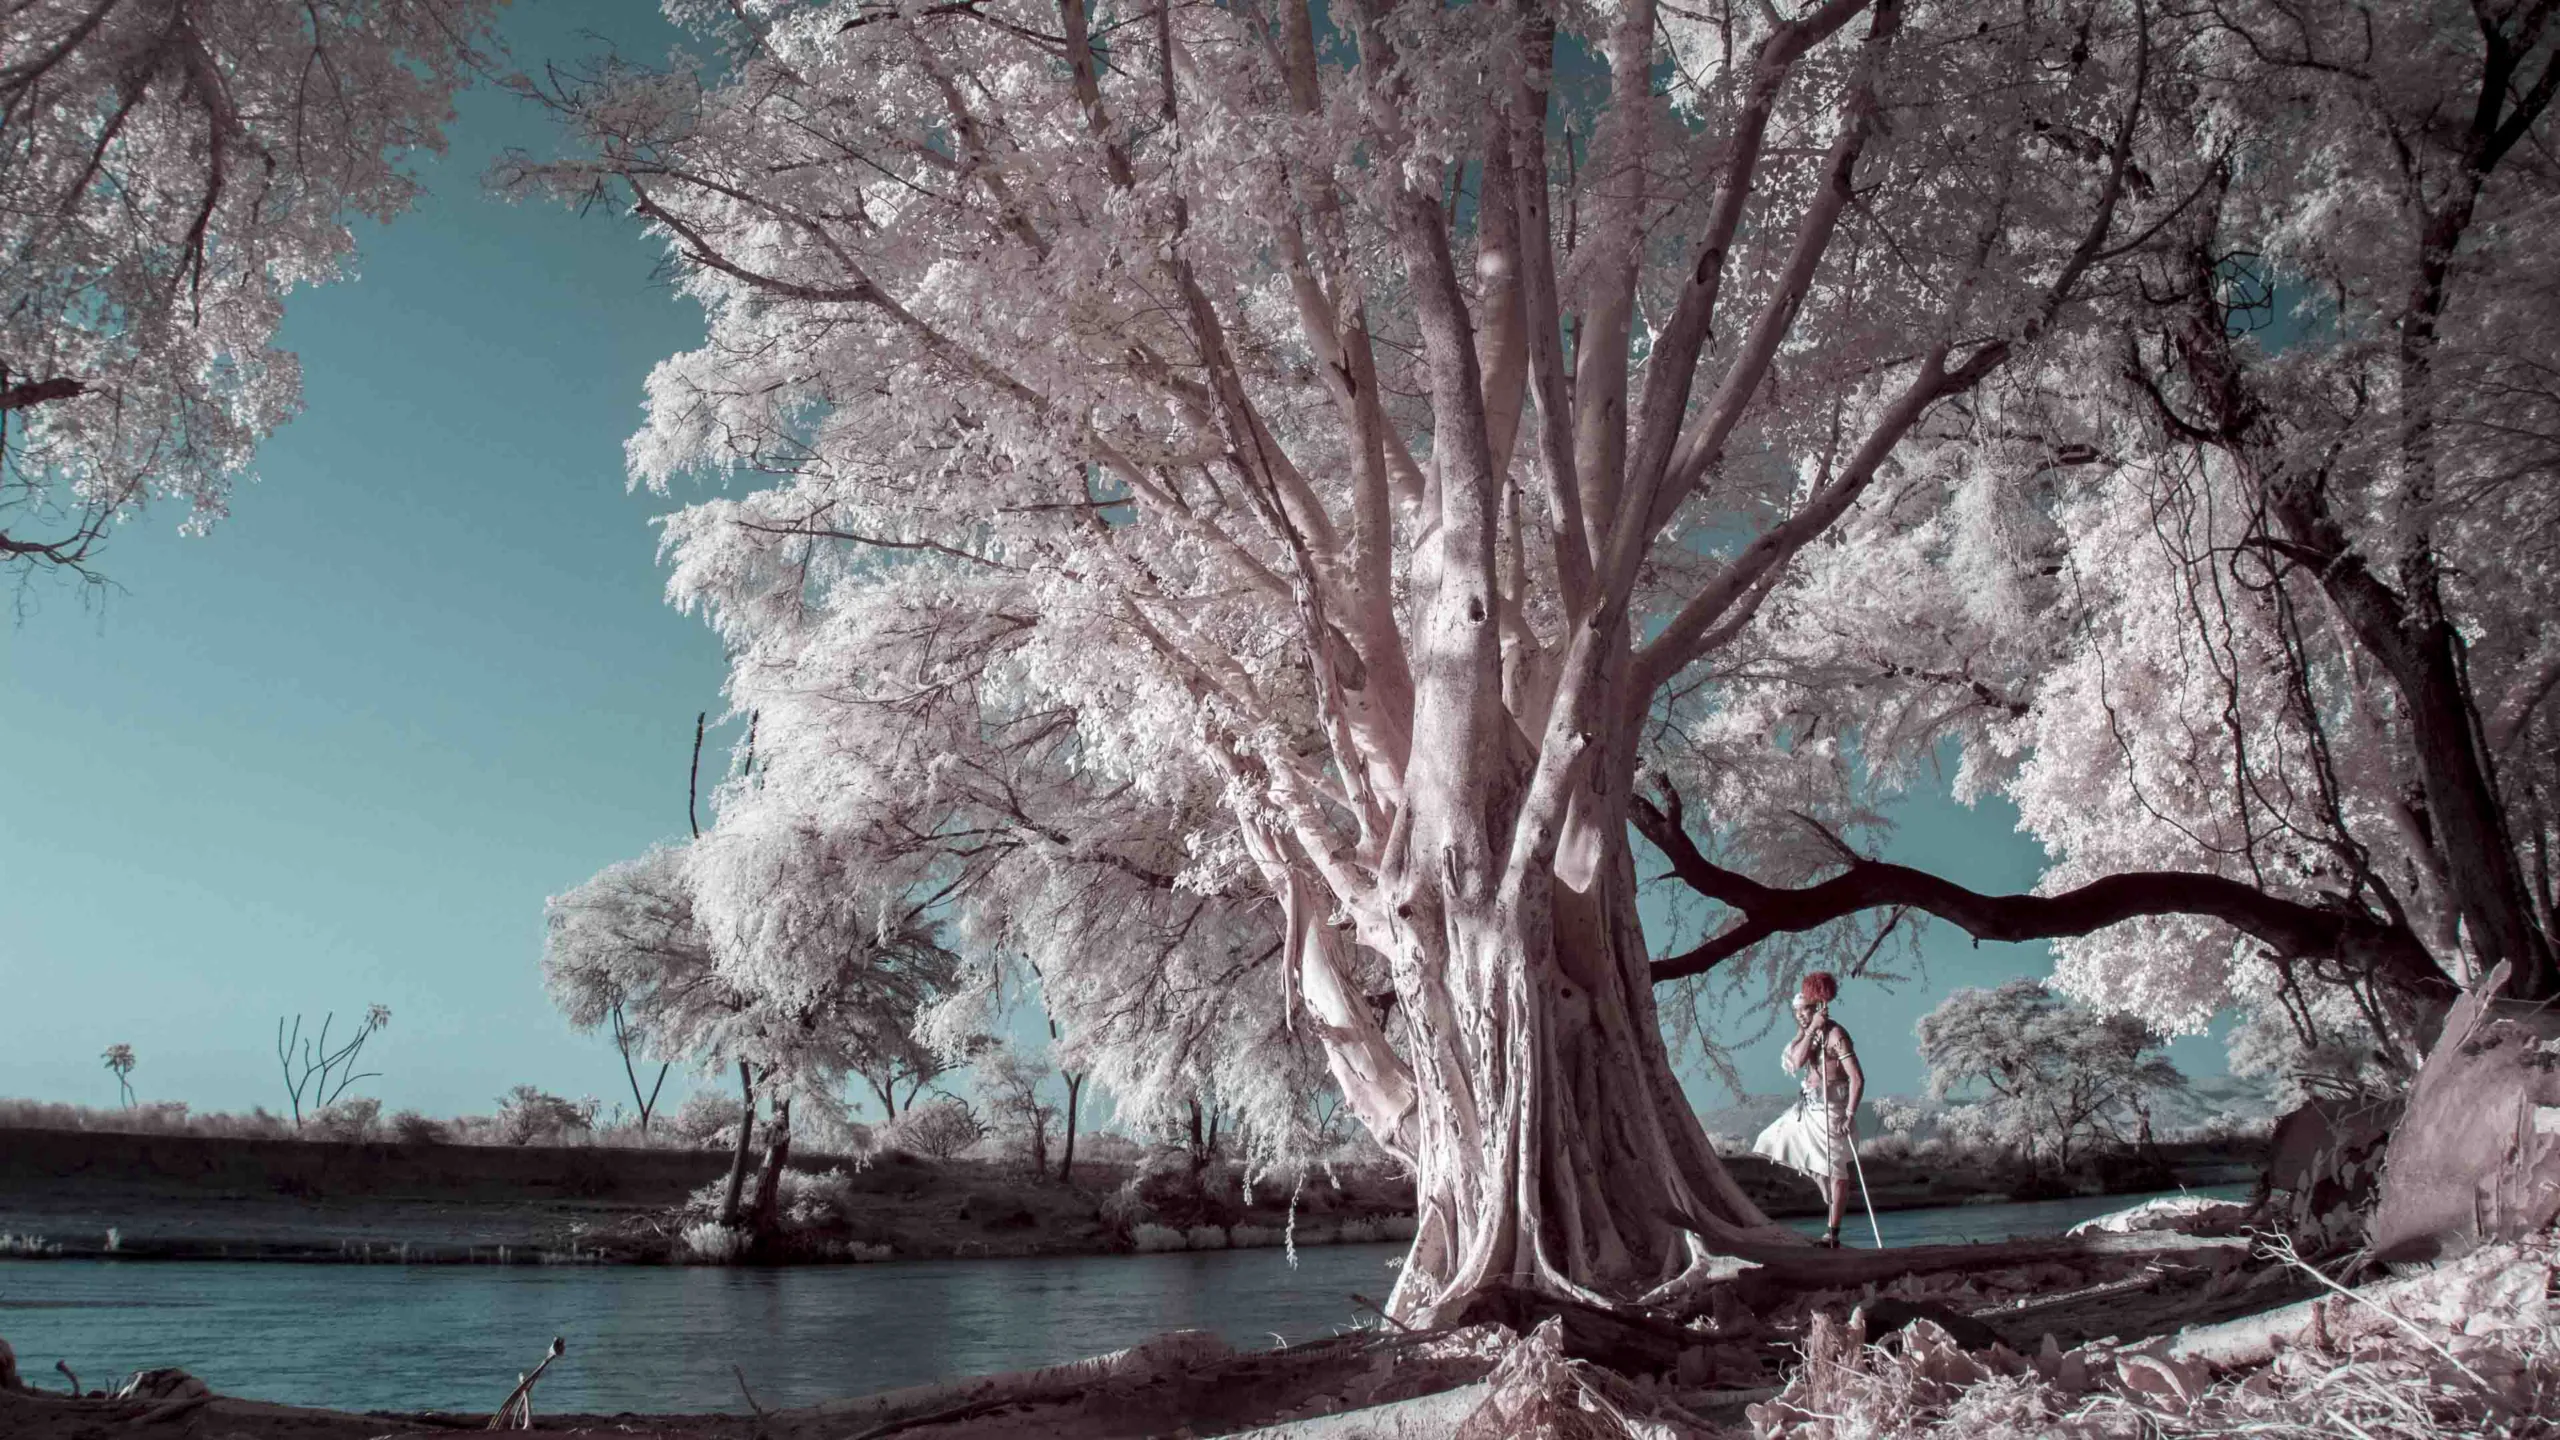
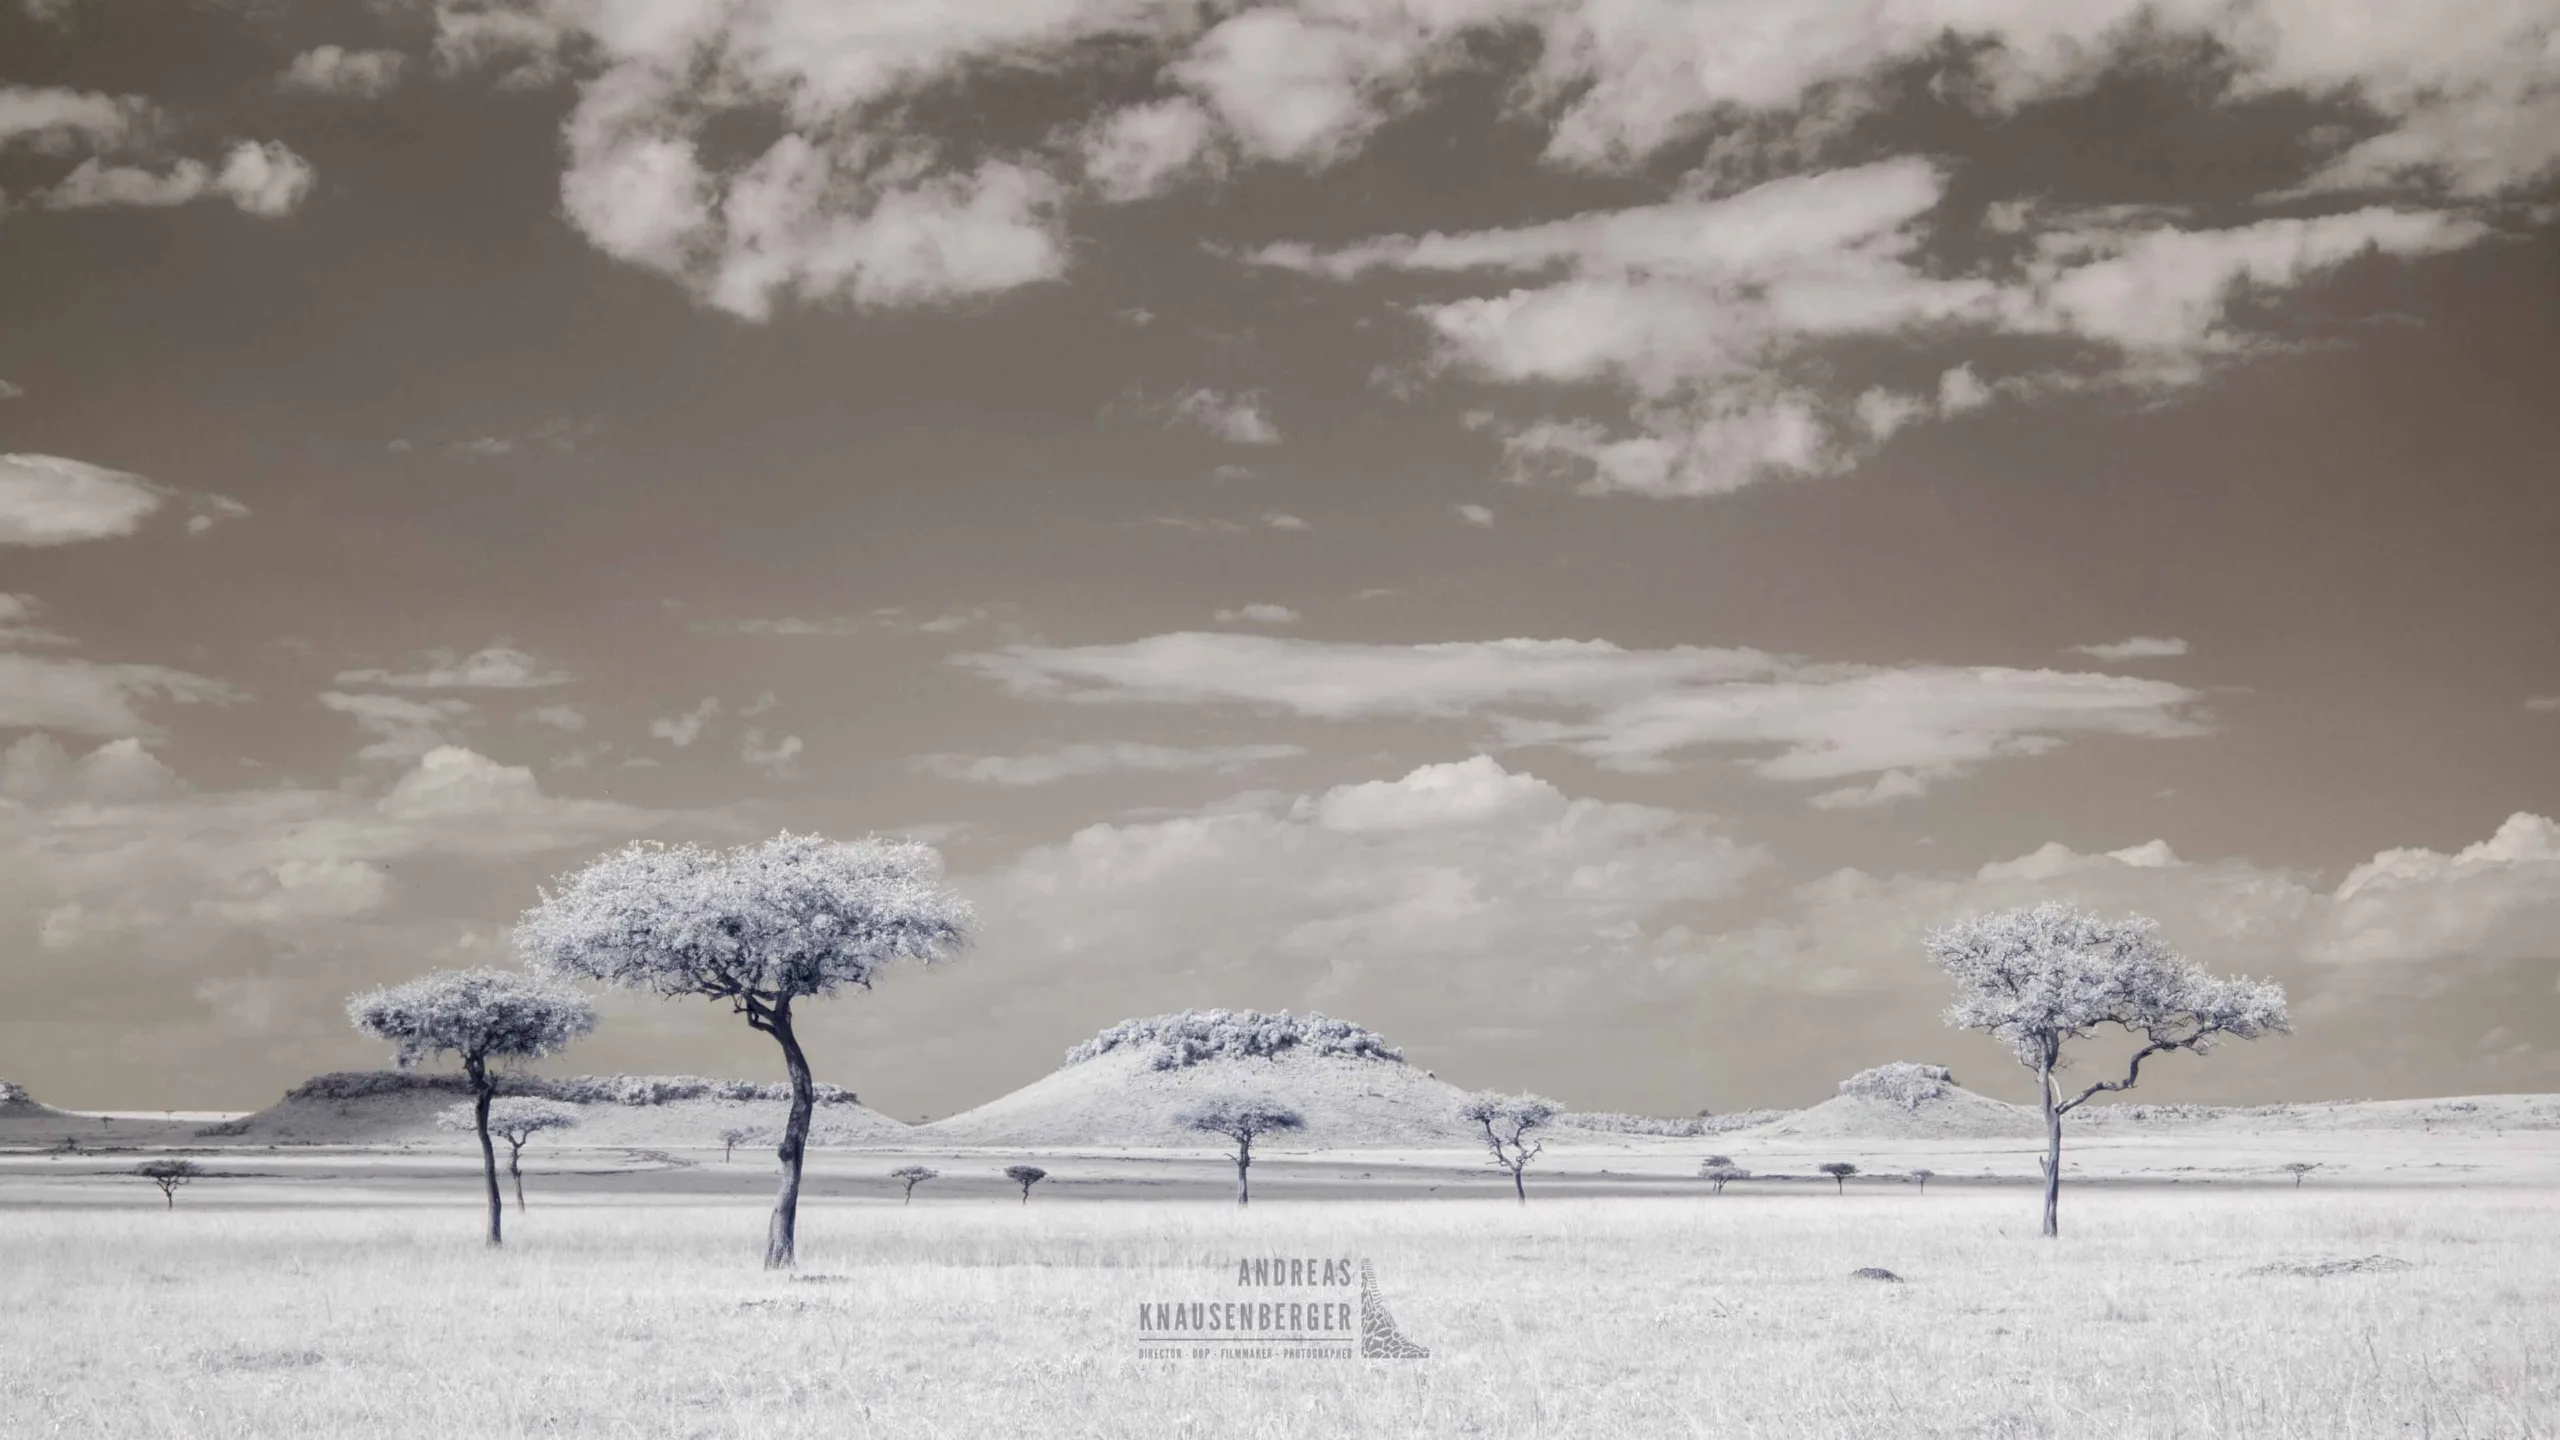
The Masai Mara is one of the most rewarding destinations for infrared wildlife photography. I realized quickly that you need more than just the animal itself in your frame. Since foliage looks so striking in IR, it’s important to include interesting trees and bushes. Forests, riverbanks, or solitary trees add something special to your composition.
I spend a lot of time in the Masai Mara as a safari guide, and there are great spots with giraffes, elephants, and other animals surrounded by beautiful trees and bush lines—perfect for photo safaris.
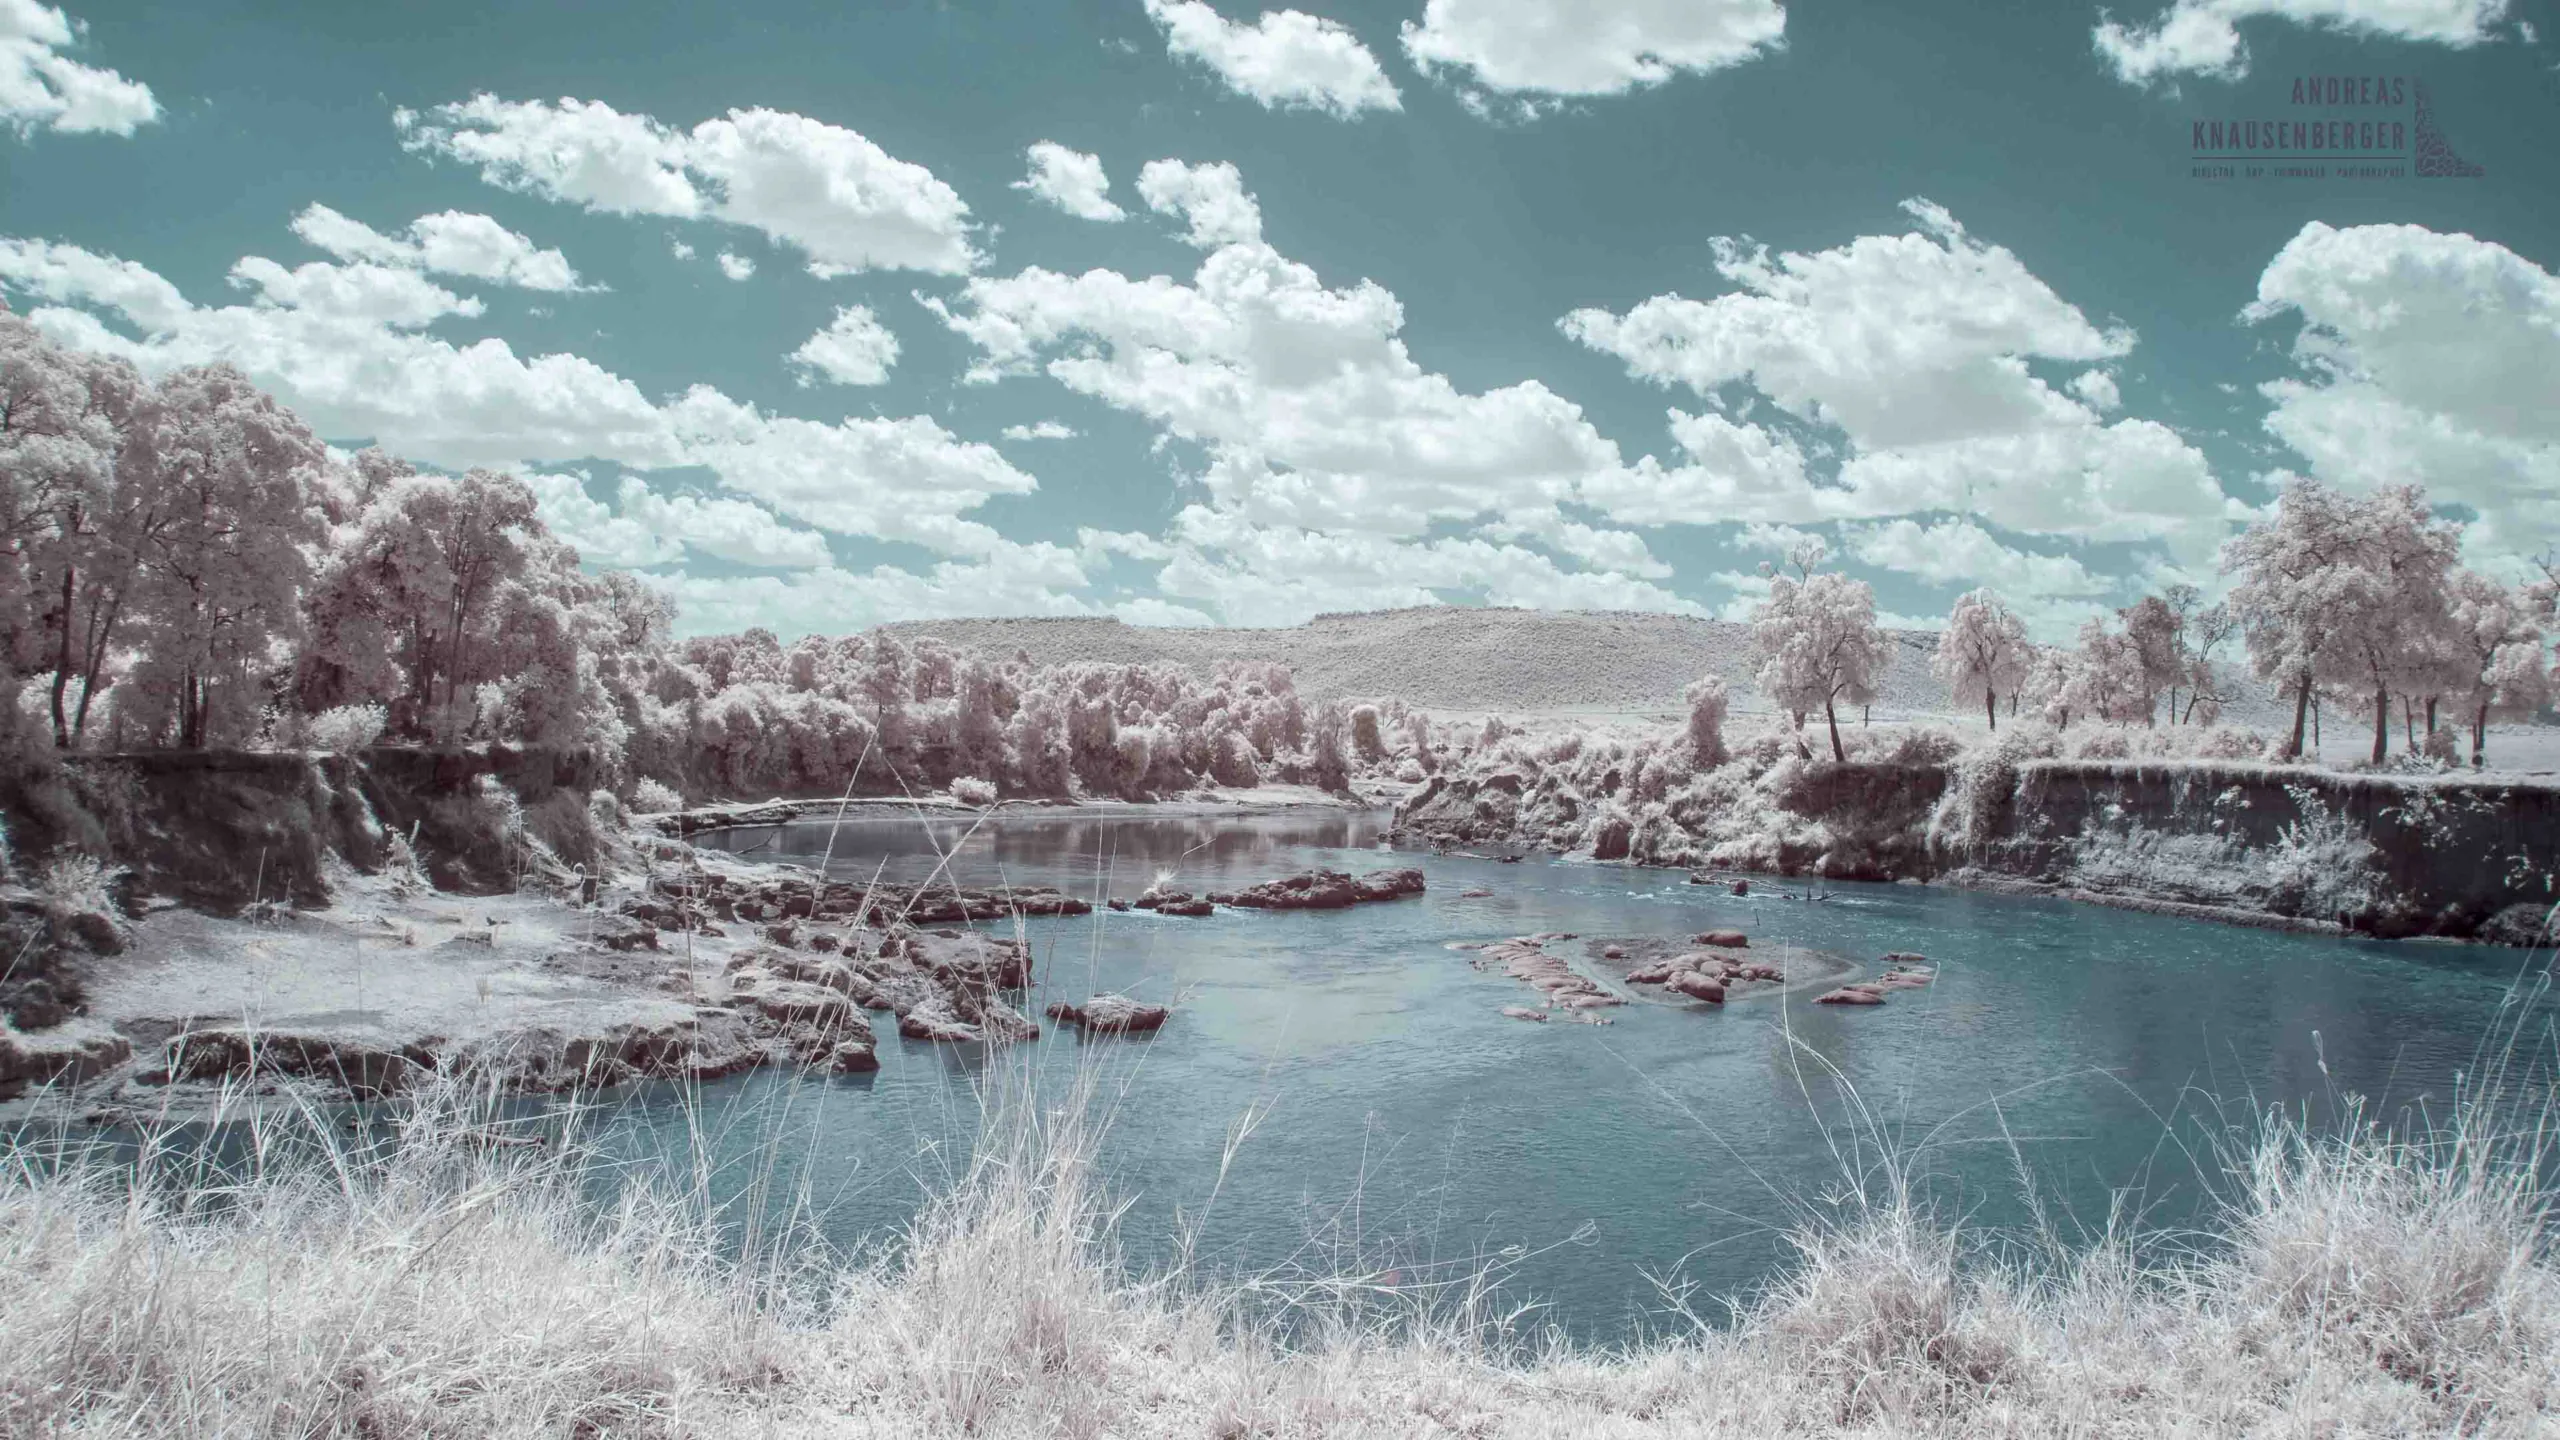
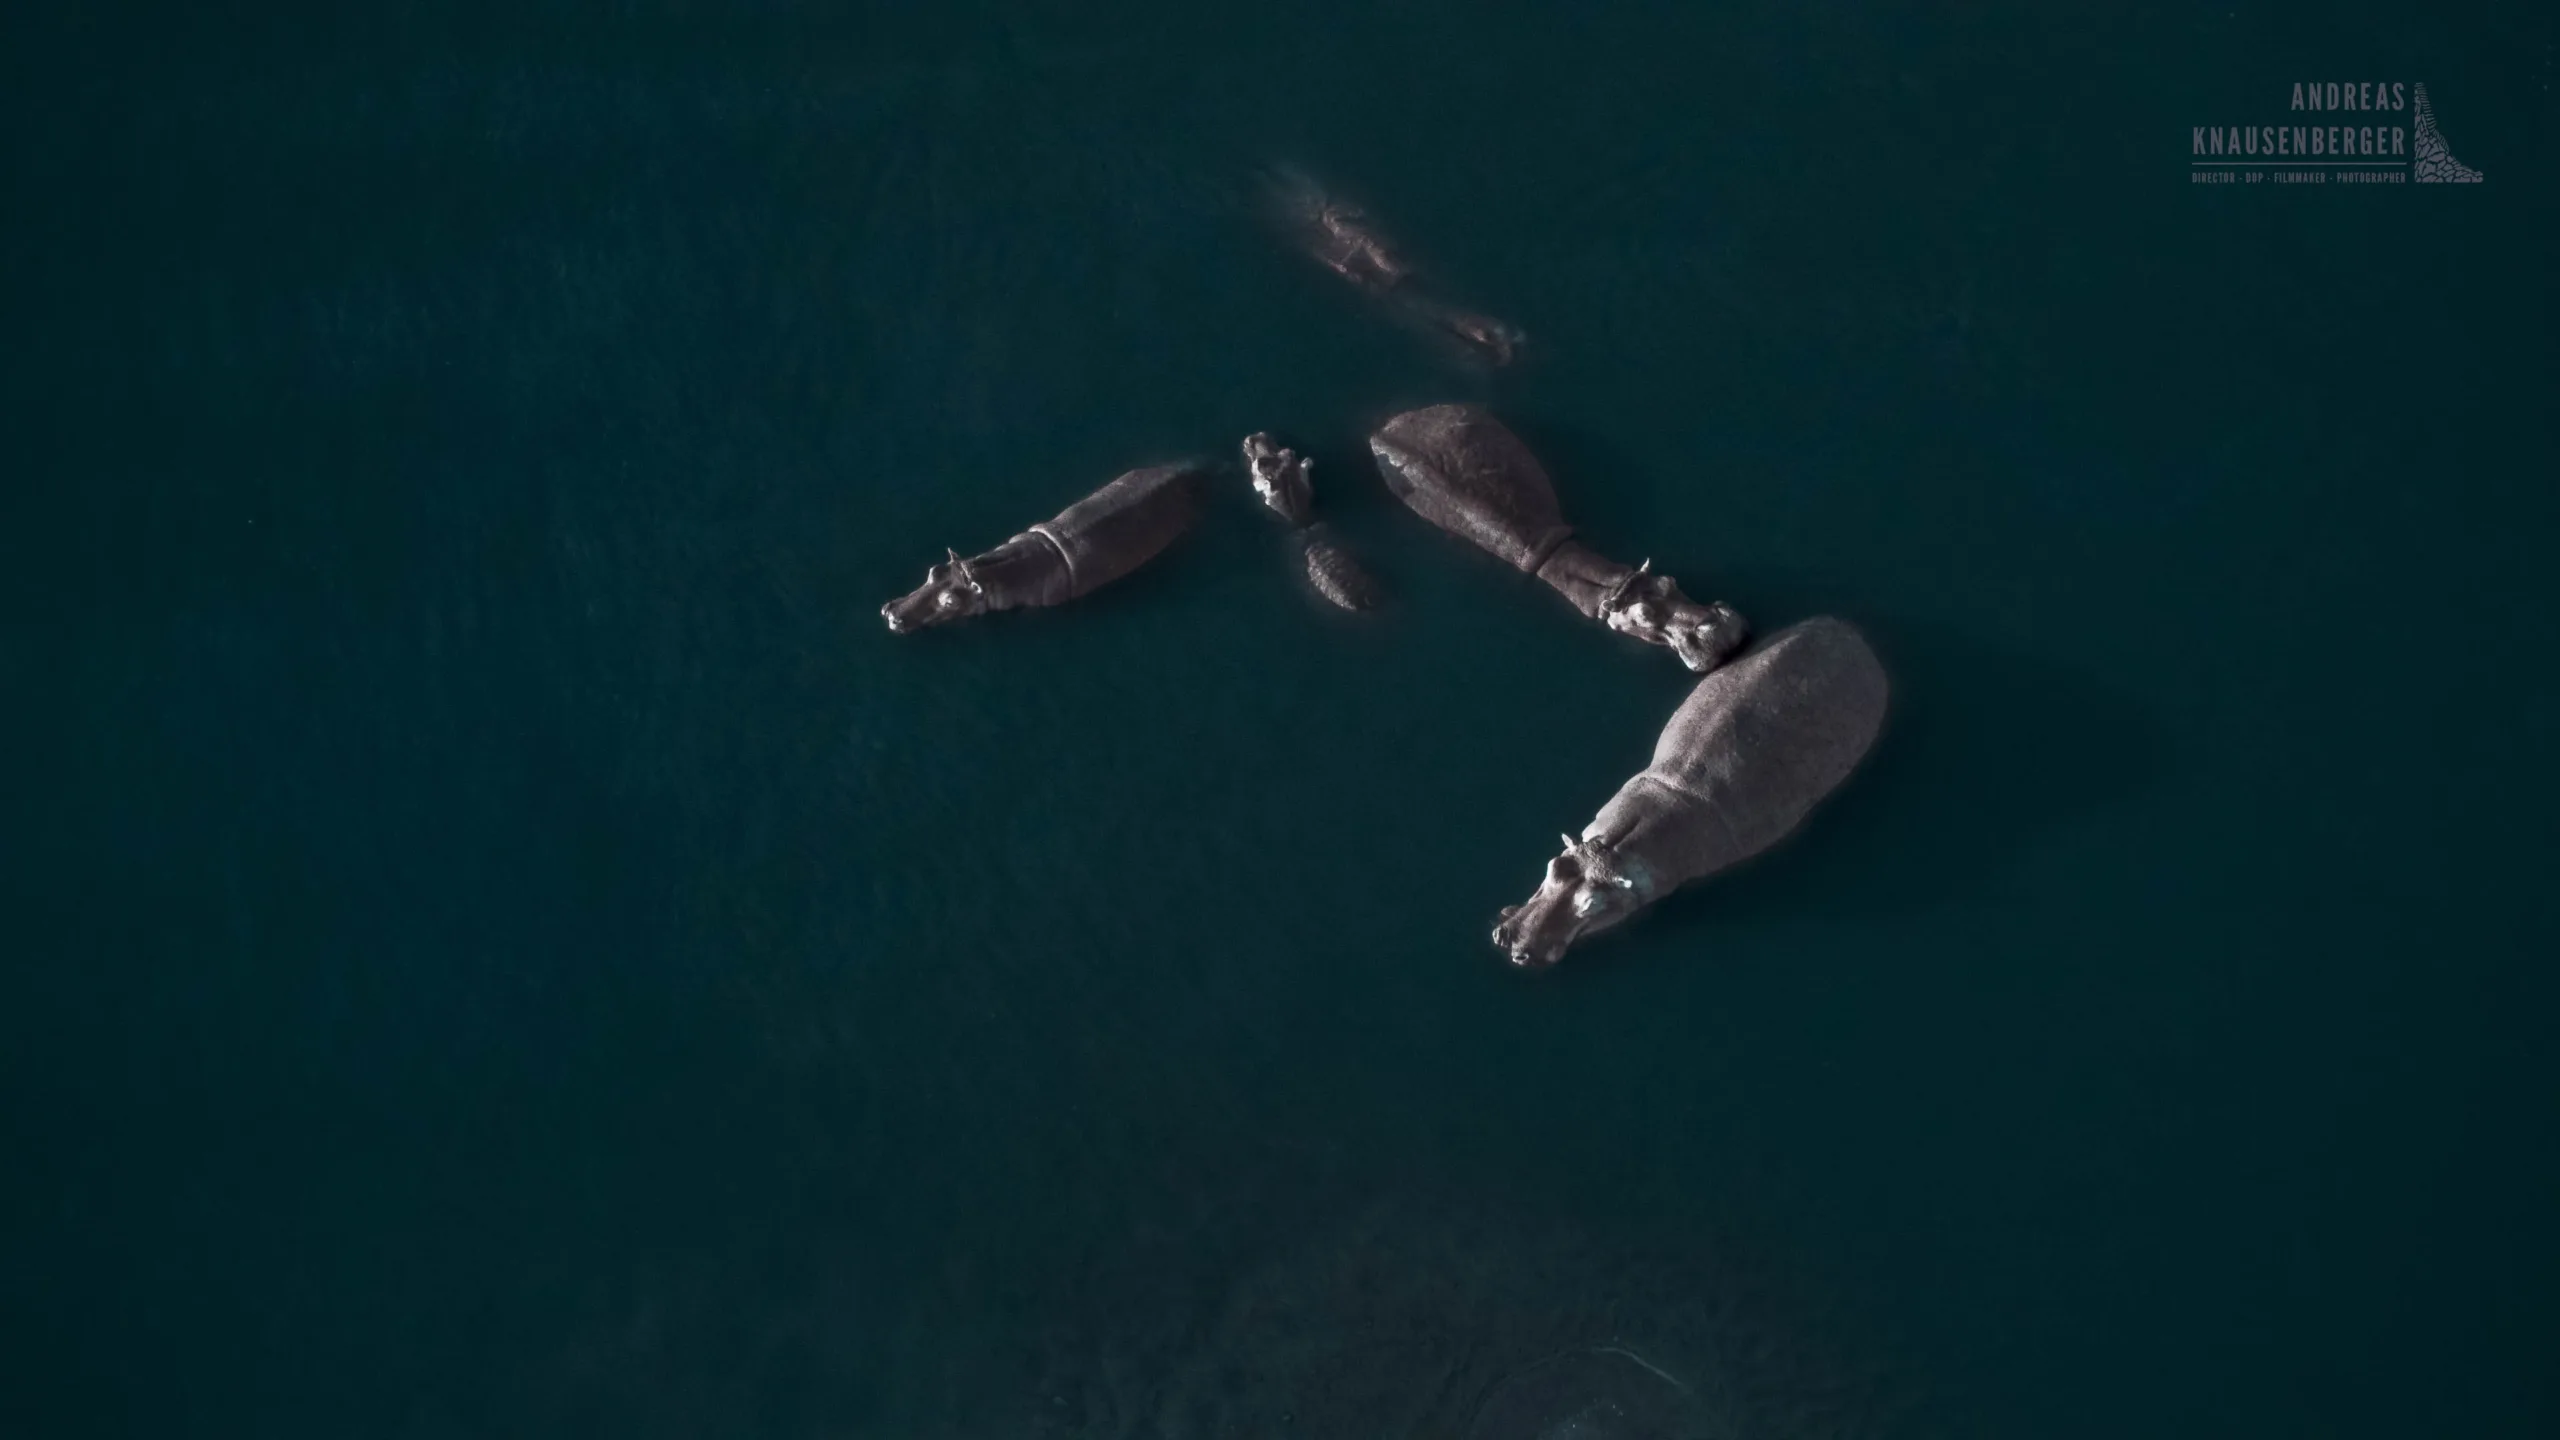
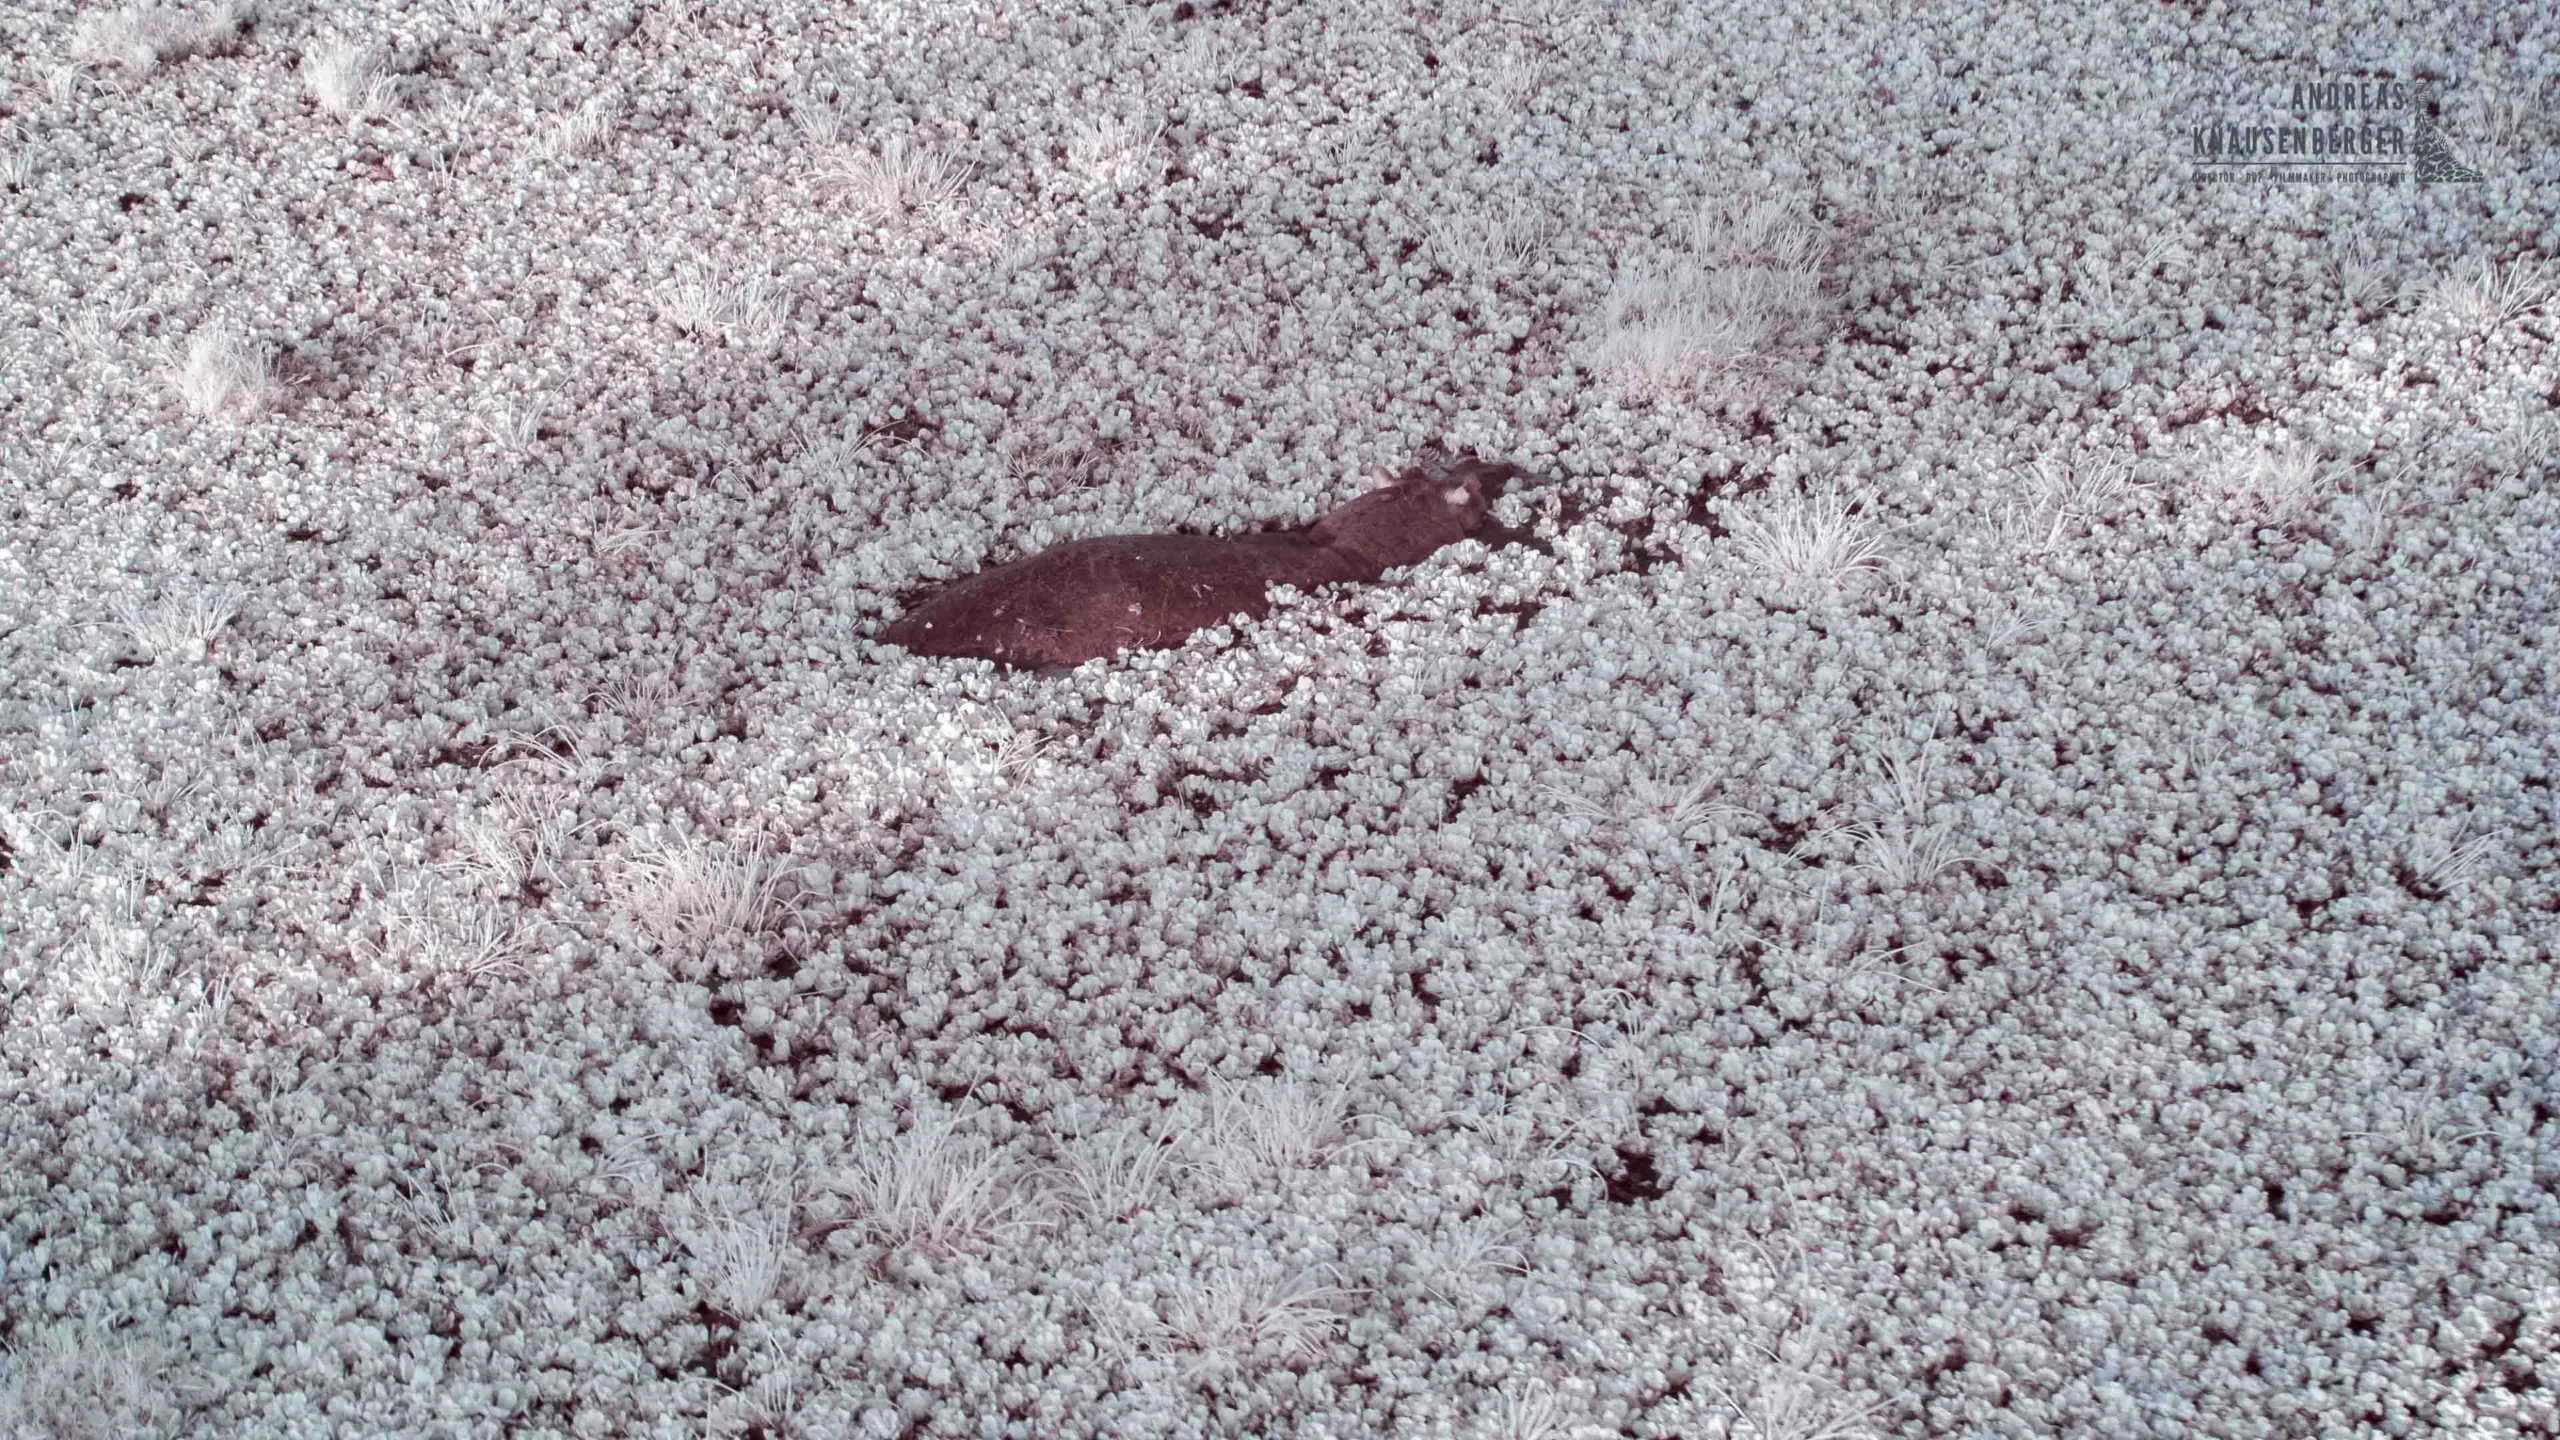
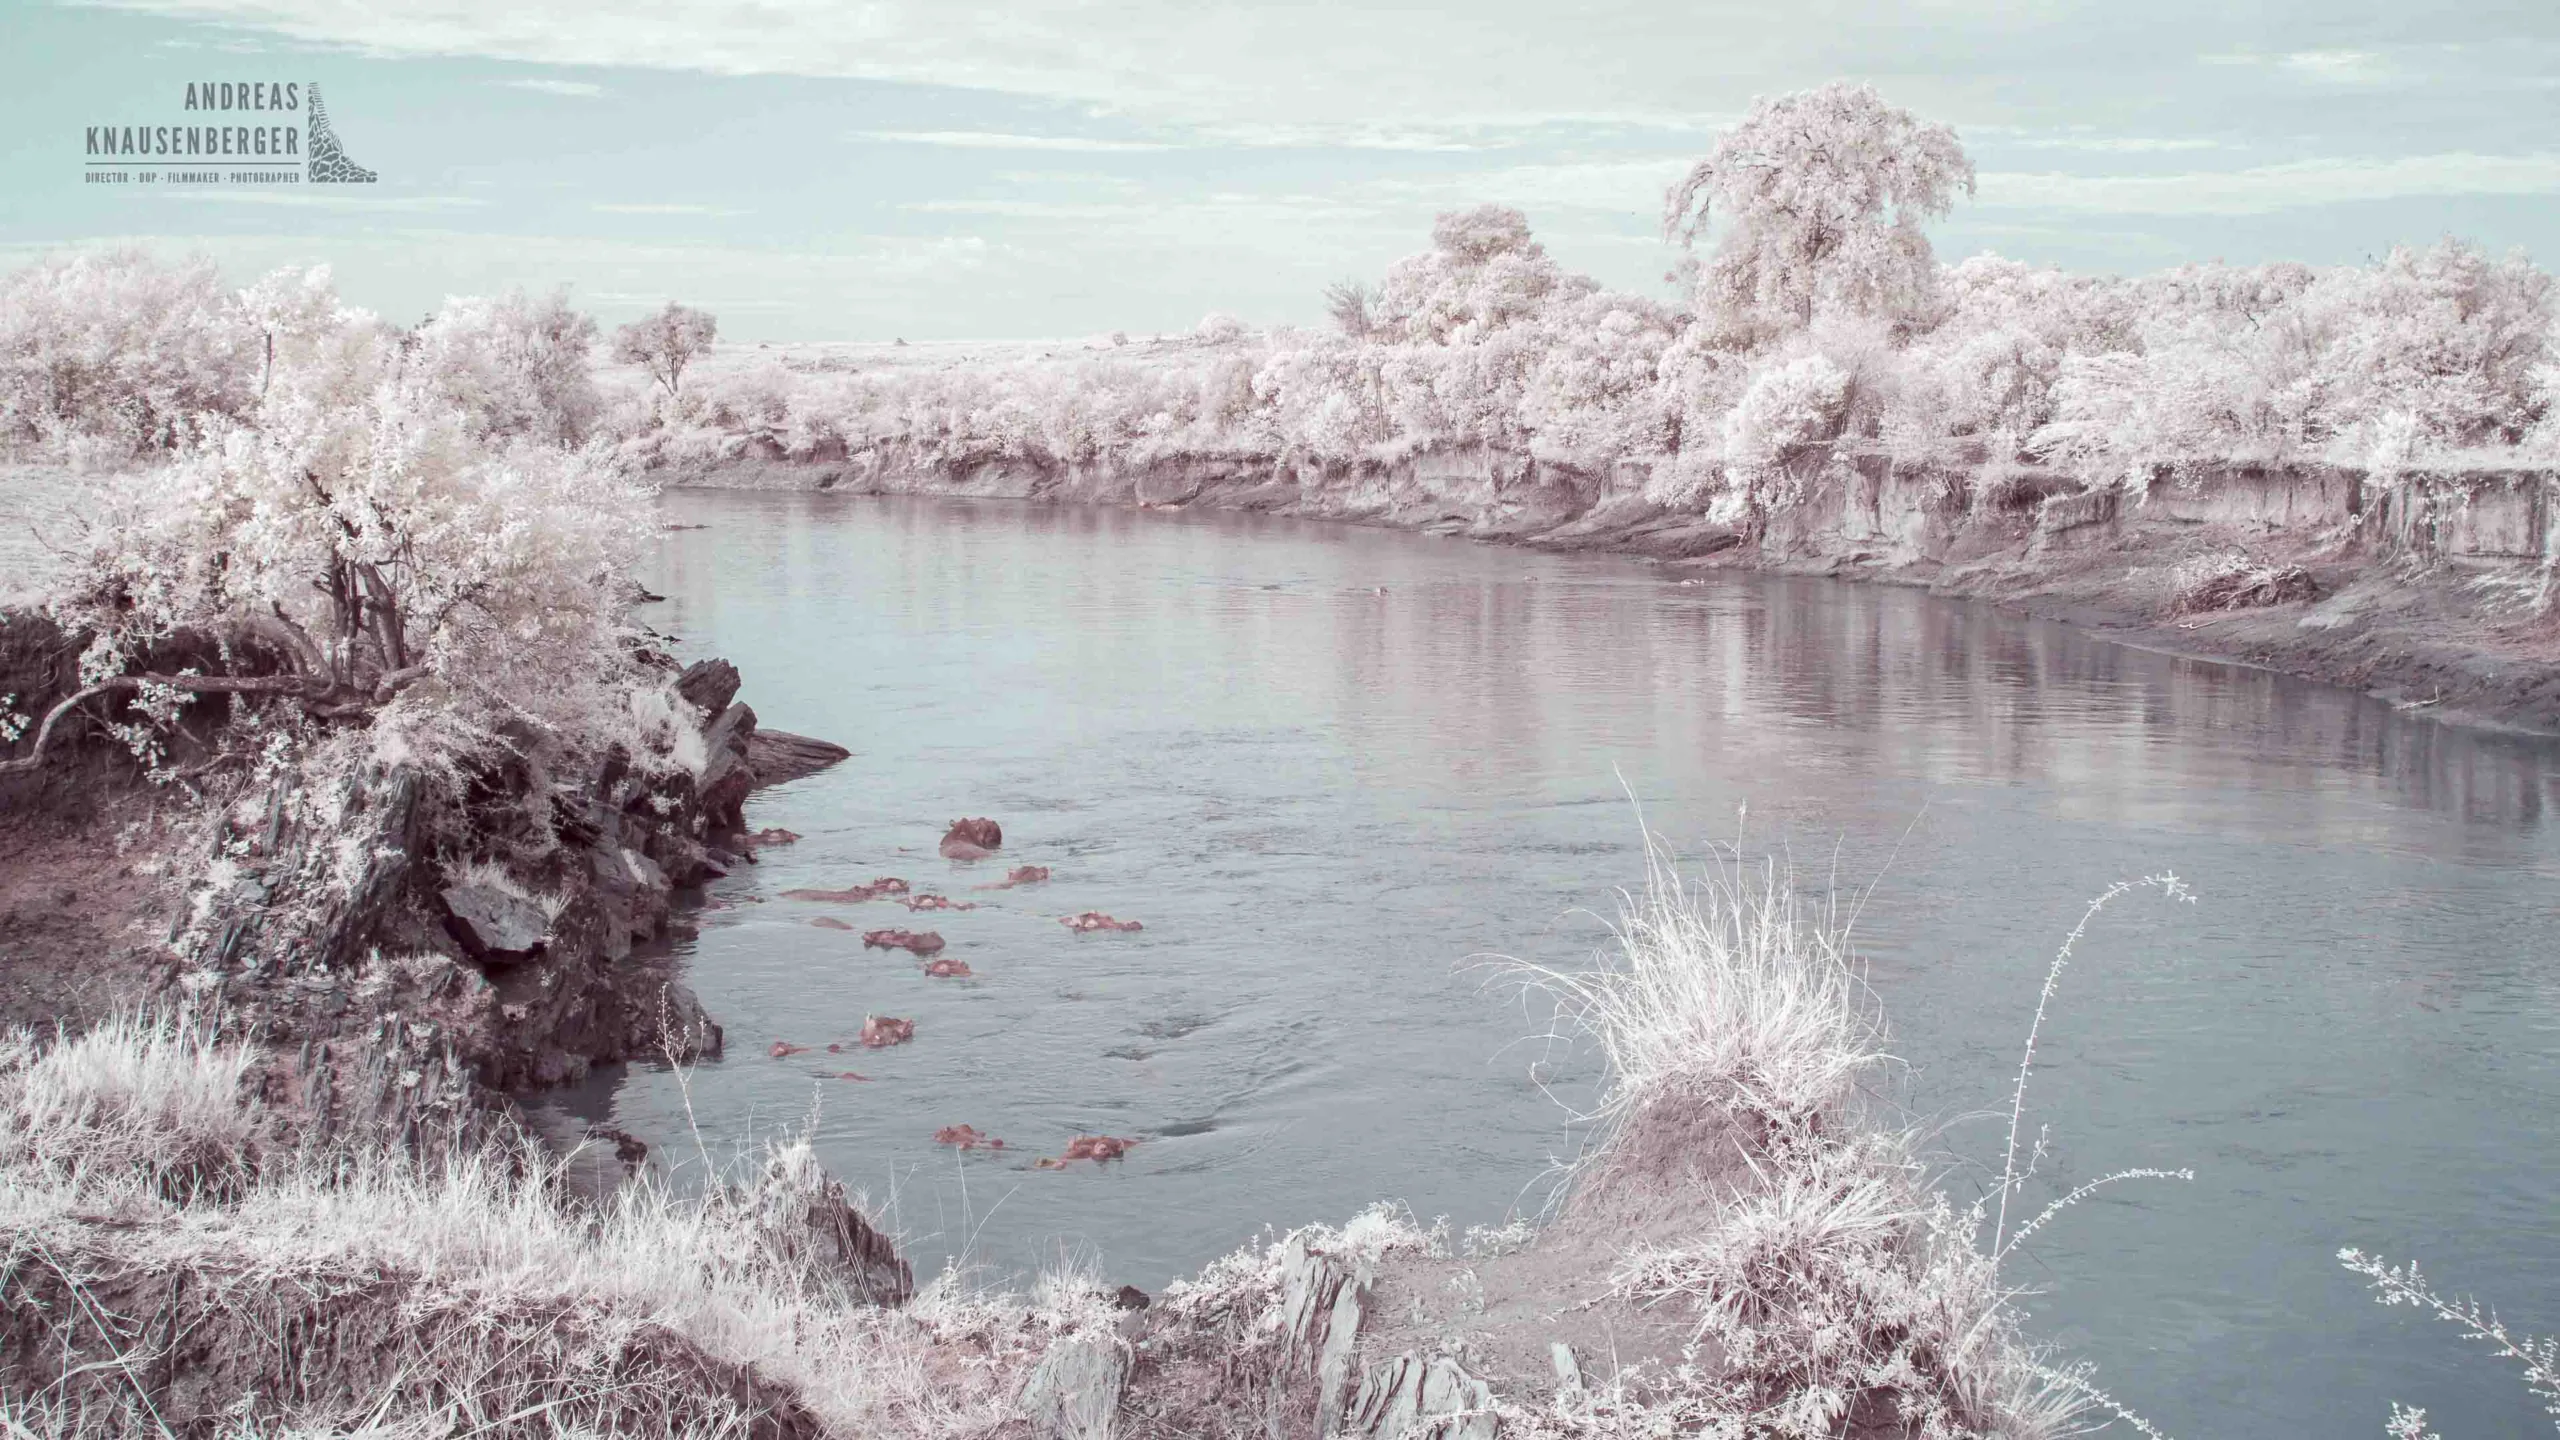
The Mara River also provides great infrared opportunities: the water appears black, hippos stand out beautifully, and the foliage turns completely white.
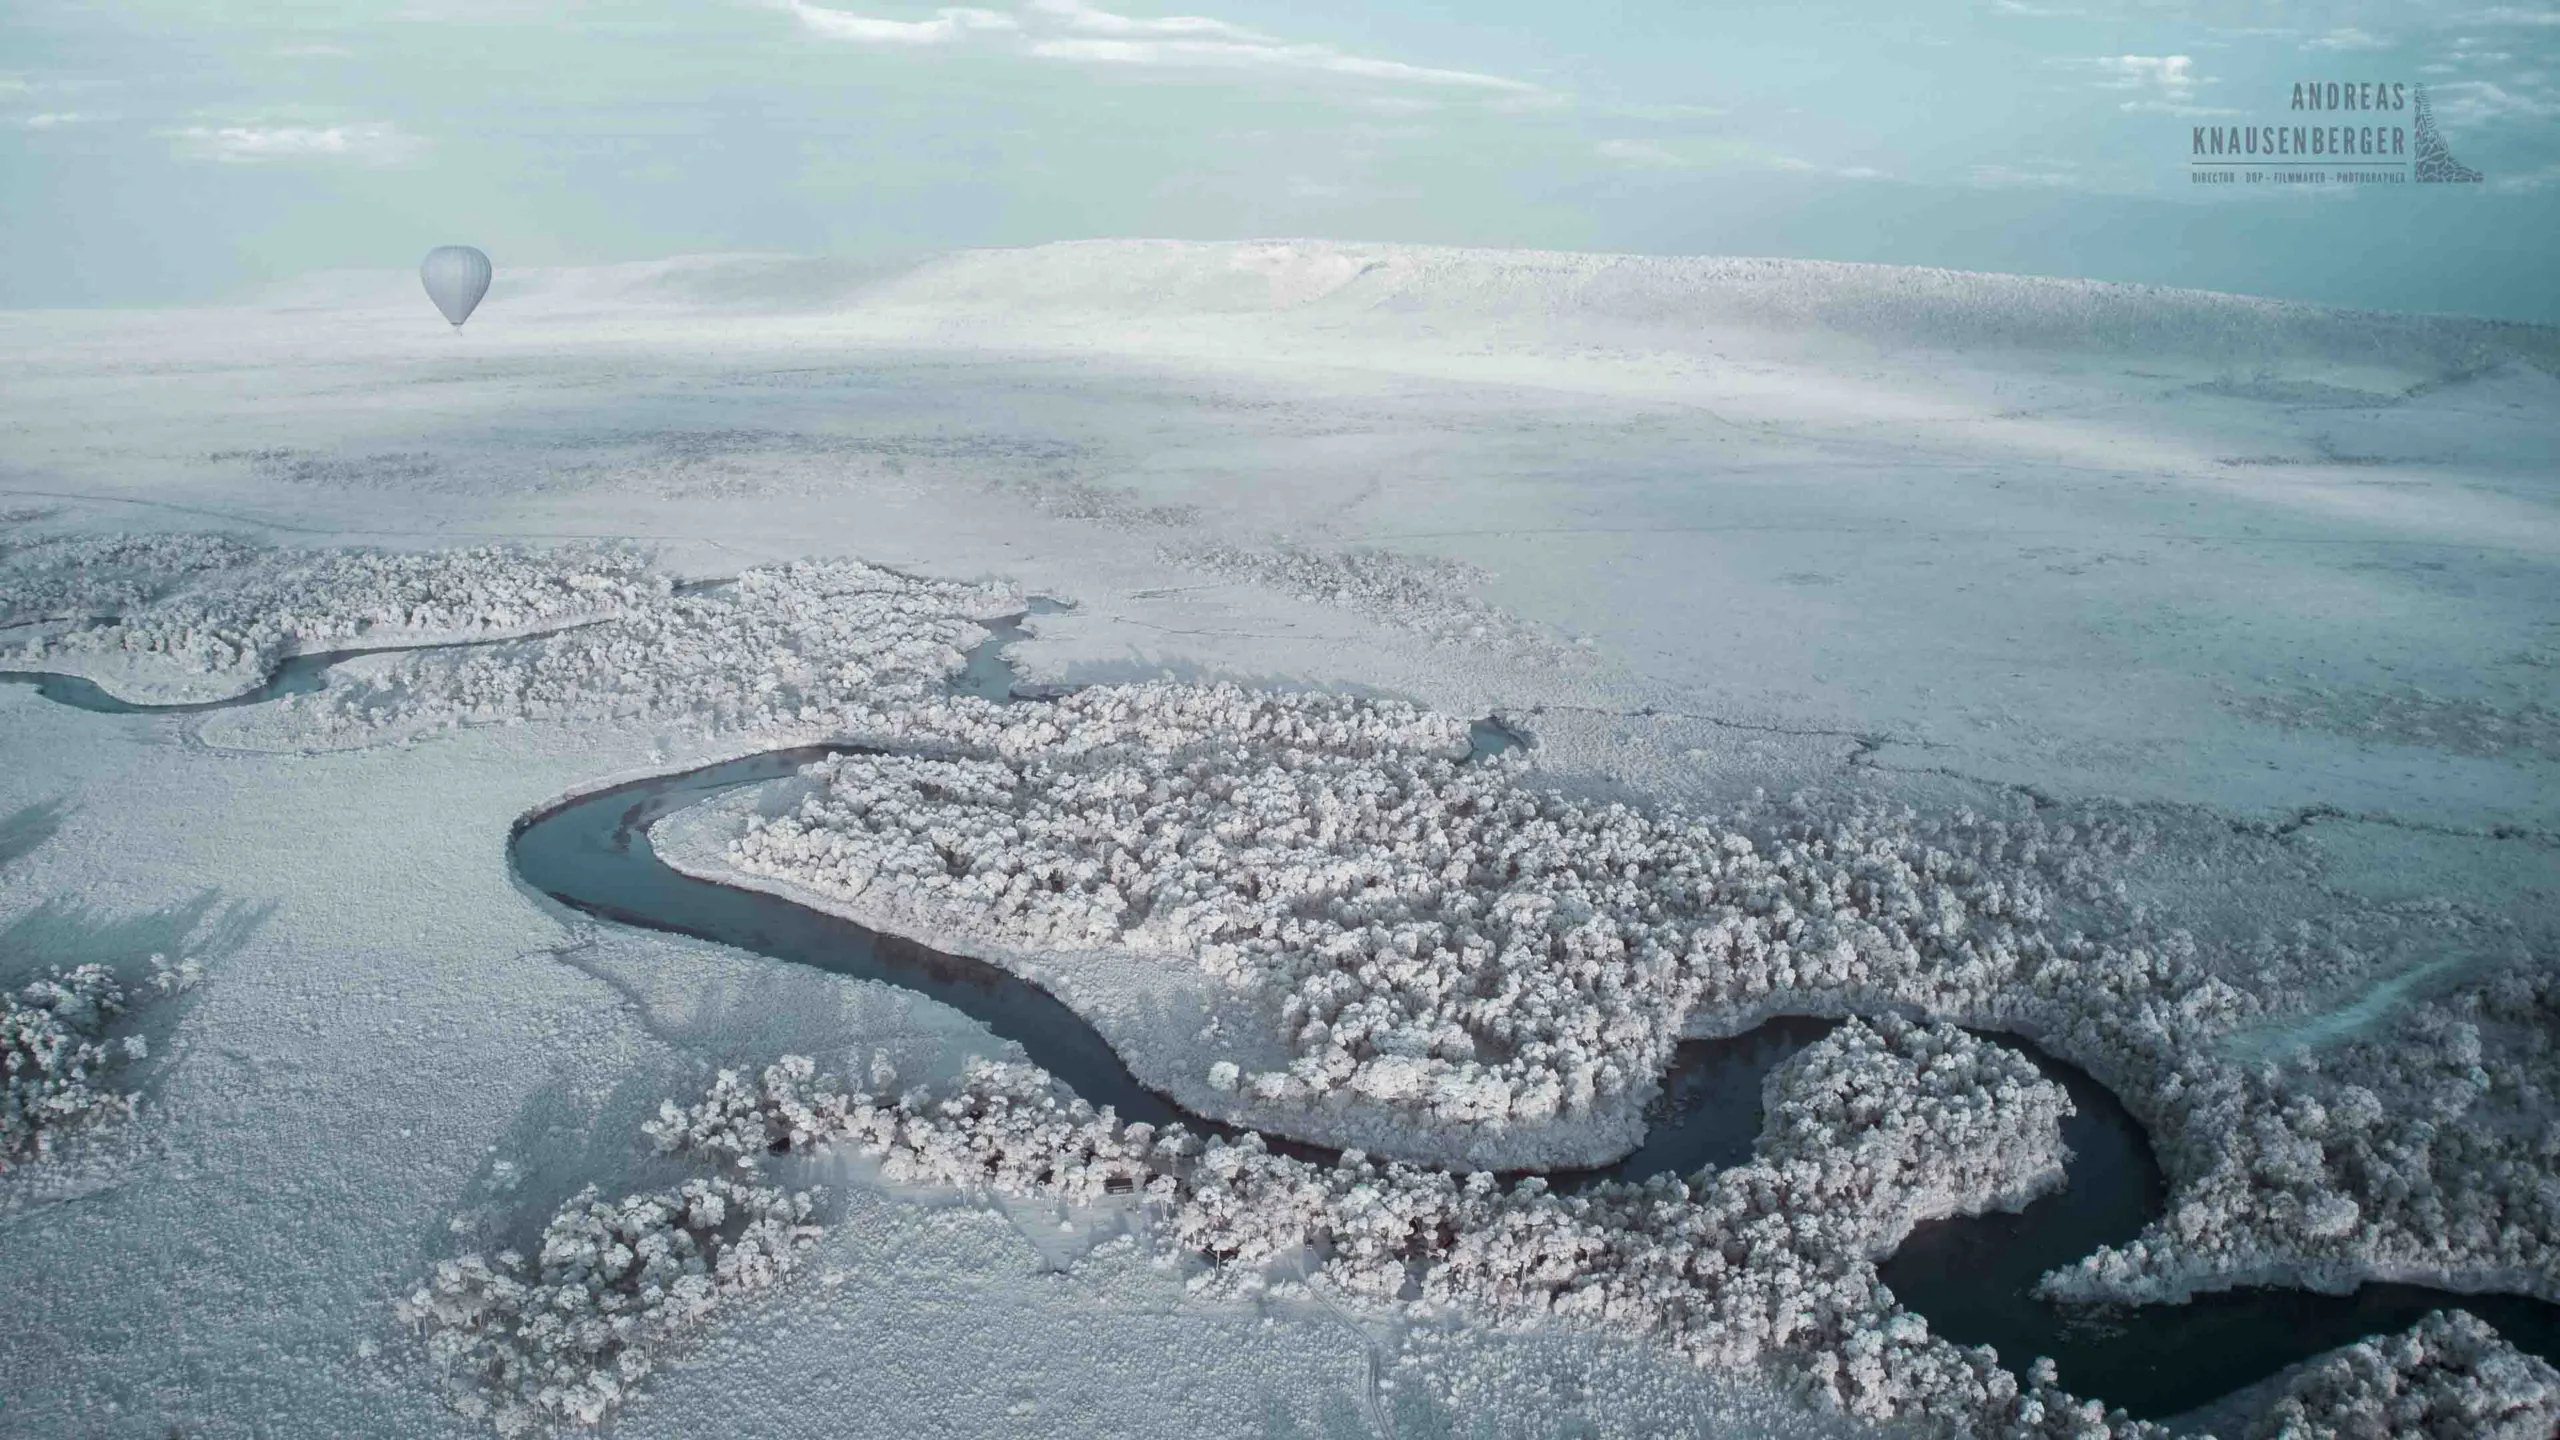
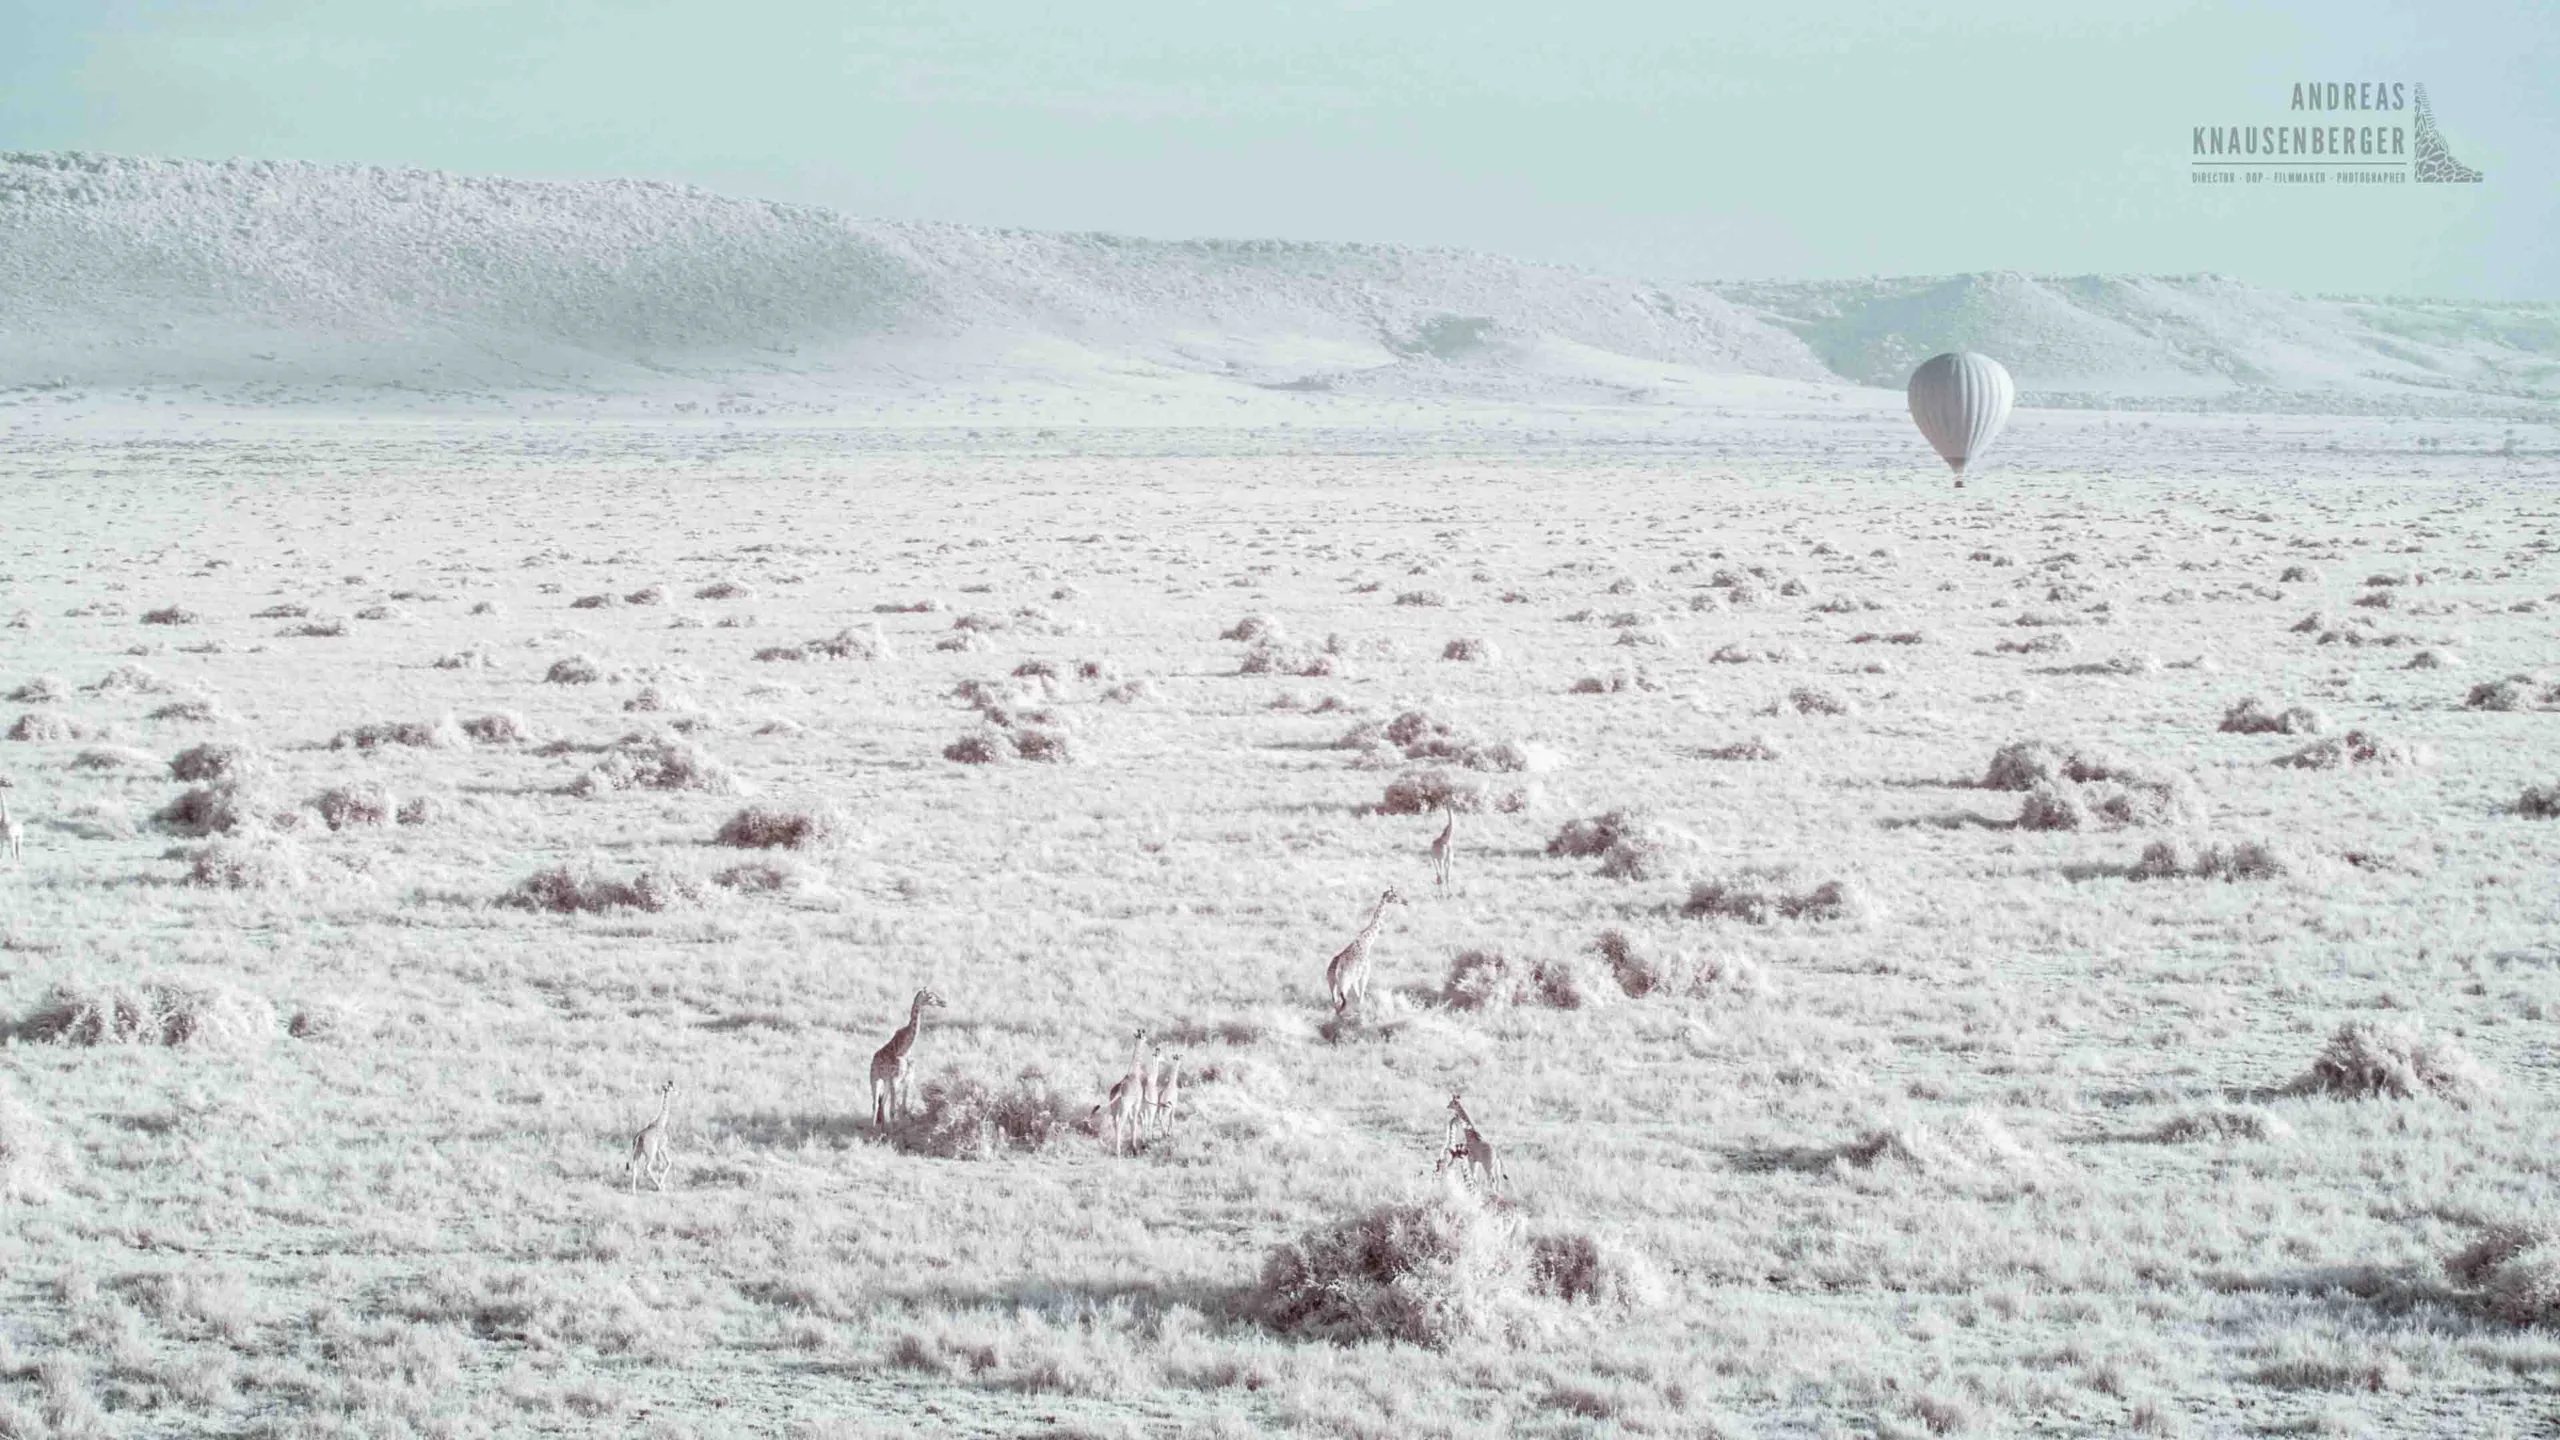
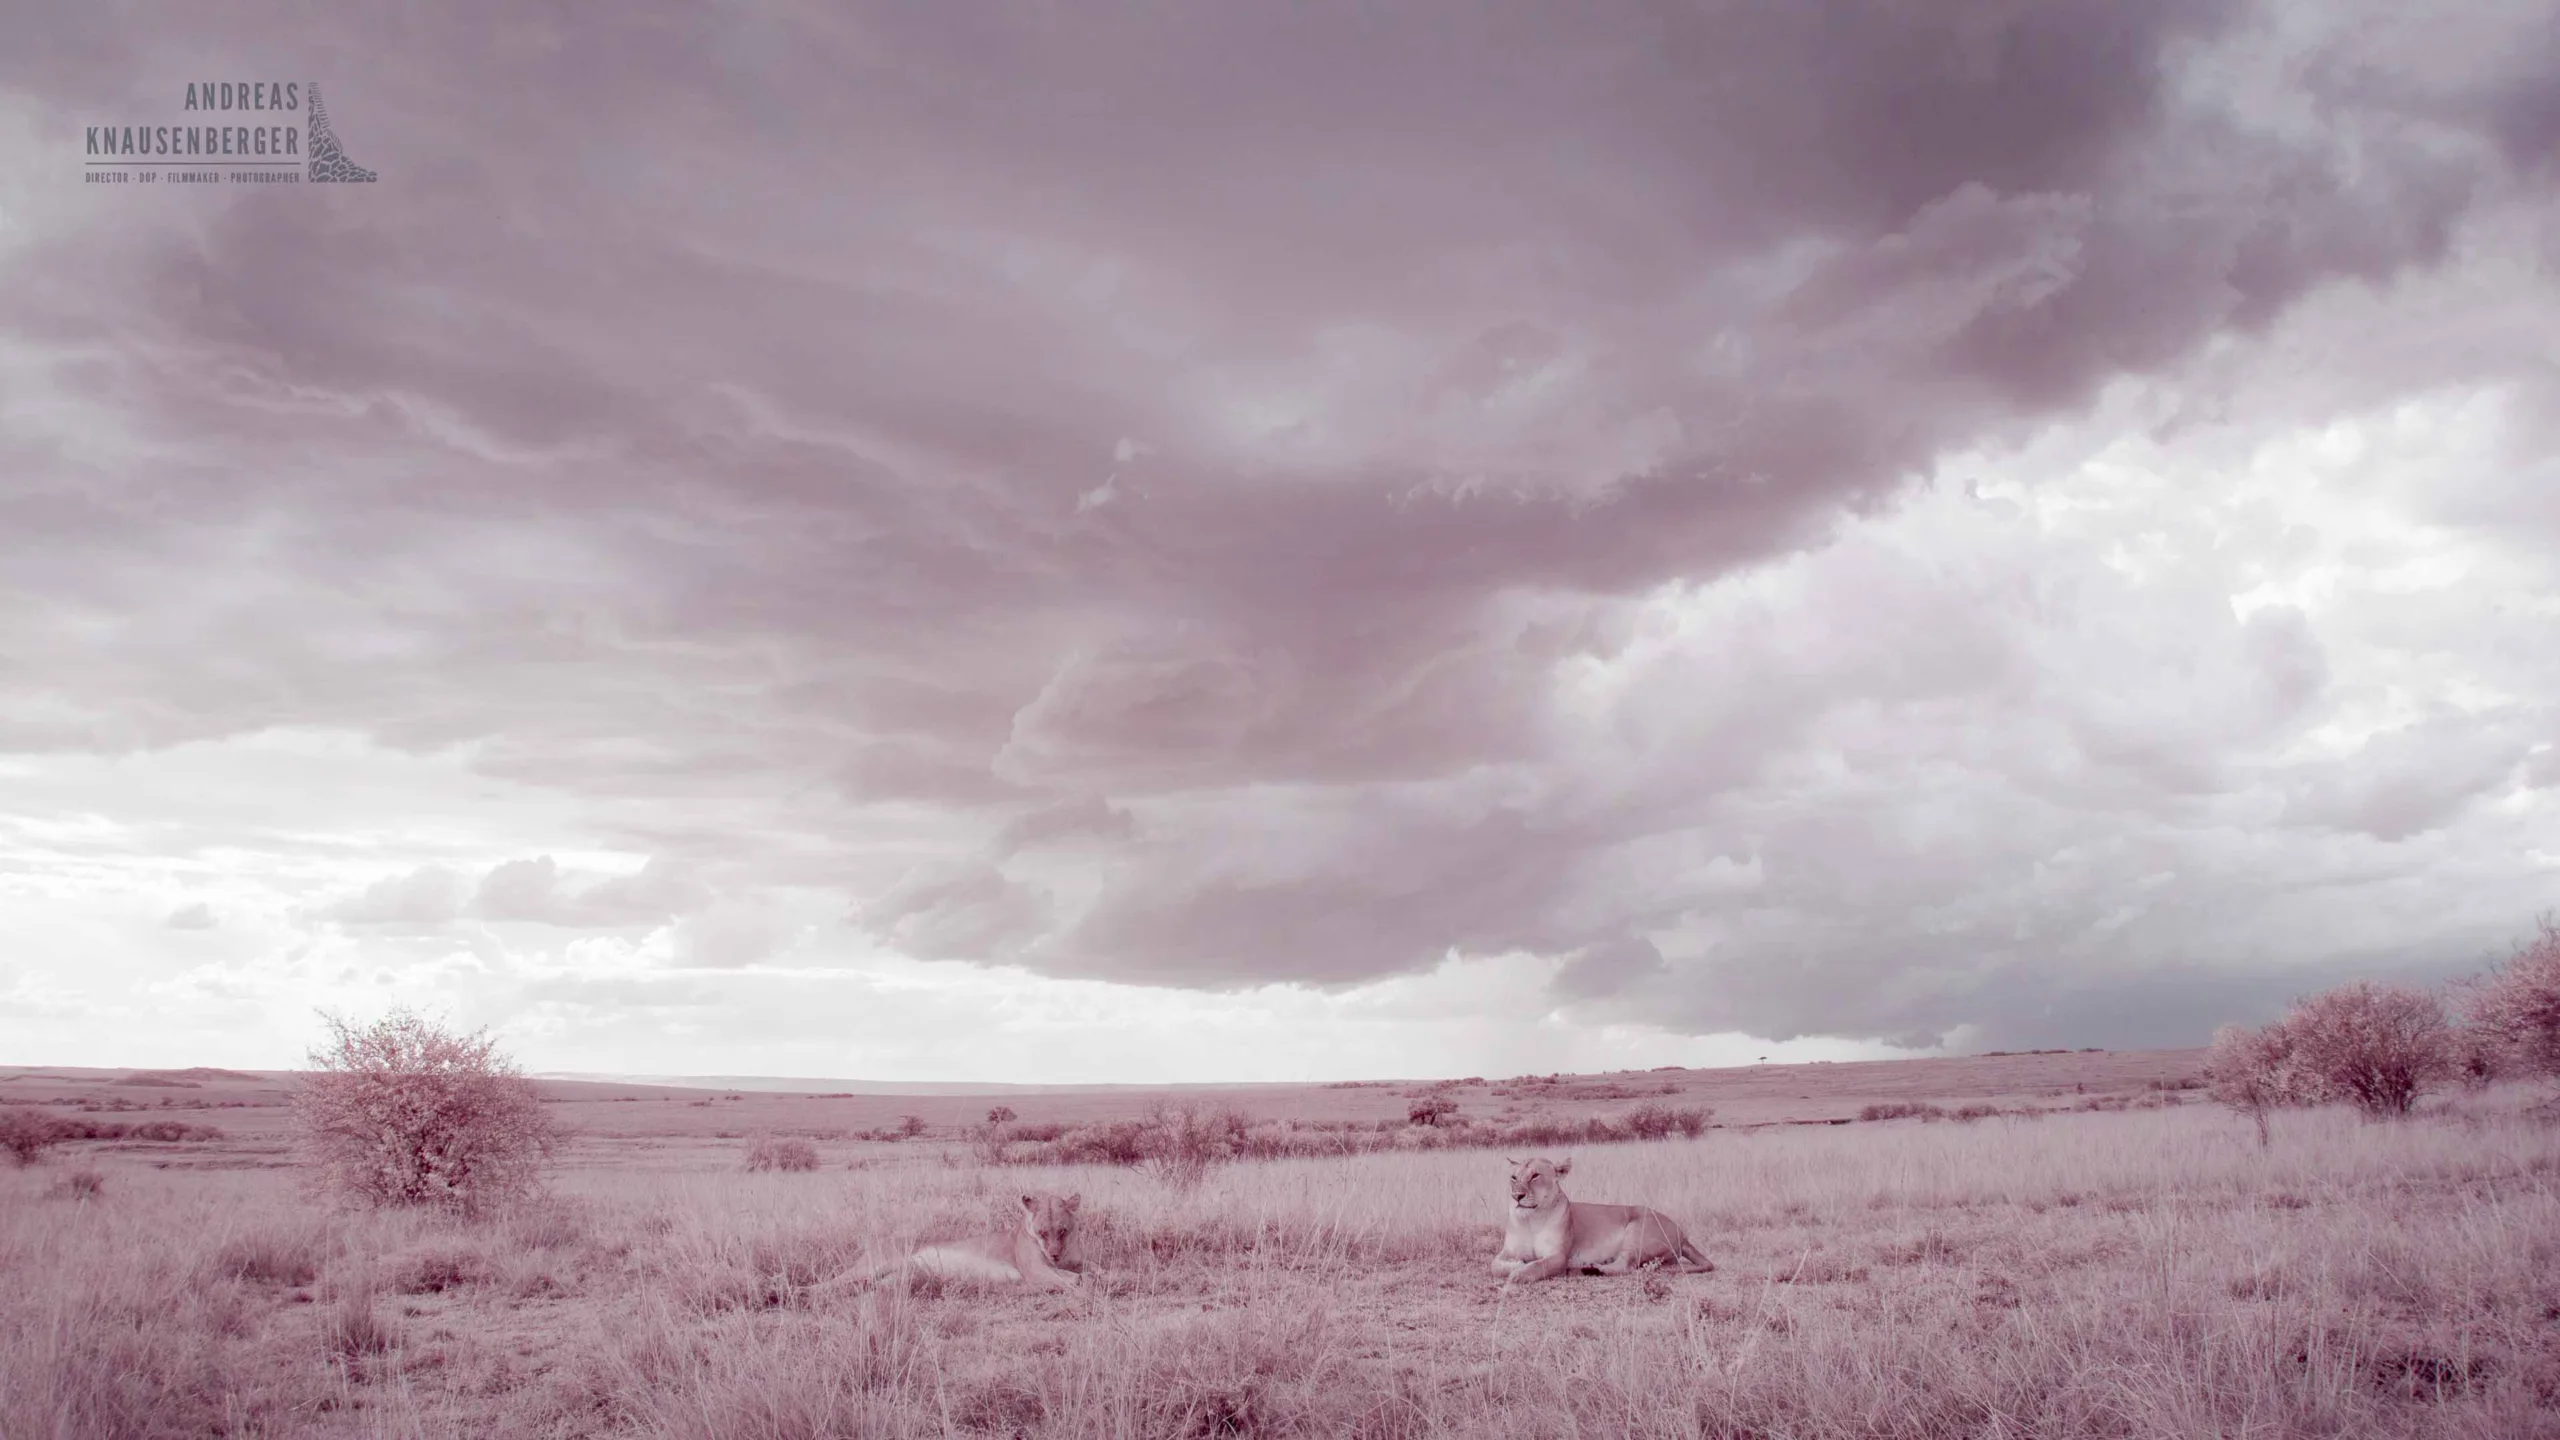
Dramatic afternoon skies are perfect too—the darkened skies and glowing clouds create amazing contrast. And if you ever get a chance to fly over the Mara in a hot-air balloon photographic safari, take your IR camera! The escarpment appears crystal clear, the river looks like a black snake through a white forest, and the hippos appear like shadows in deep blue water—unforgettable.
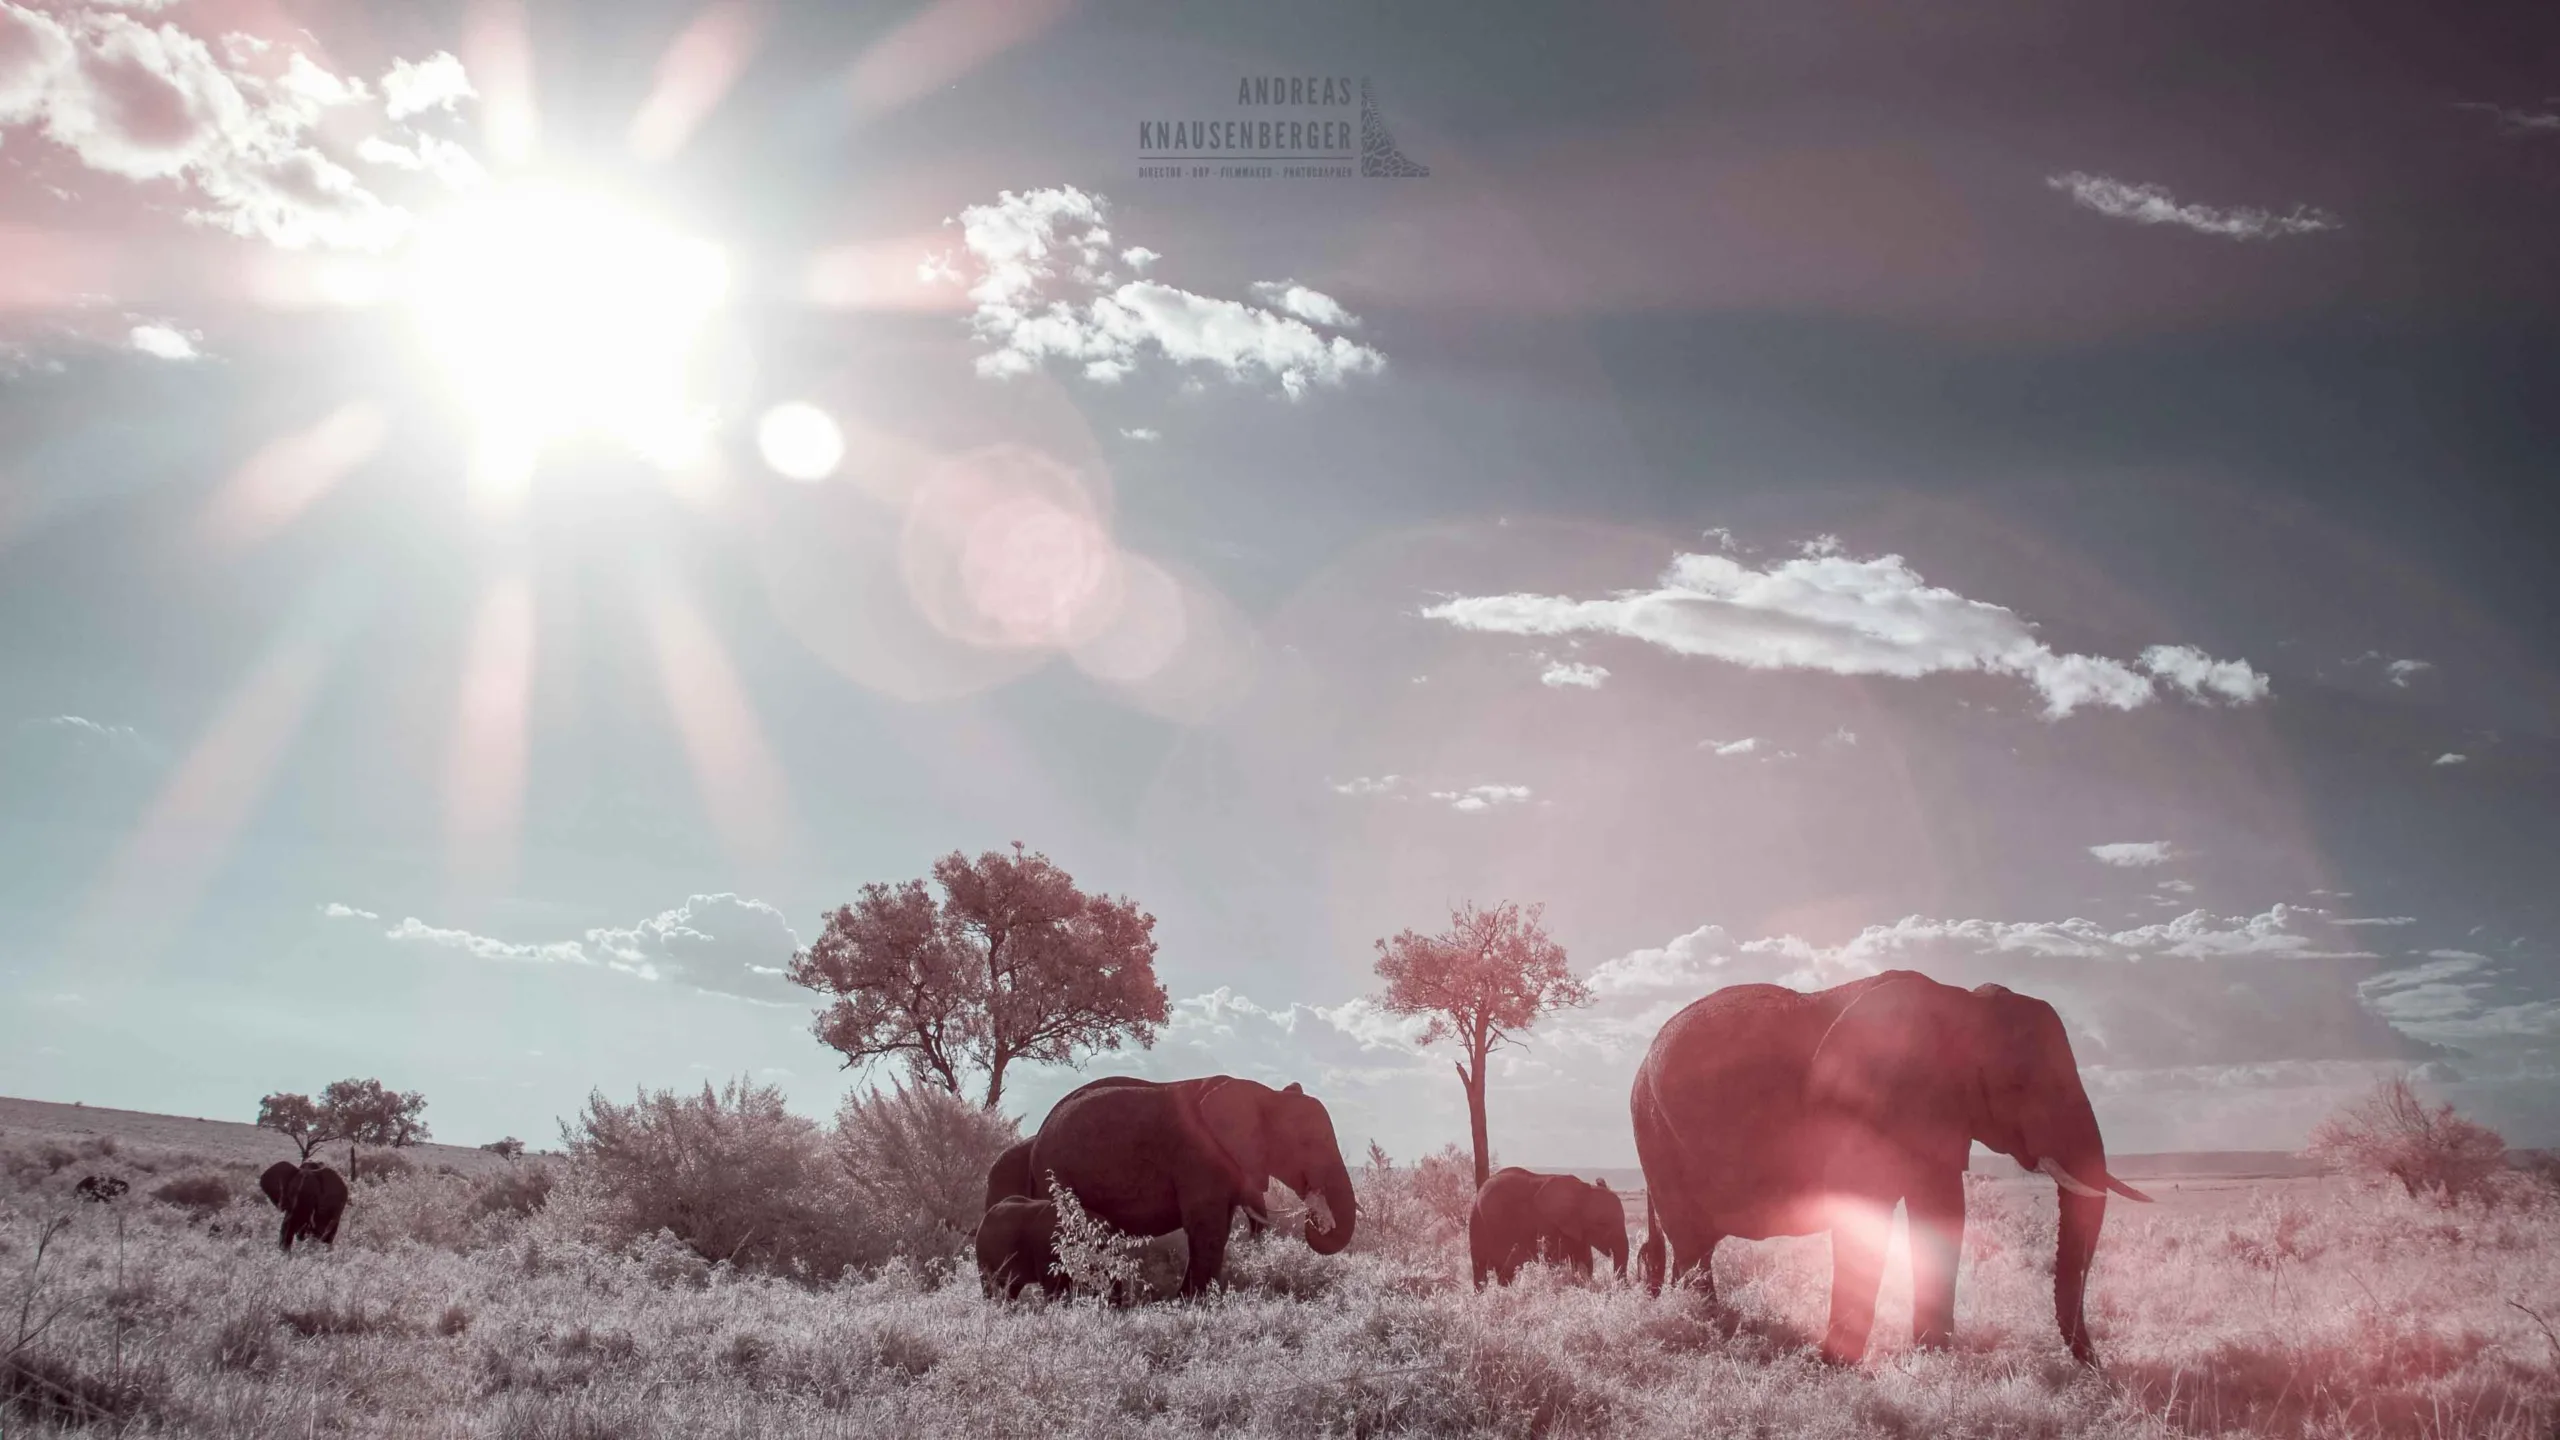
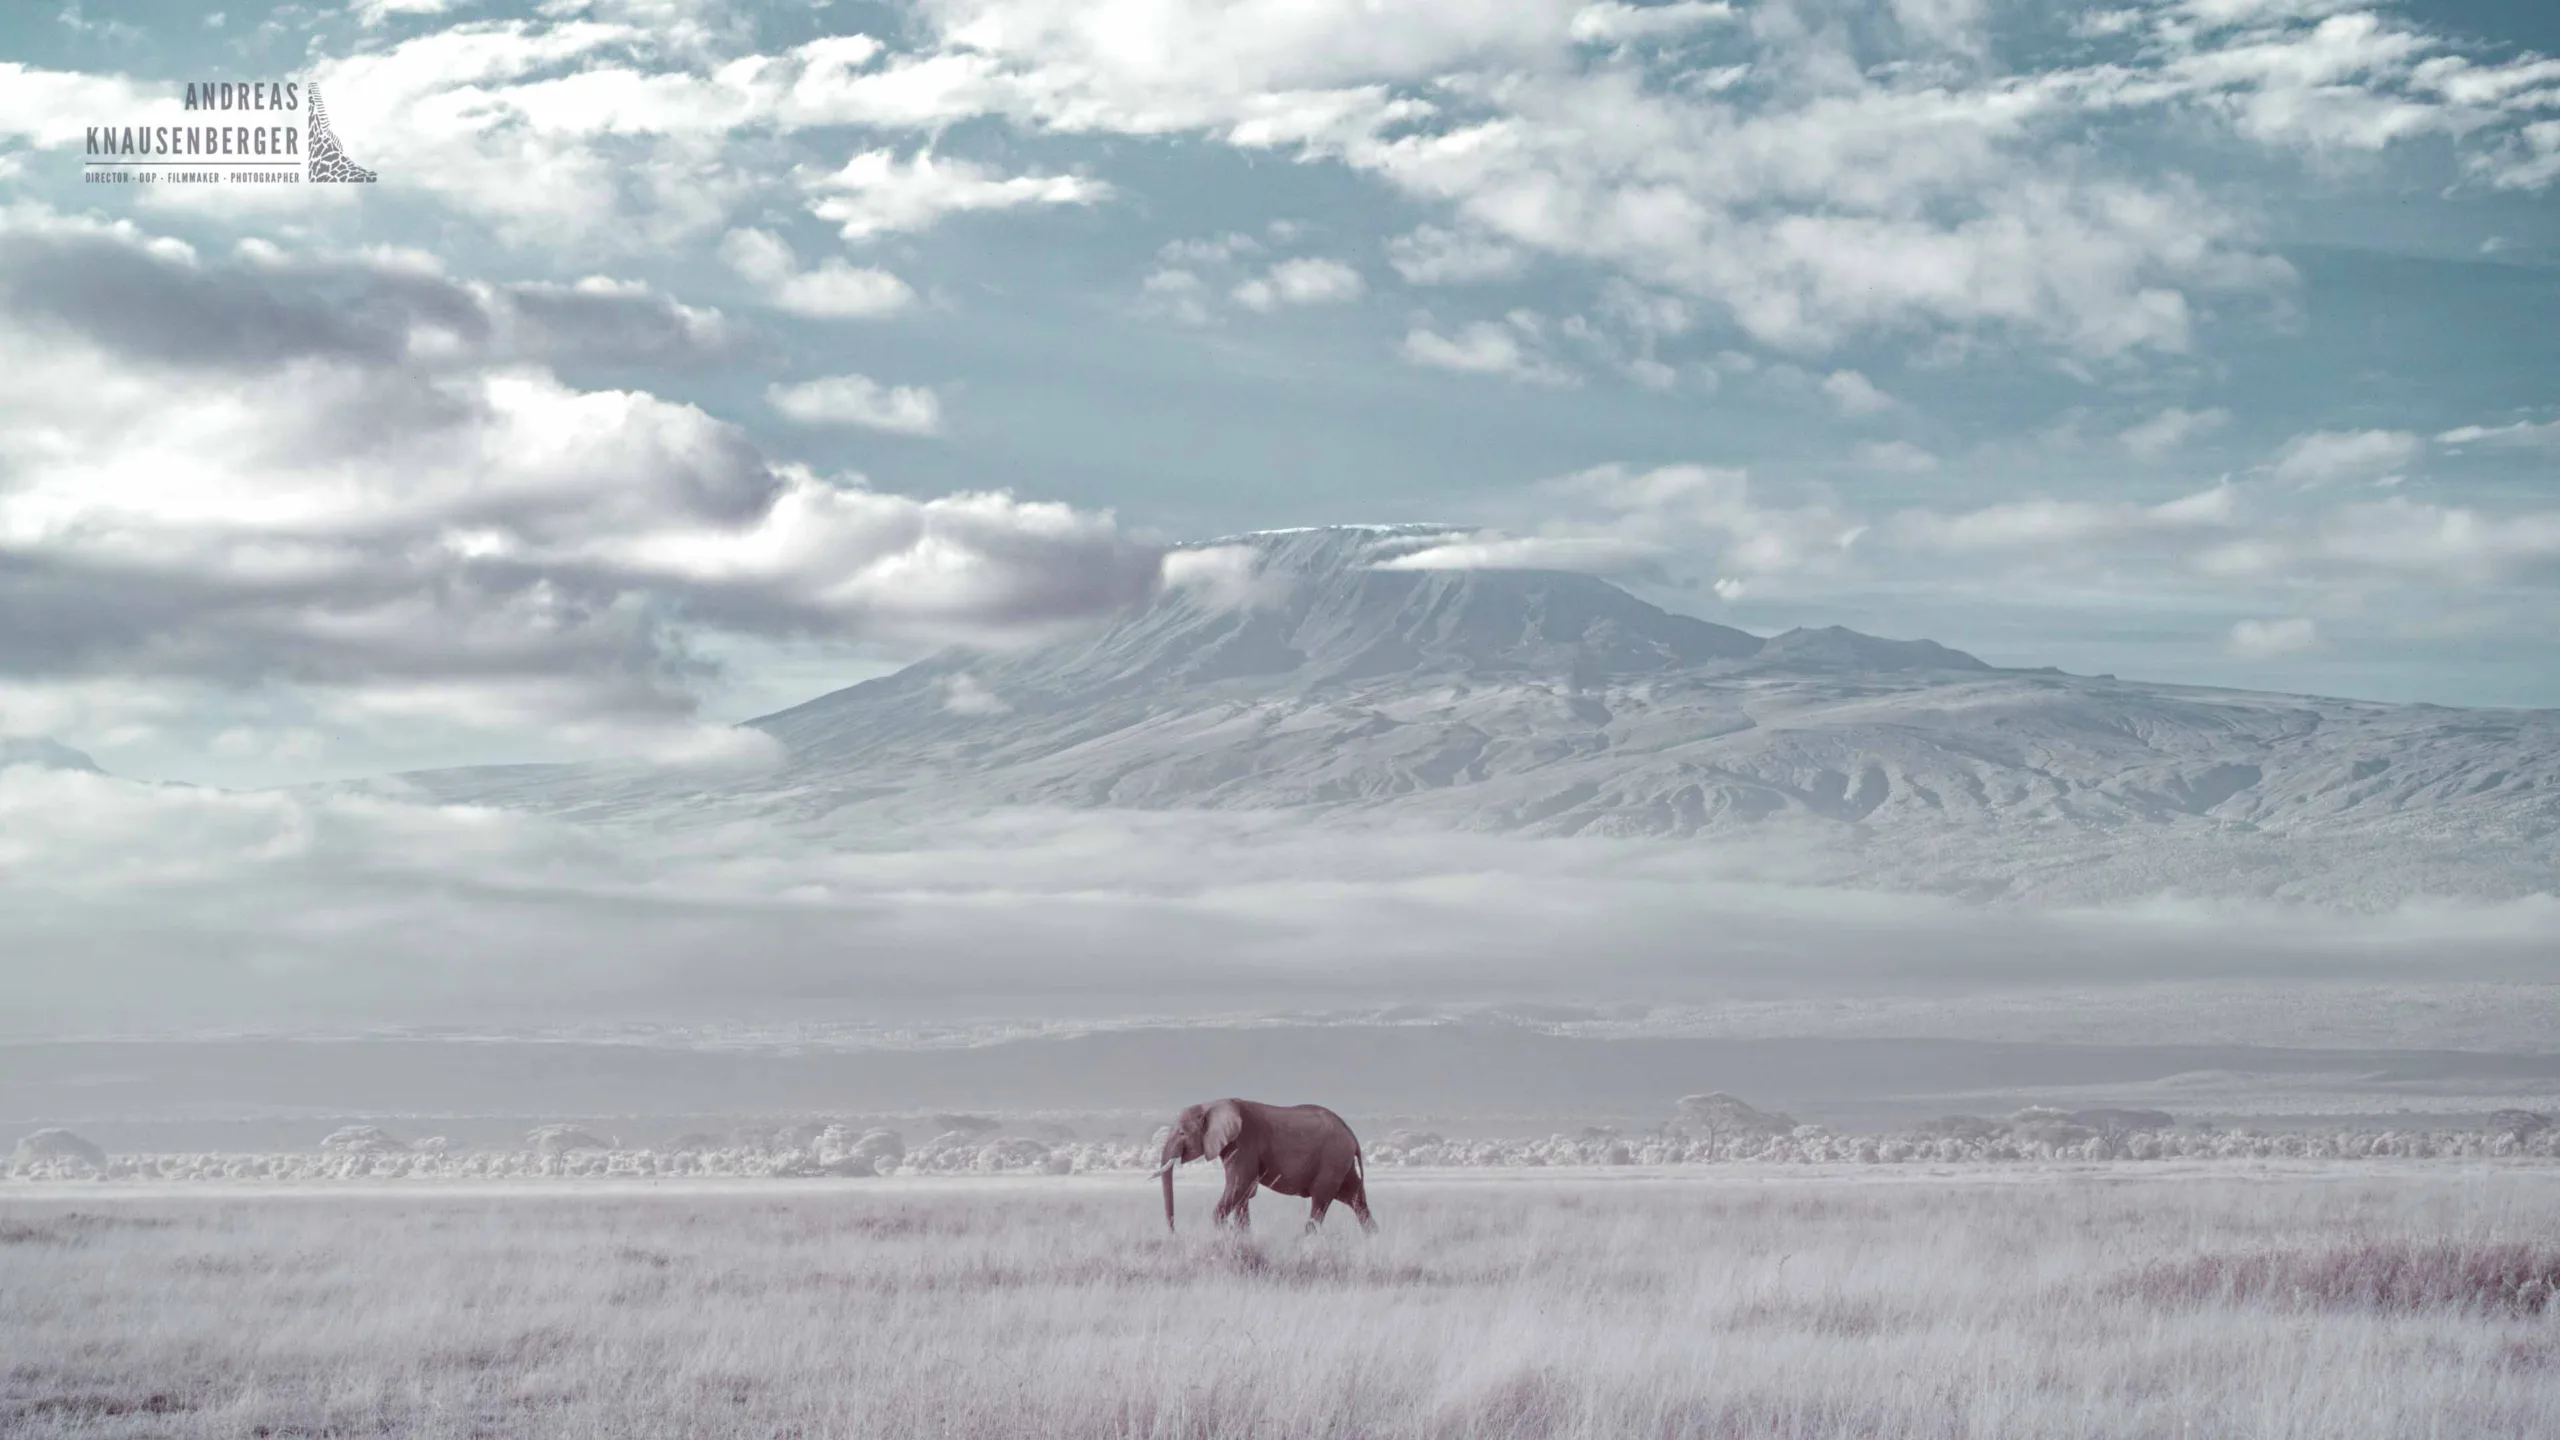
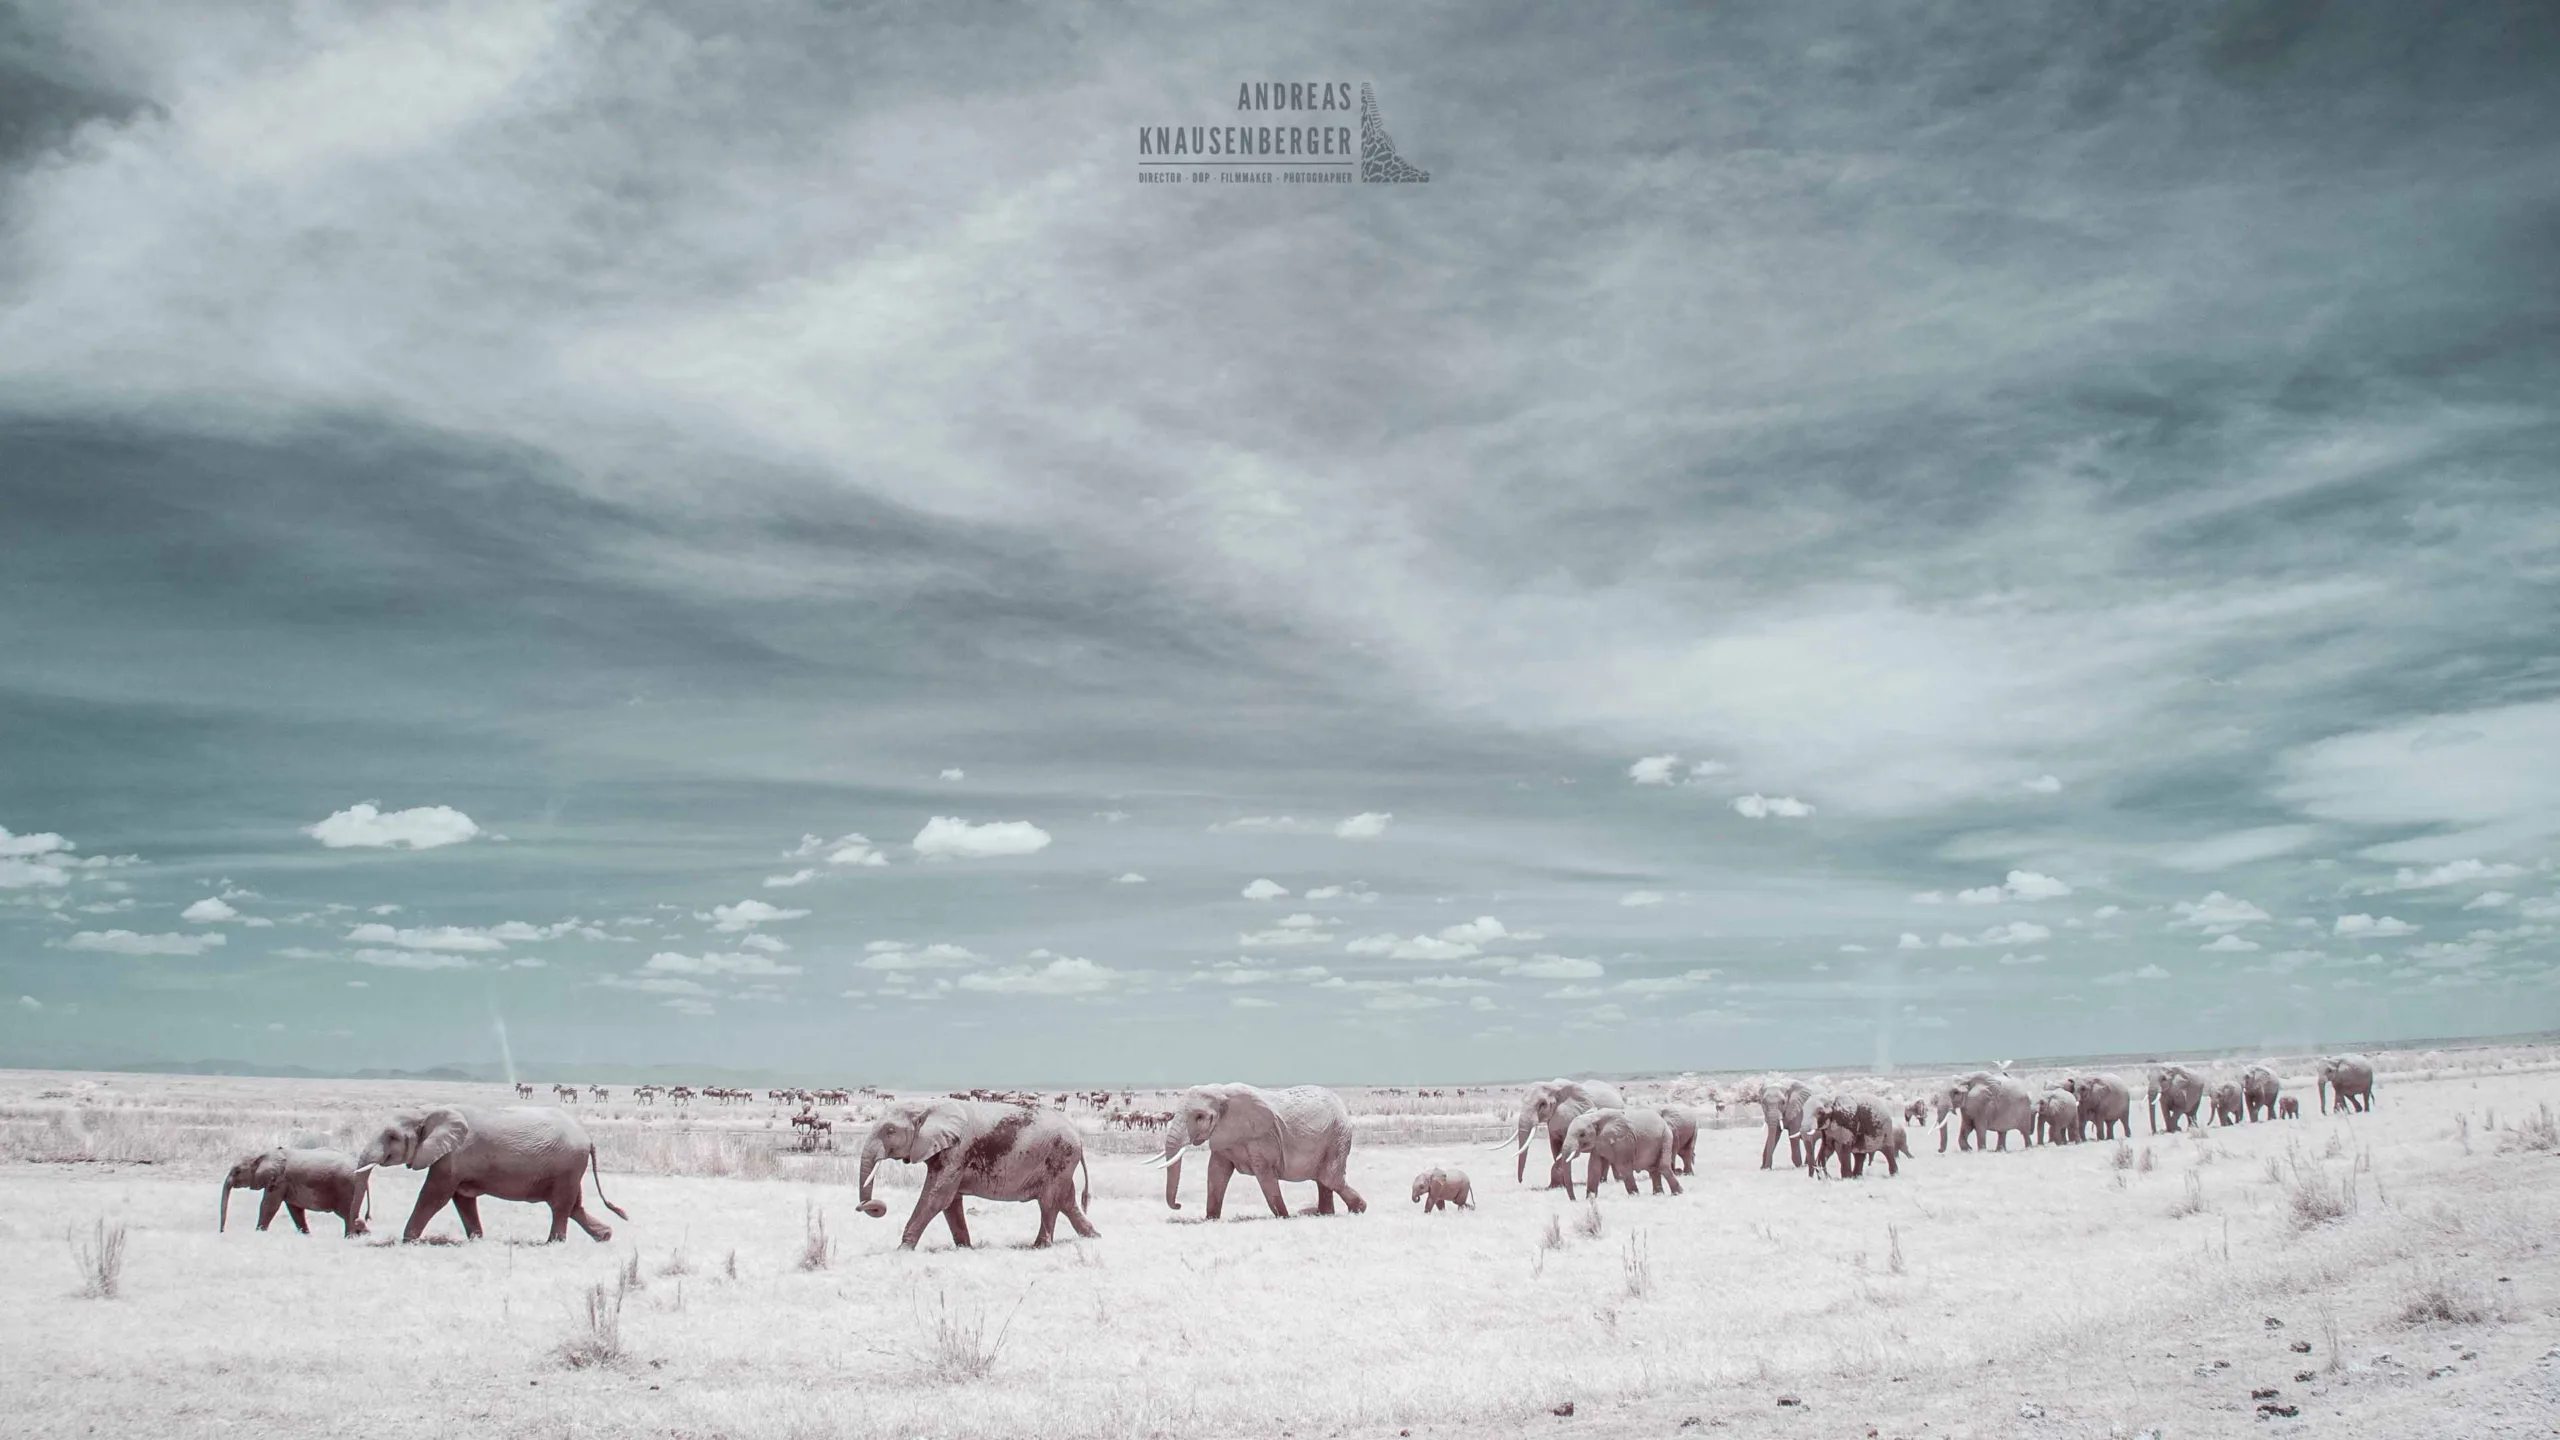
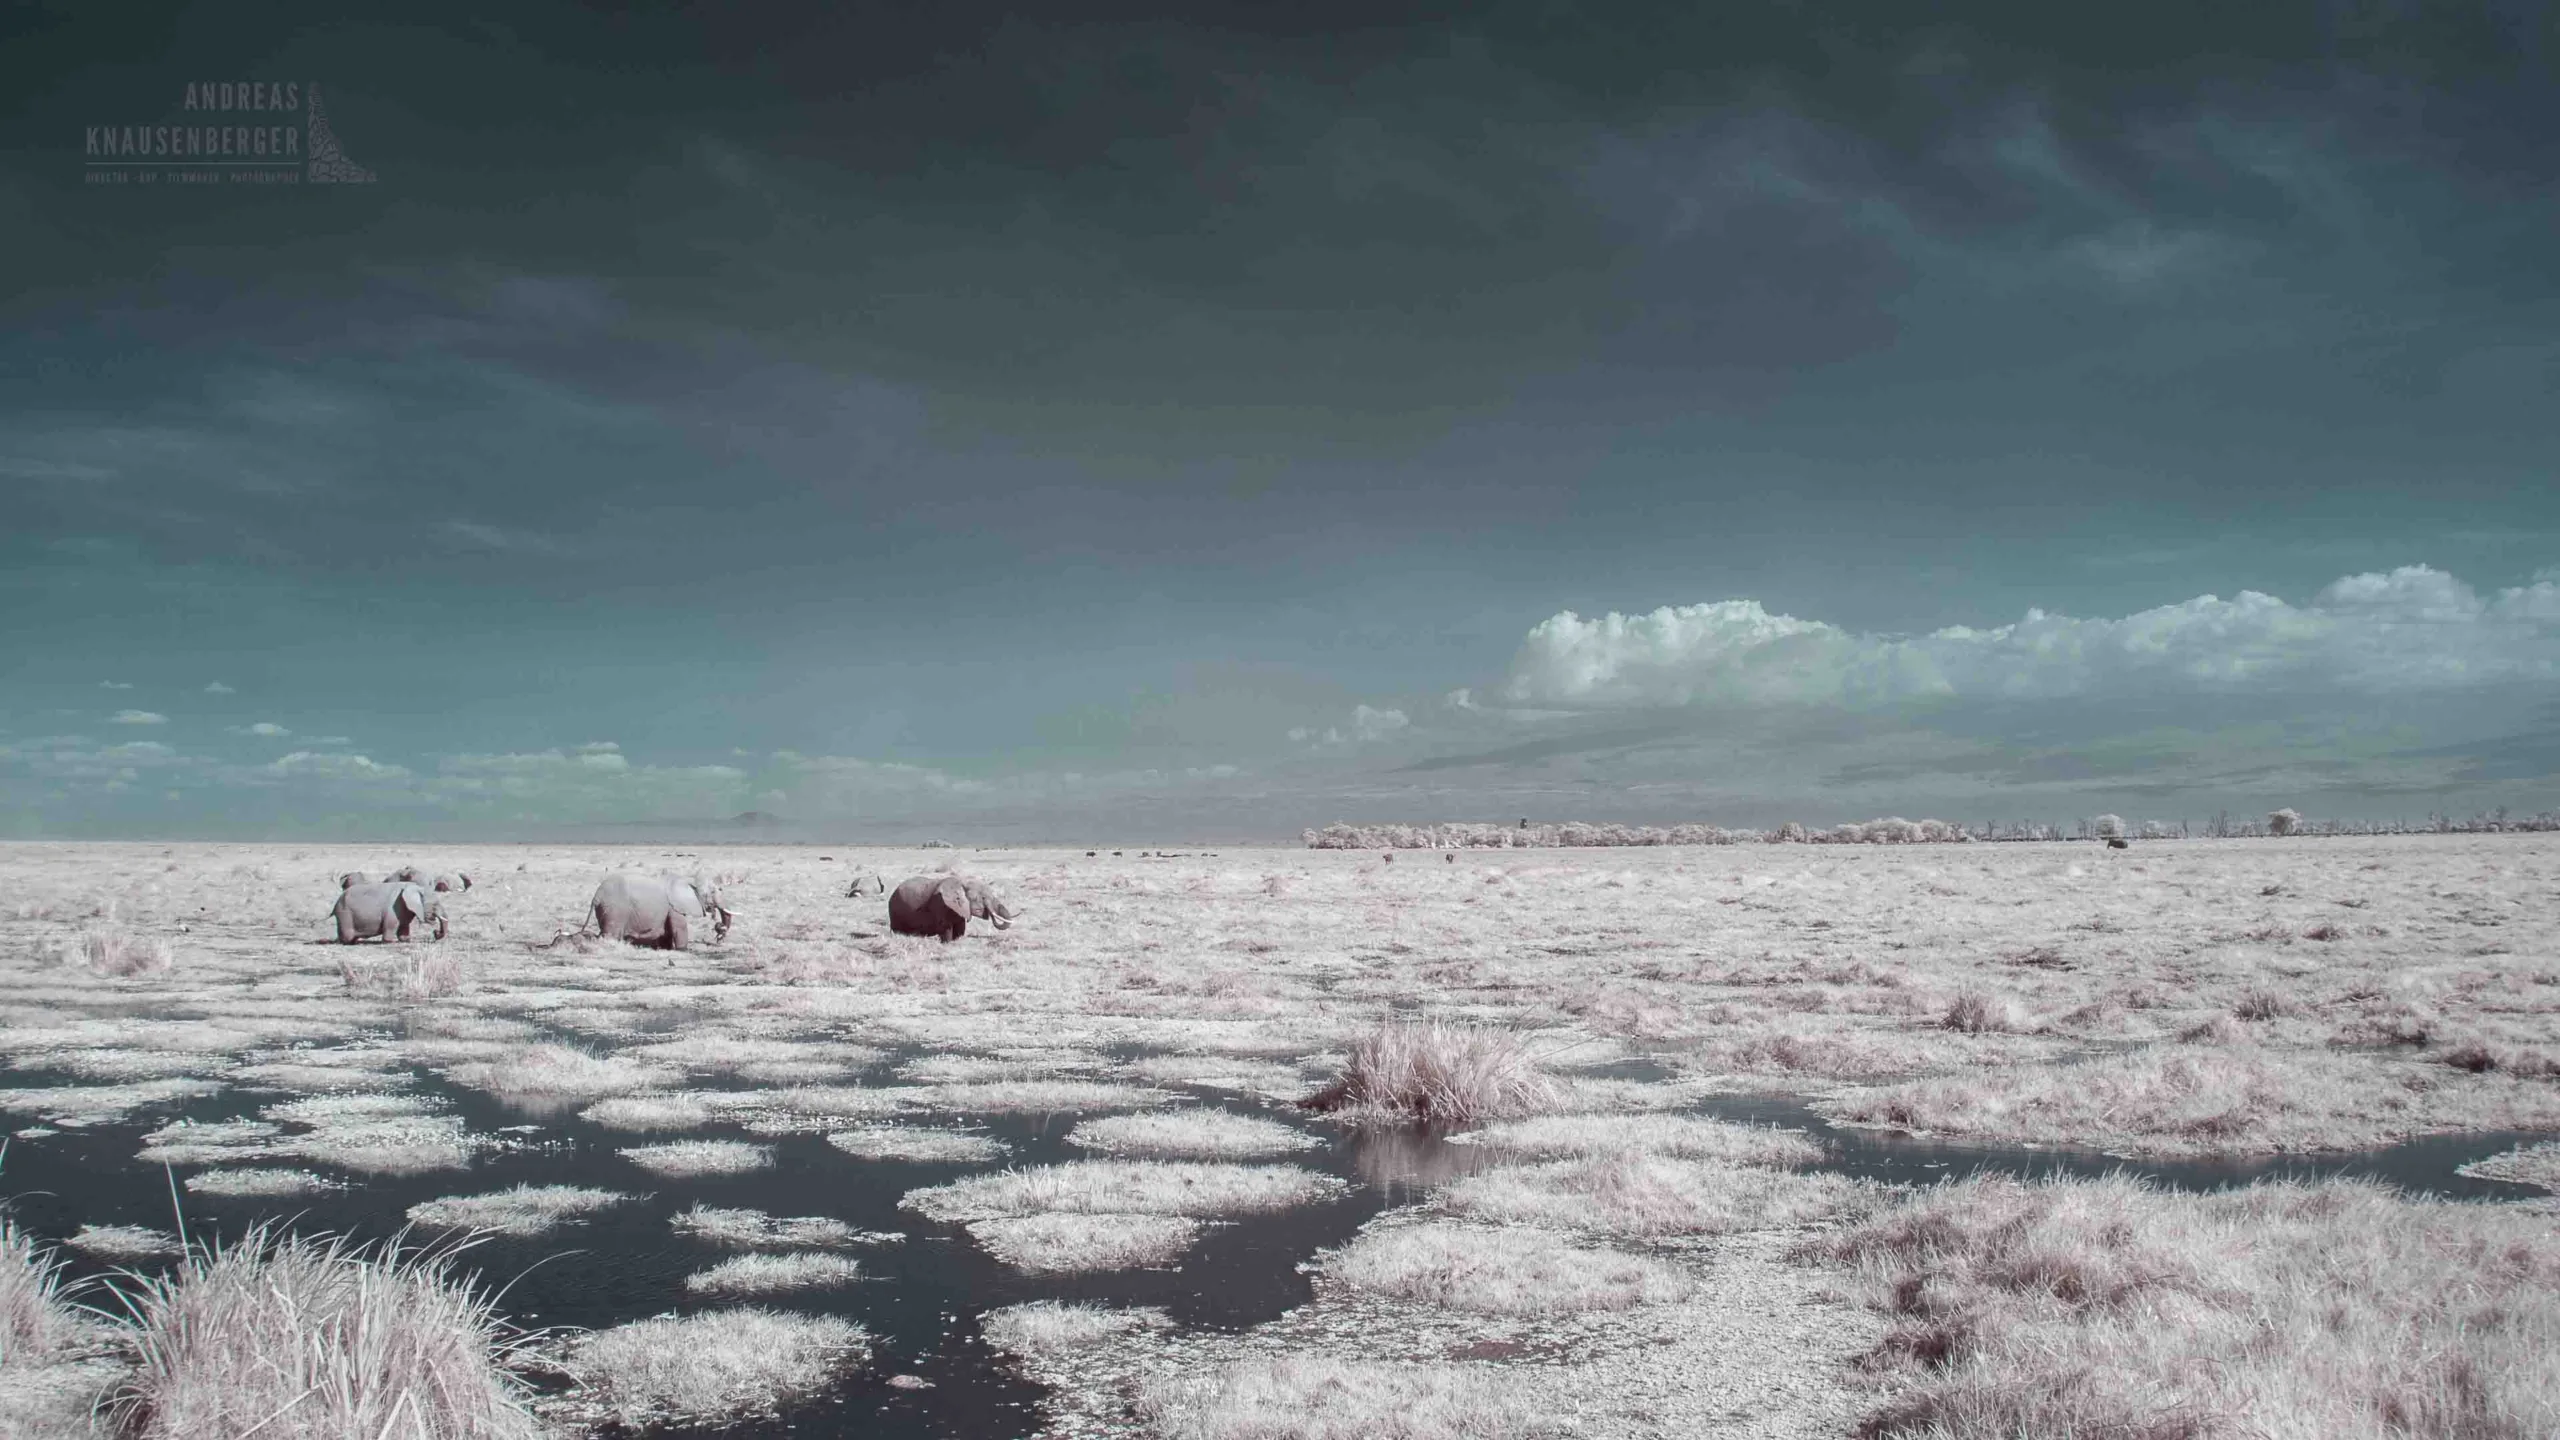
Infrared Wildlife Photography in Amboseli
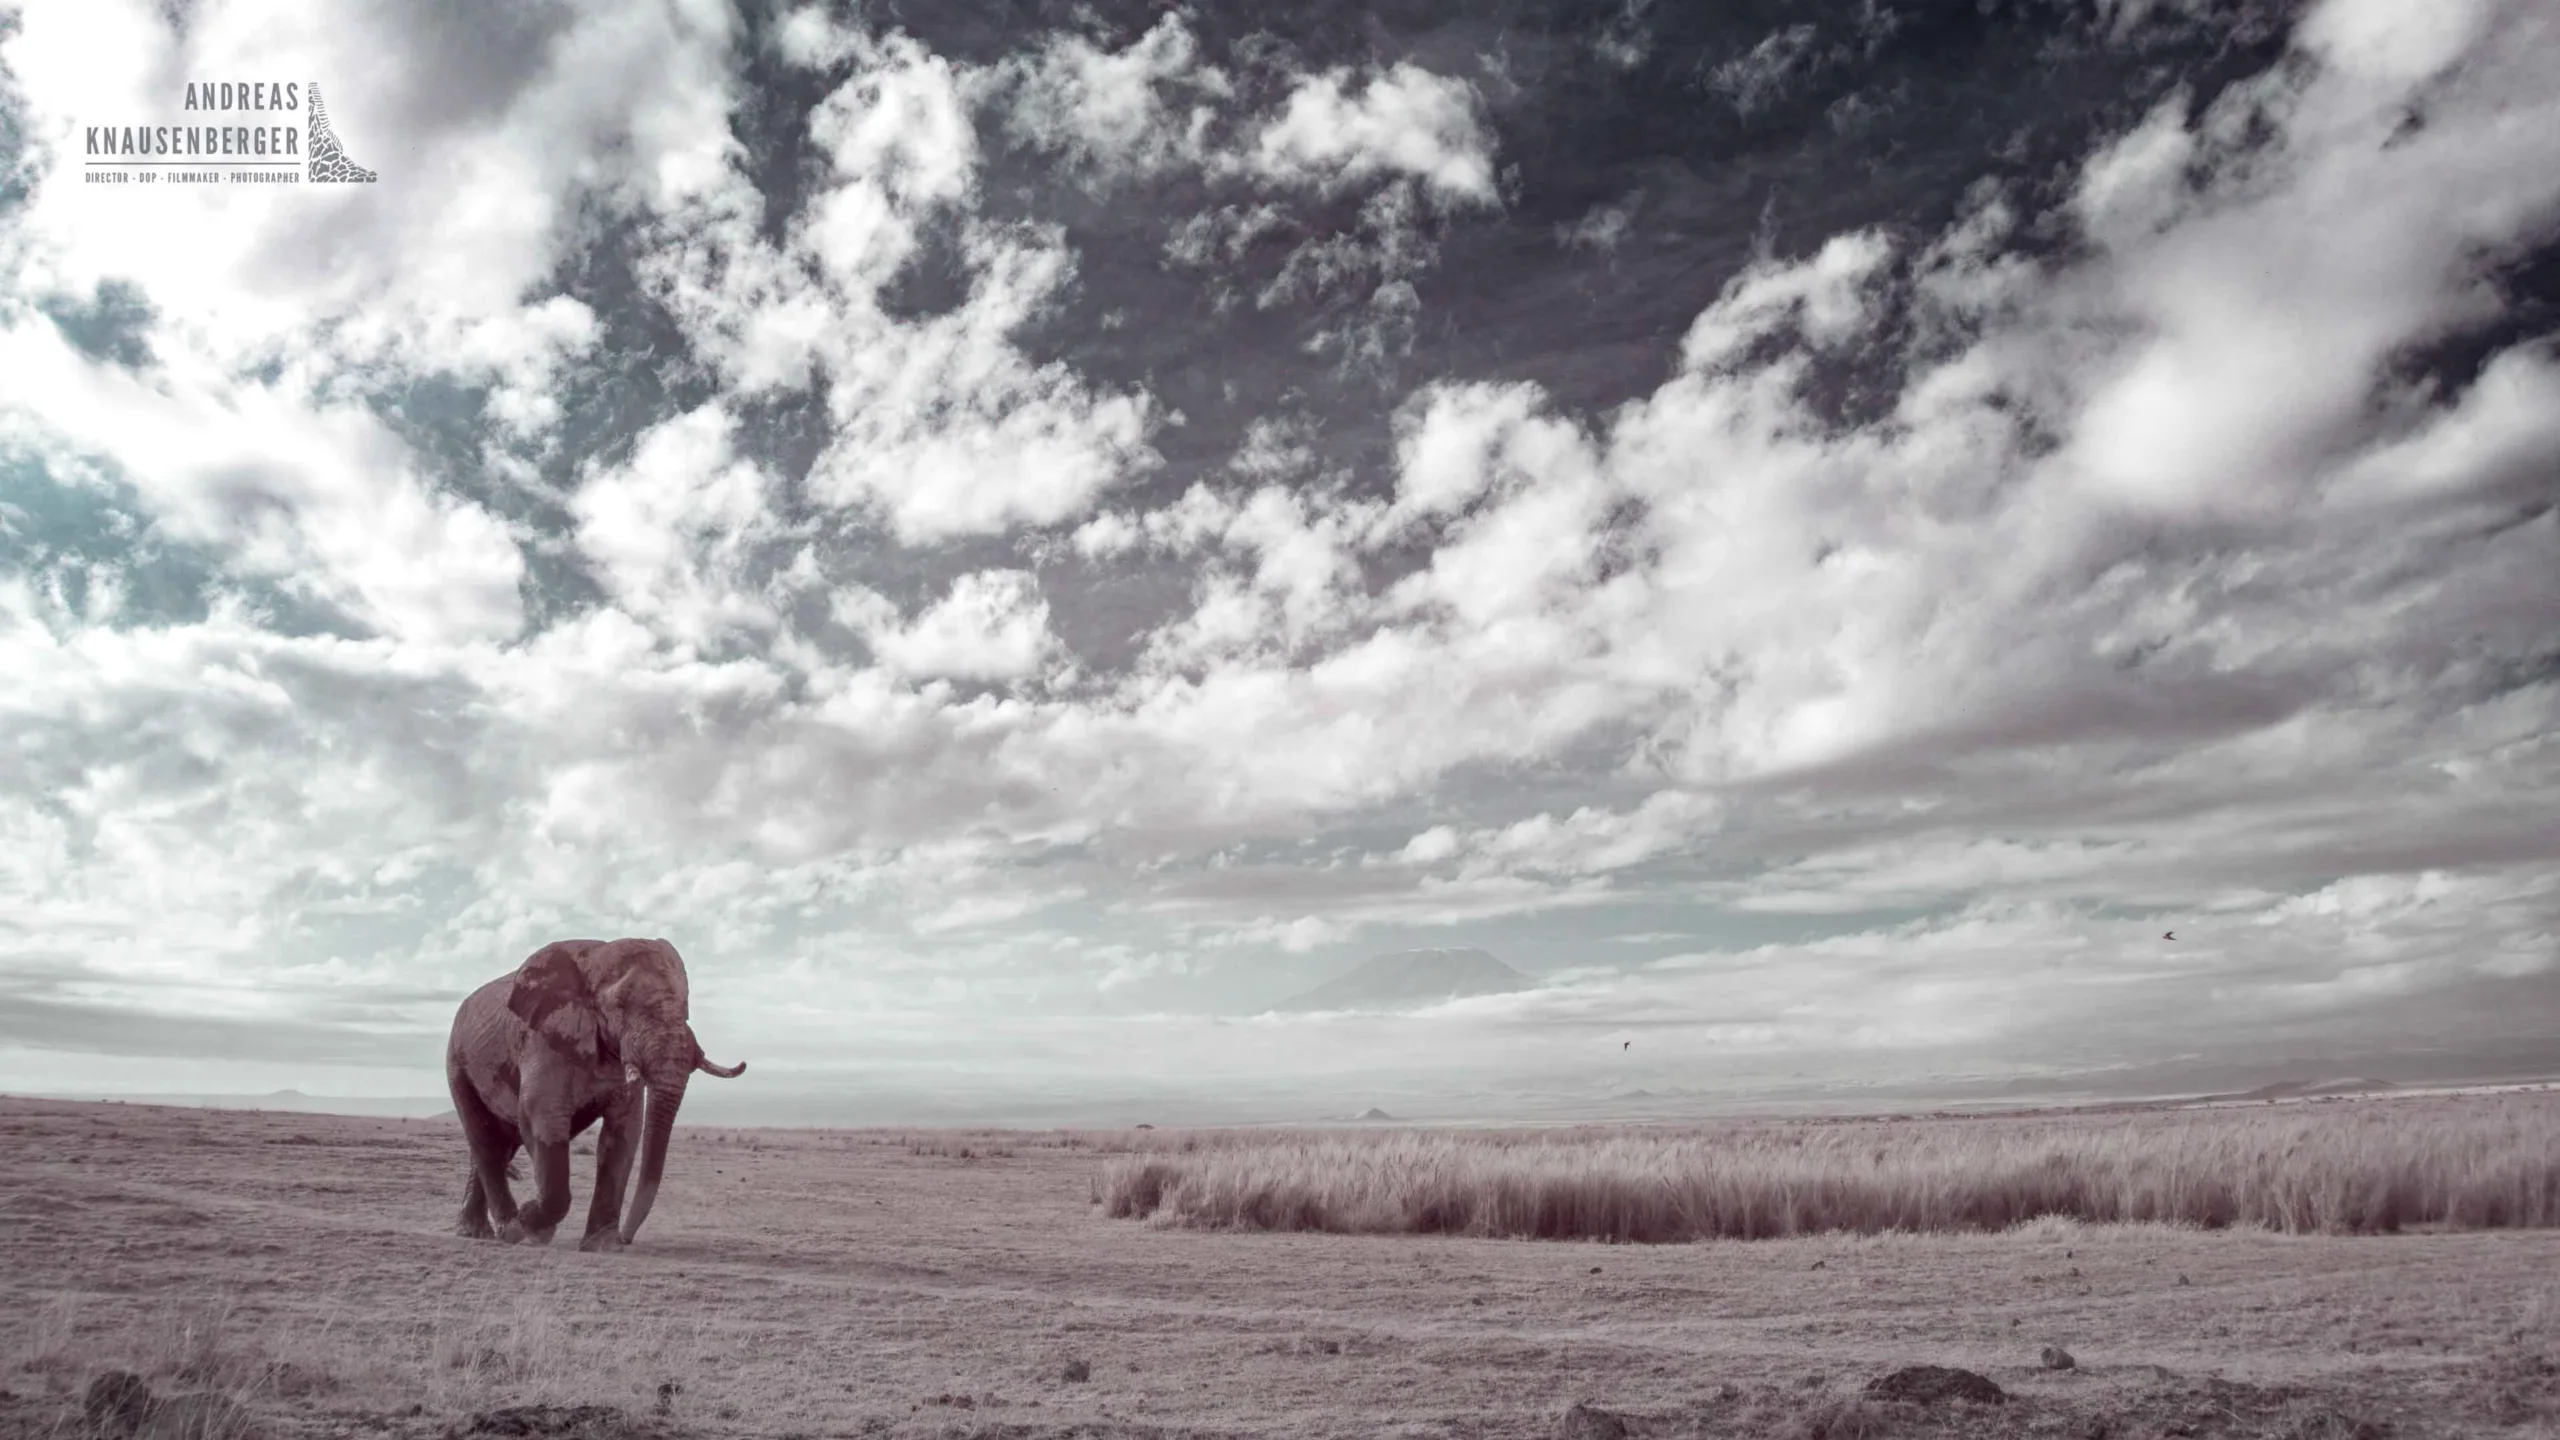
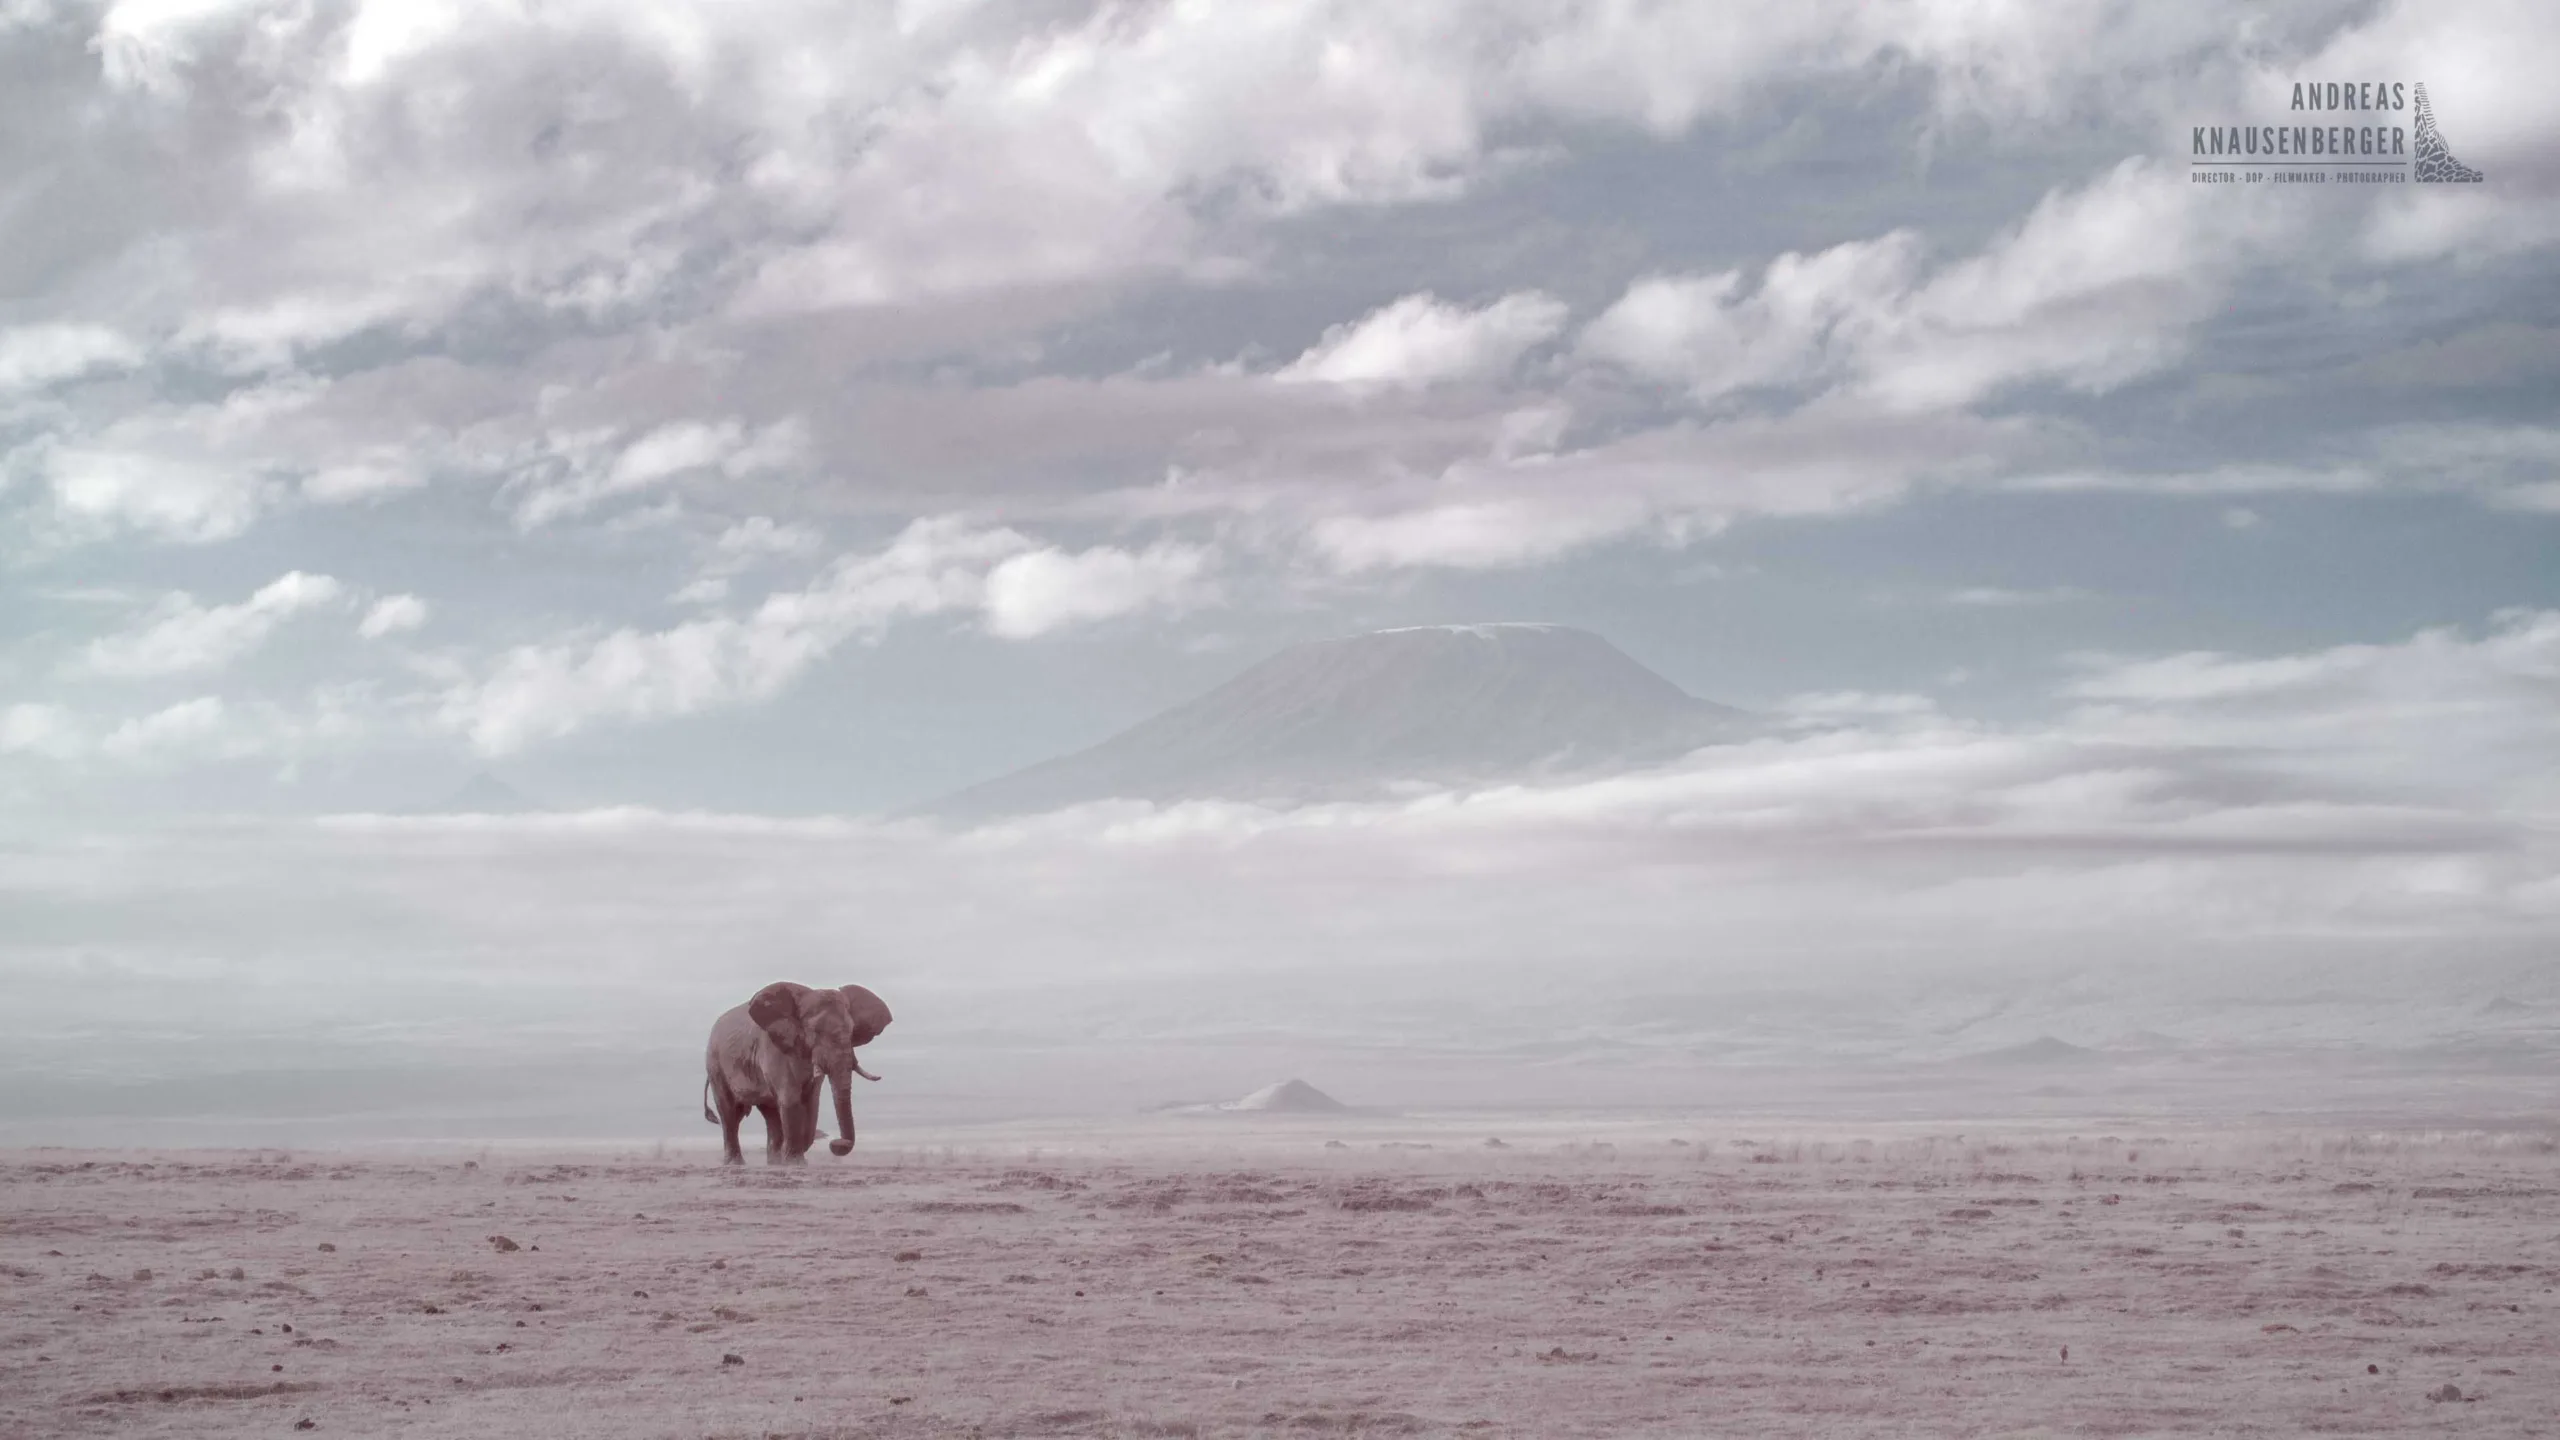
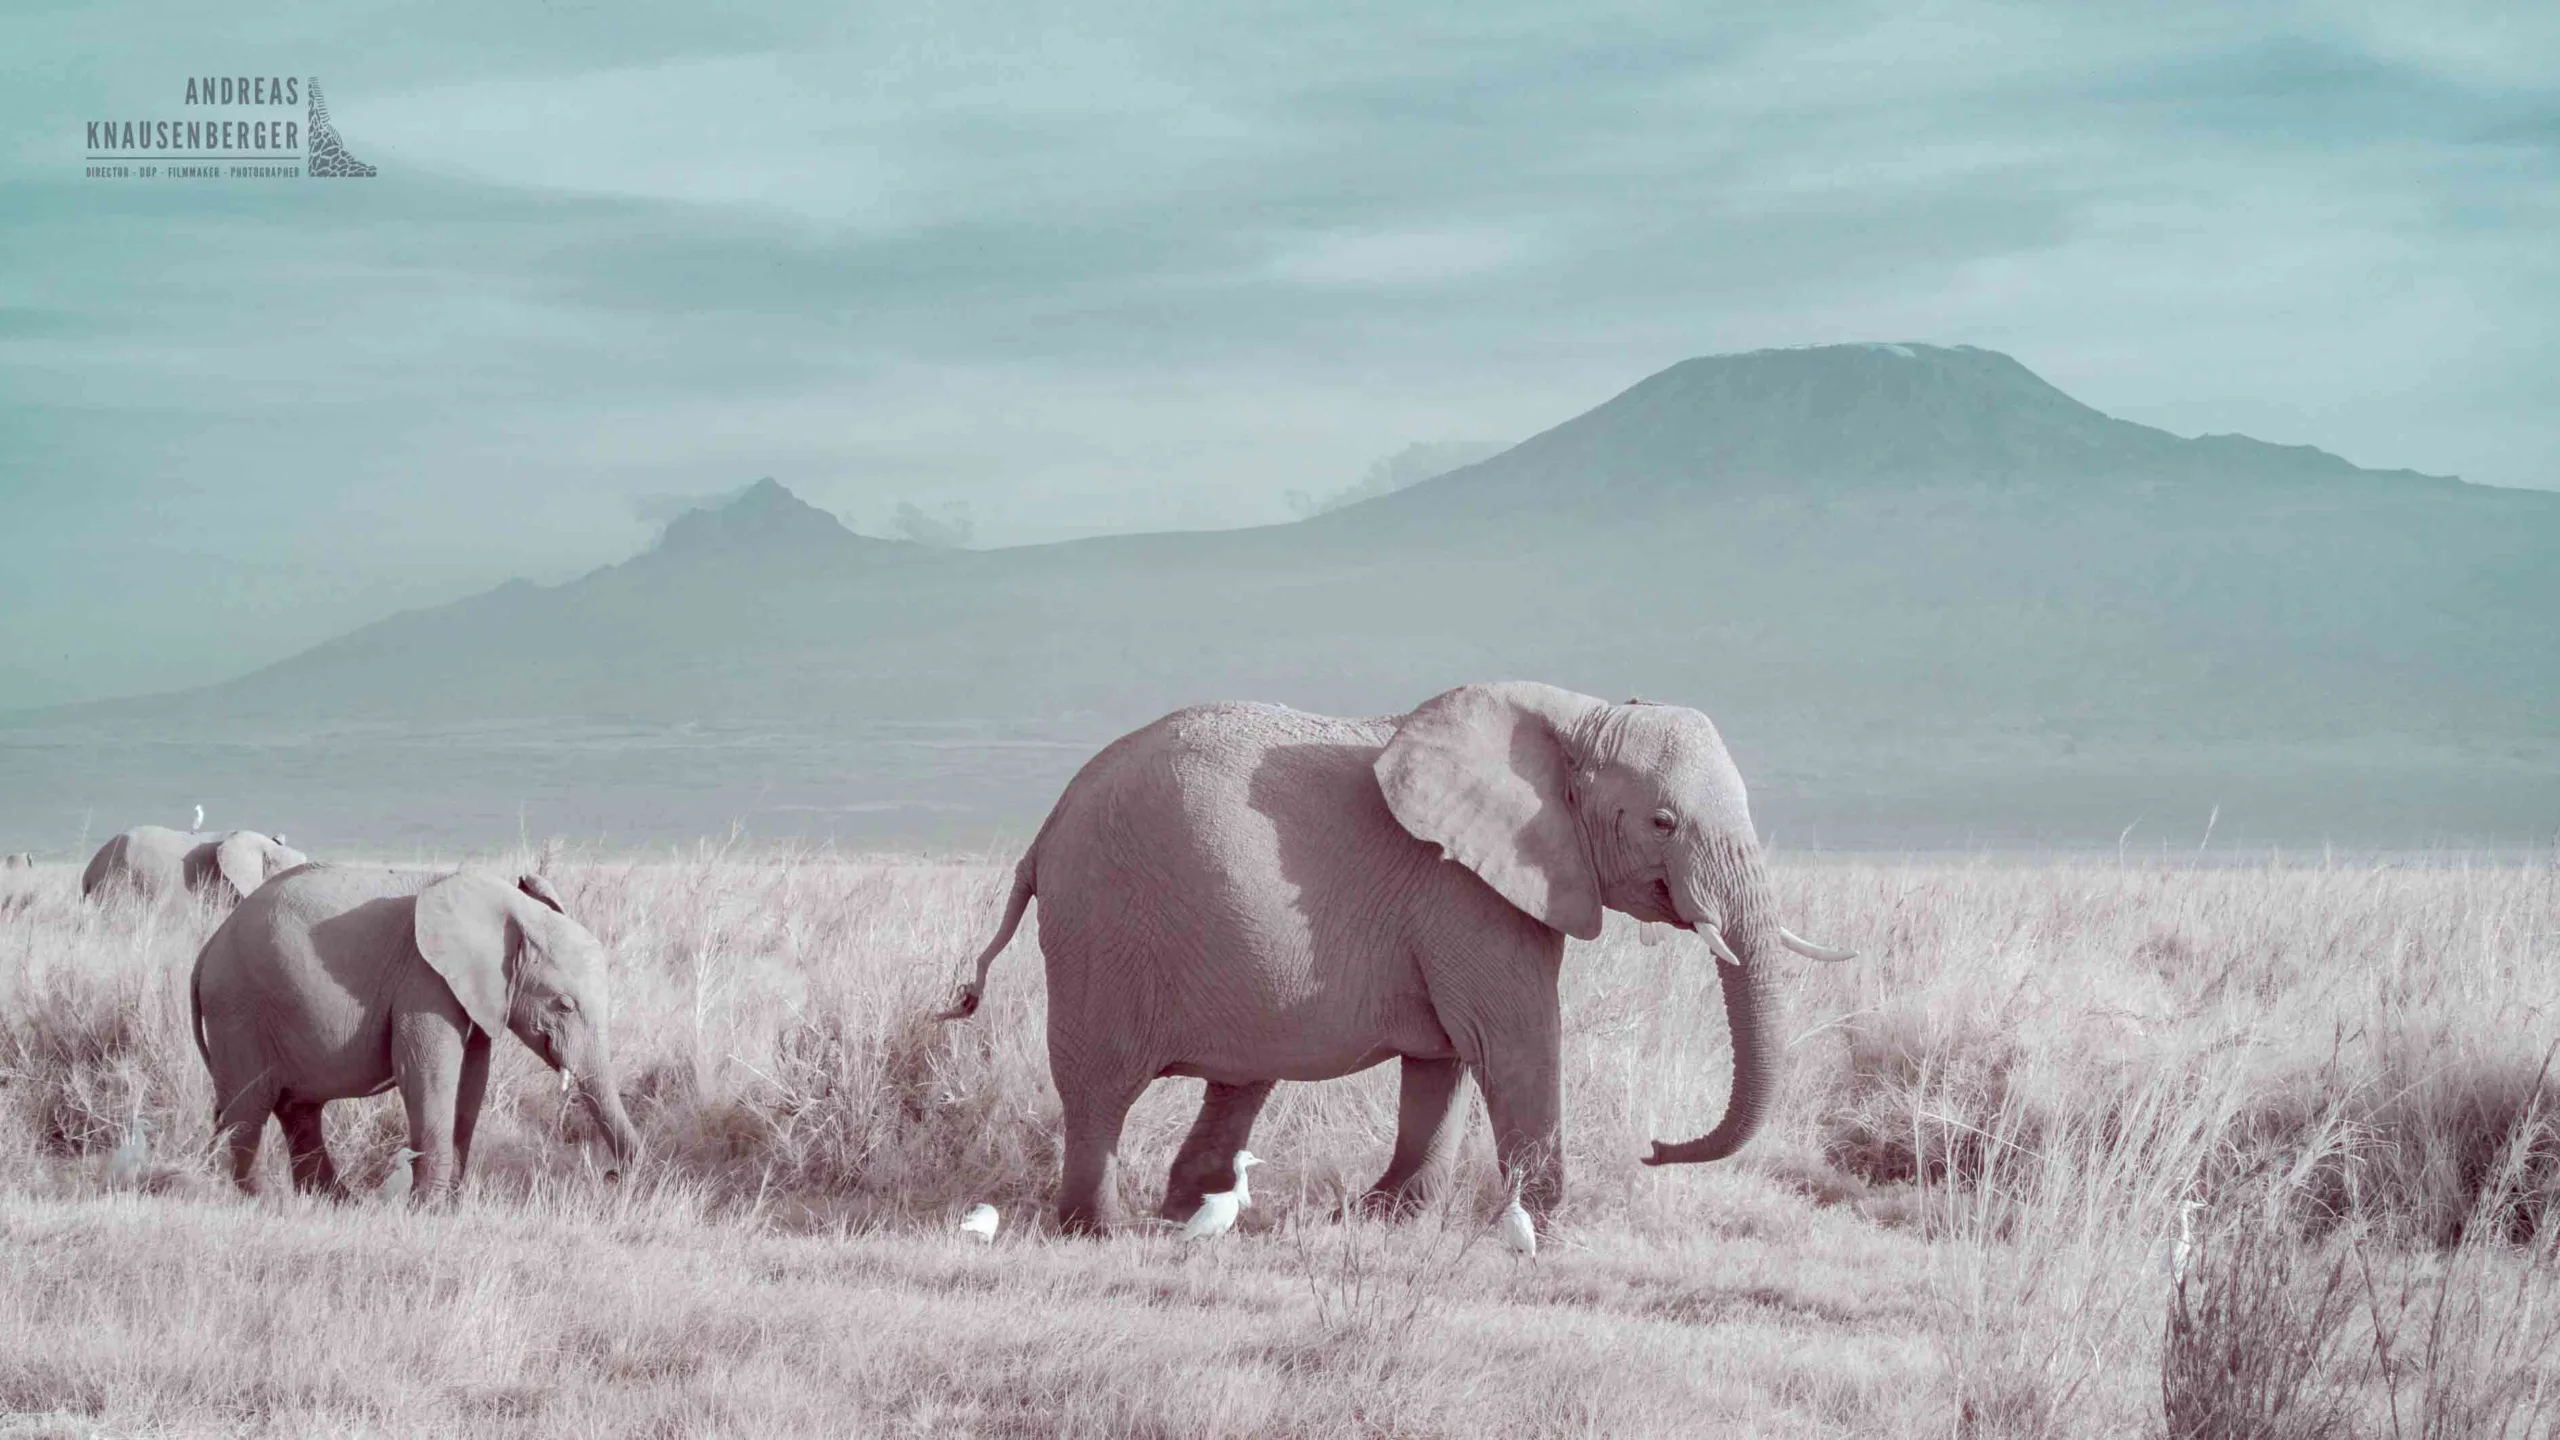
In Amboseli, I was blown away by the results. The park is famous for its huge elephant herds, dry lakebeds, dust devils, and, of course, Africa’s highest mountain—Kilimanjaro.
It’s not easy to see the mountain clearly every day. Due to dust and haze, it’s often partially hidden. Finding elephants in front of it is another challenge—but after years of working as a photography guide, I know exactly where and when to go.
On my first evening game drive, I framed a lone elephant against the mountain. Through the IR camera, almost all the haze disappeared! Later, during editing, I realized the reason: haze and dust scatter visible light, but since the IR camera doesn’t “see” visible light, it also doesn’t see the haze—resulting in a crystal-clear image of the mountain.
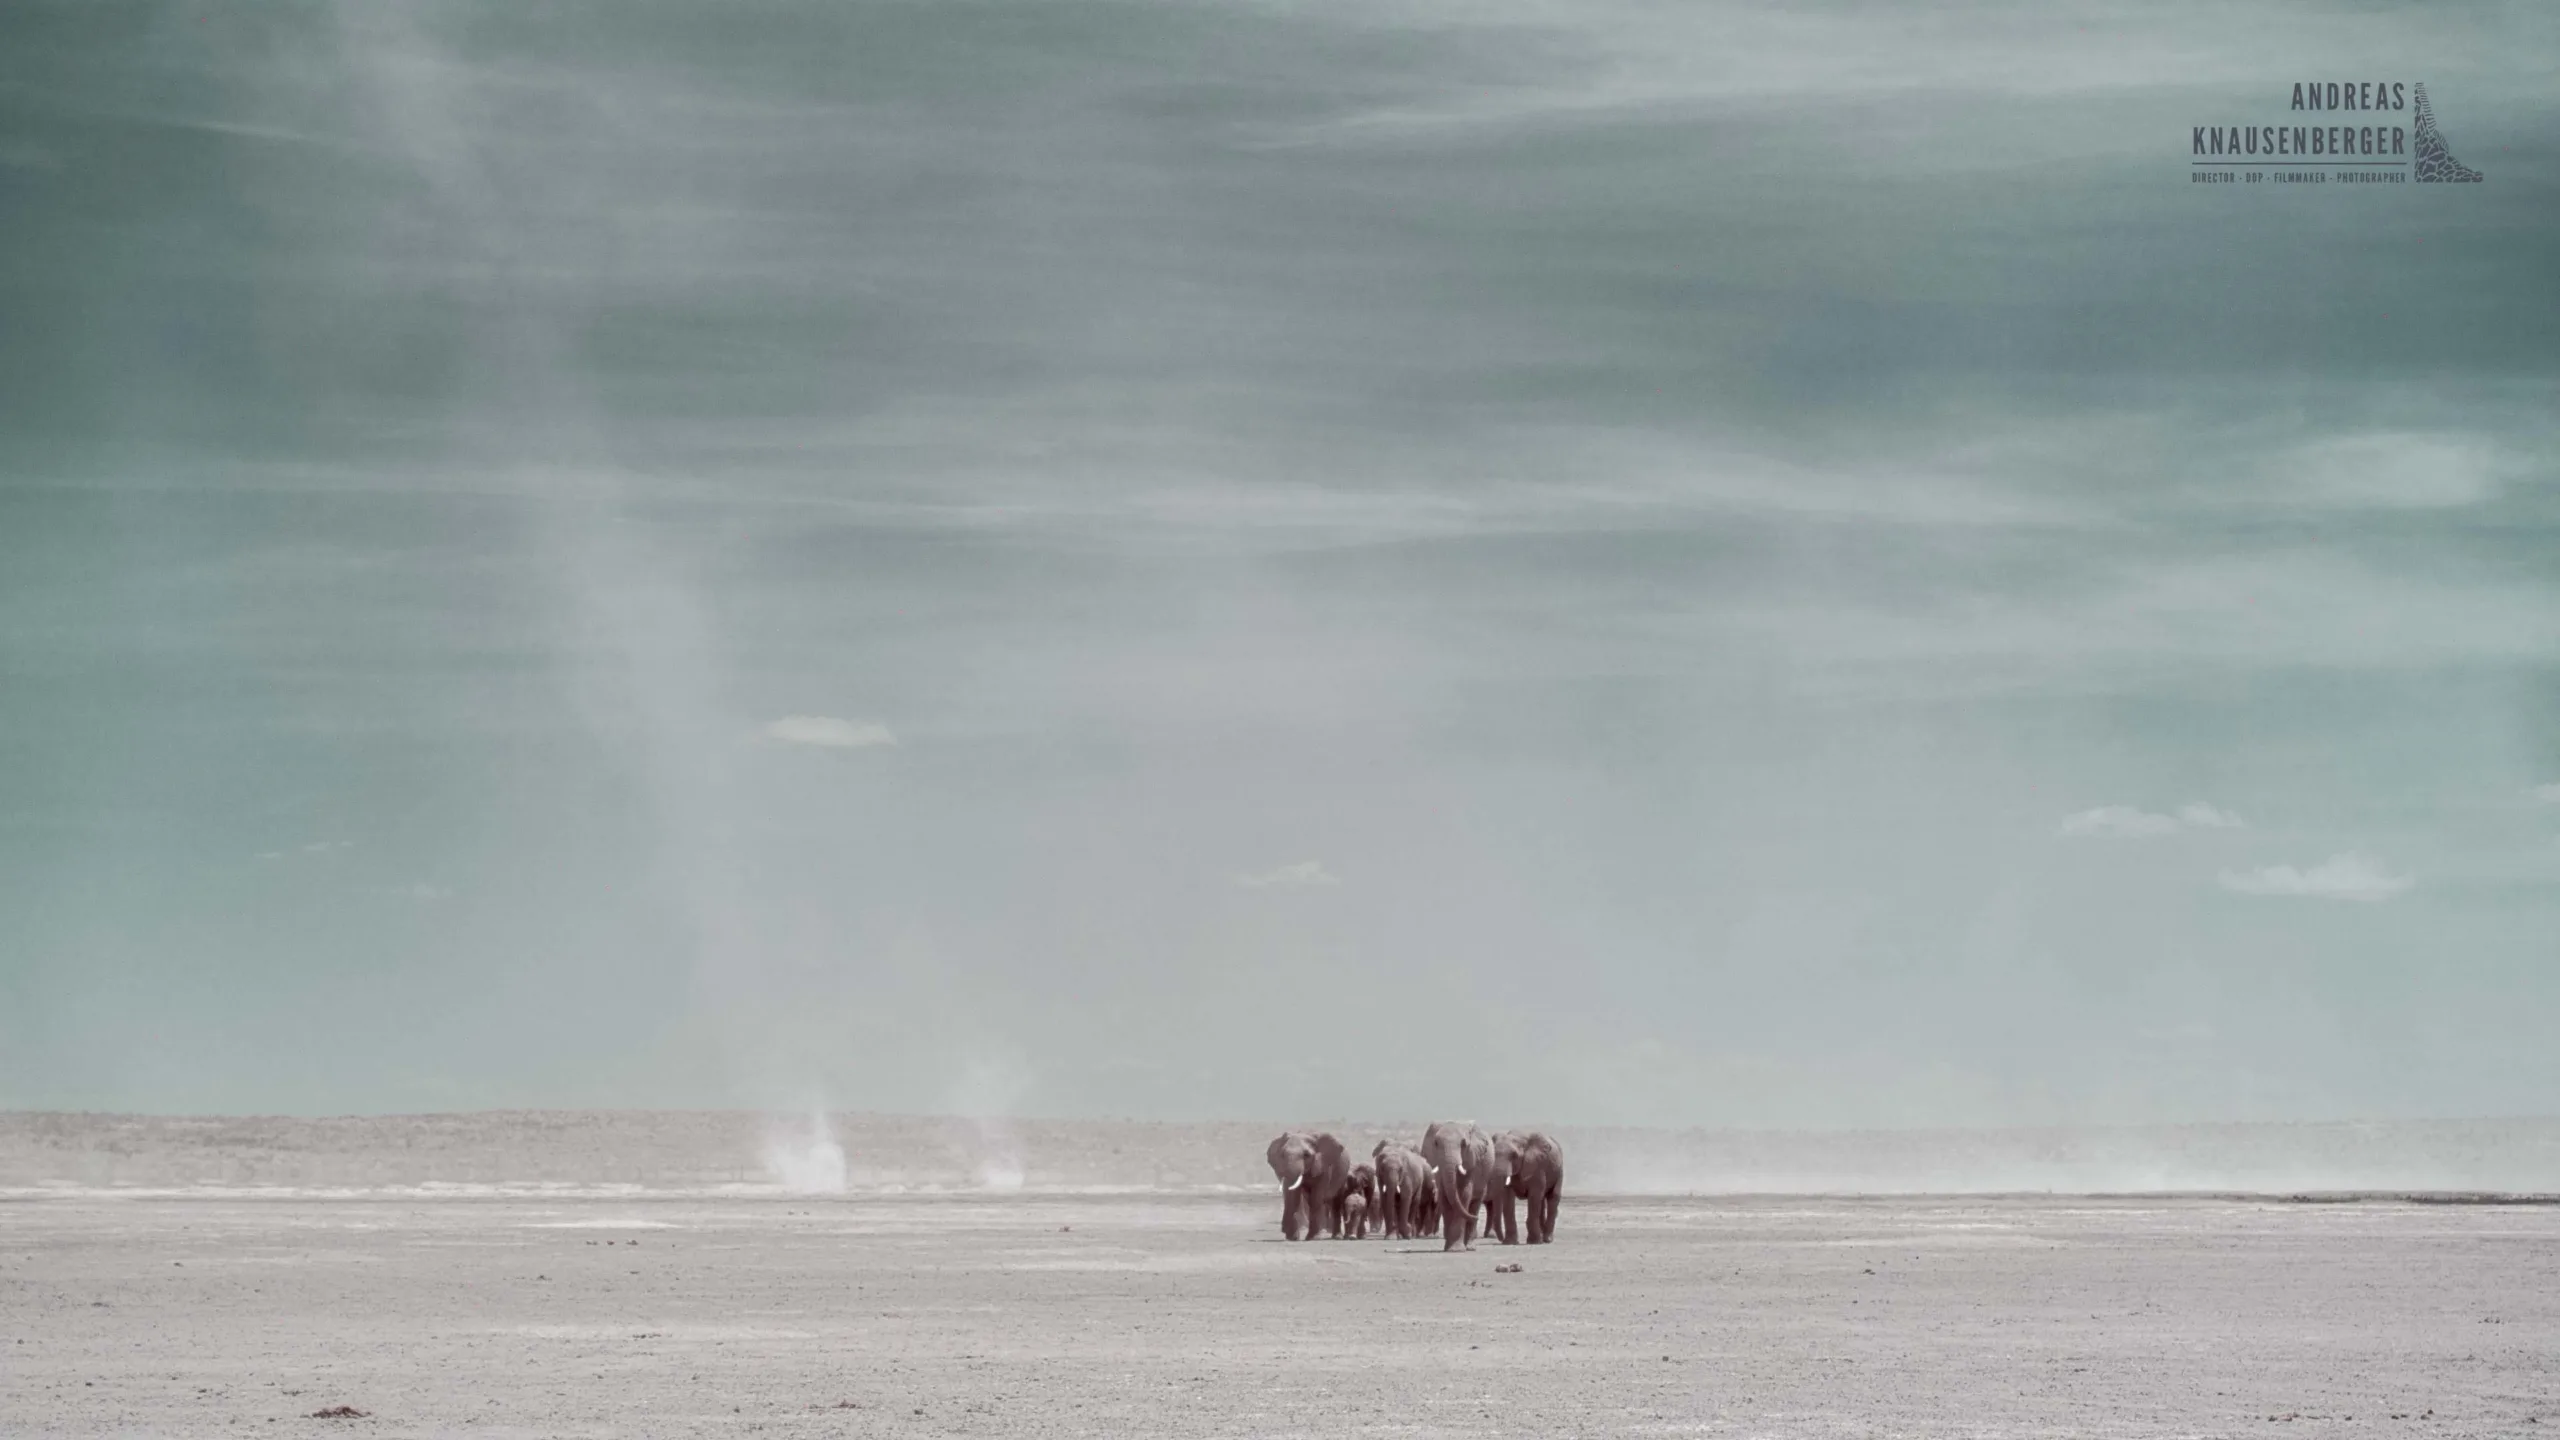
The swamps in Amboseli also provide beautiful contrast between dark water, white foliage, and elephants. The dry lakebed scenes, with elephants walking across cracked soil and dust devils rising behind them, look incredible in IR—especially with some clouds to make the sky pop. Interestingly, the dust devils are more visible in IR than in normal light.
Infrared Wildlife Photography in Samburu
The third destination I visited recently was Samburu, one of my favorite places in Kenya. The landscapes, wildlife, and people are simply amazing. I’ve spent many weeks up north filming elephants during the day and at night—Samburu truly has a special place in my heart.
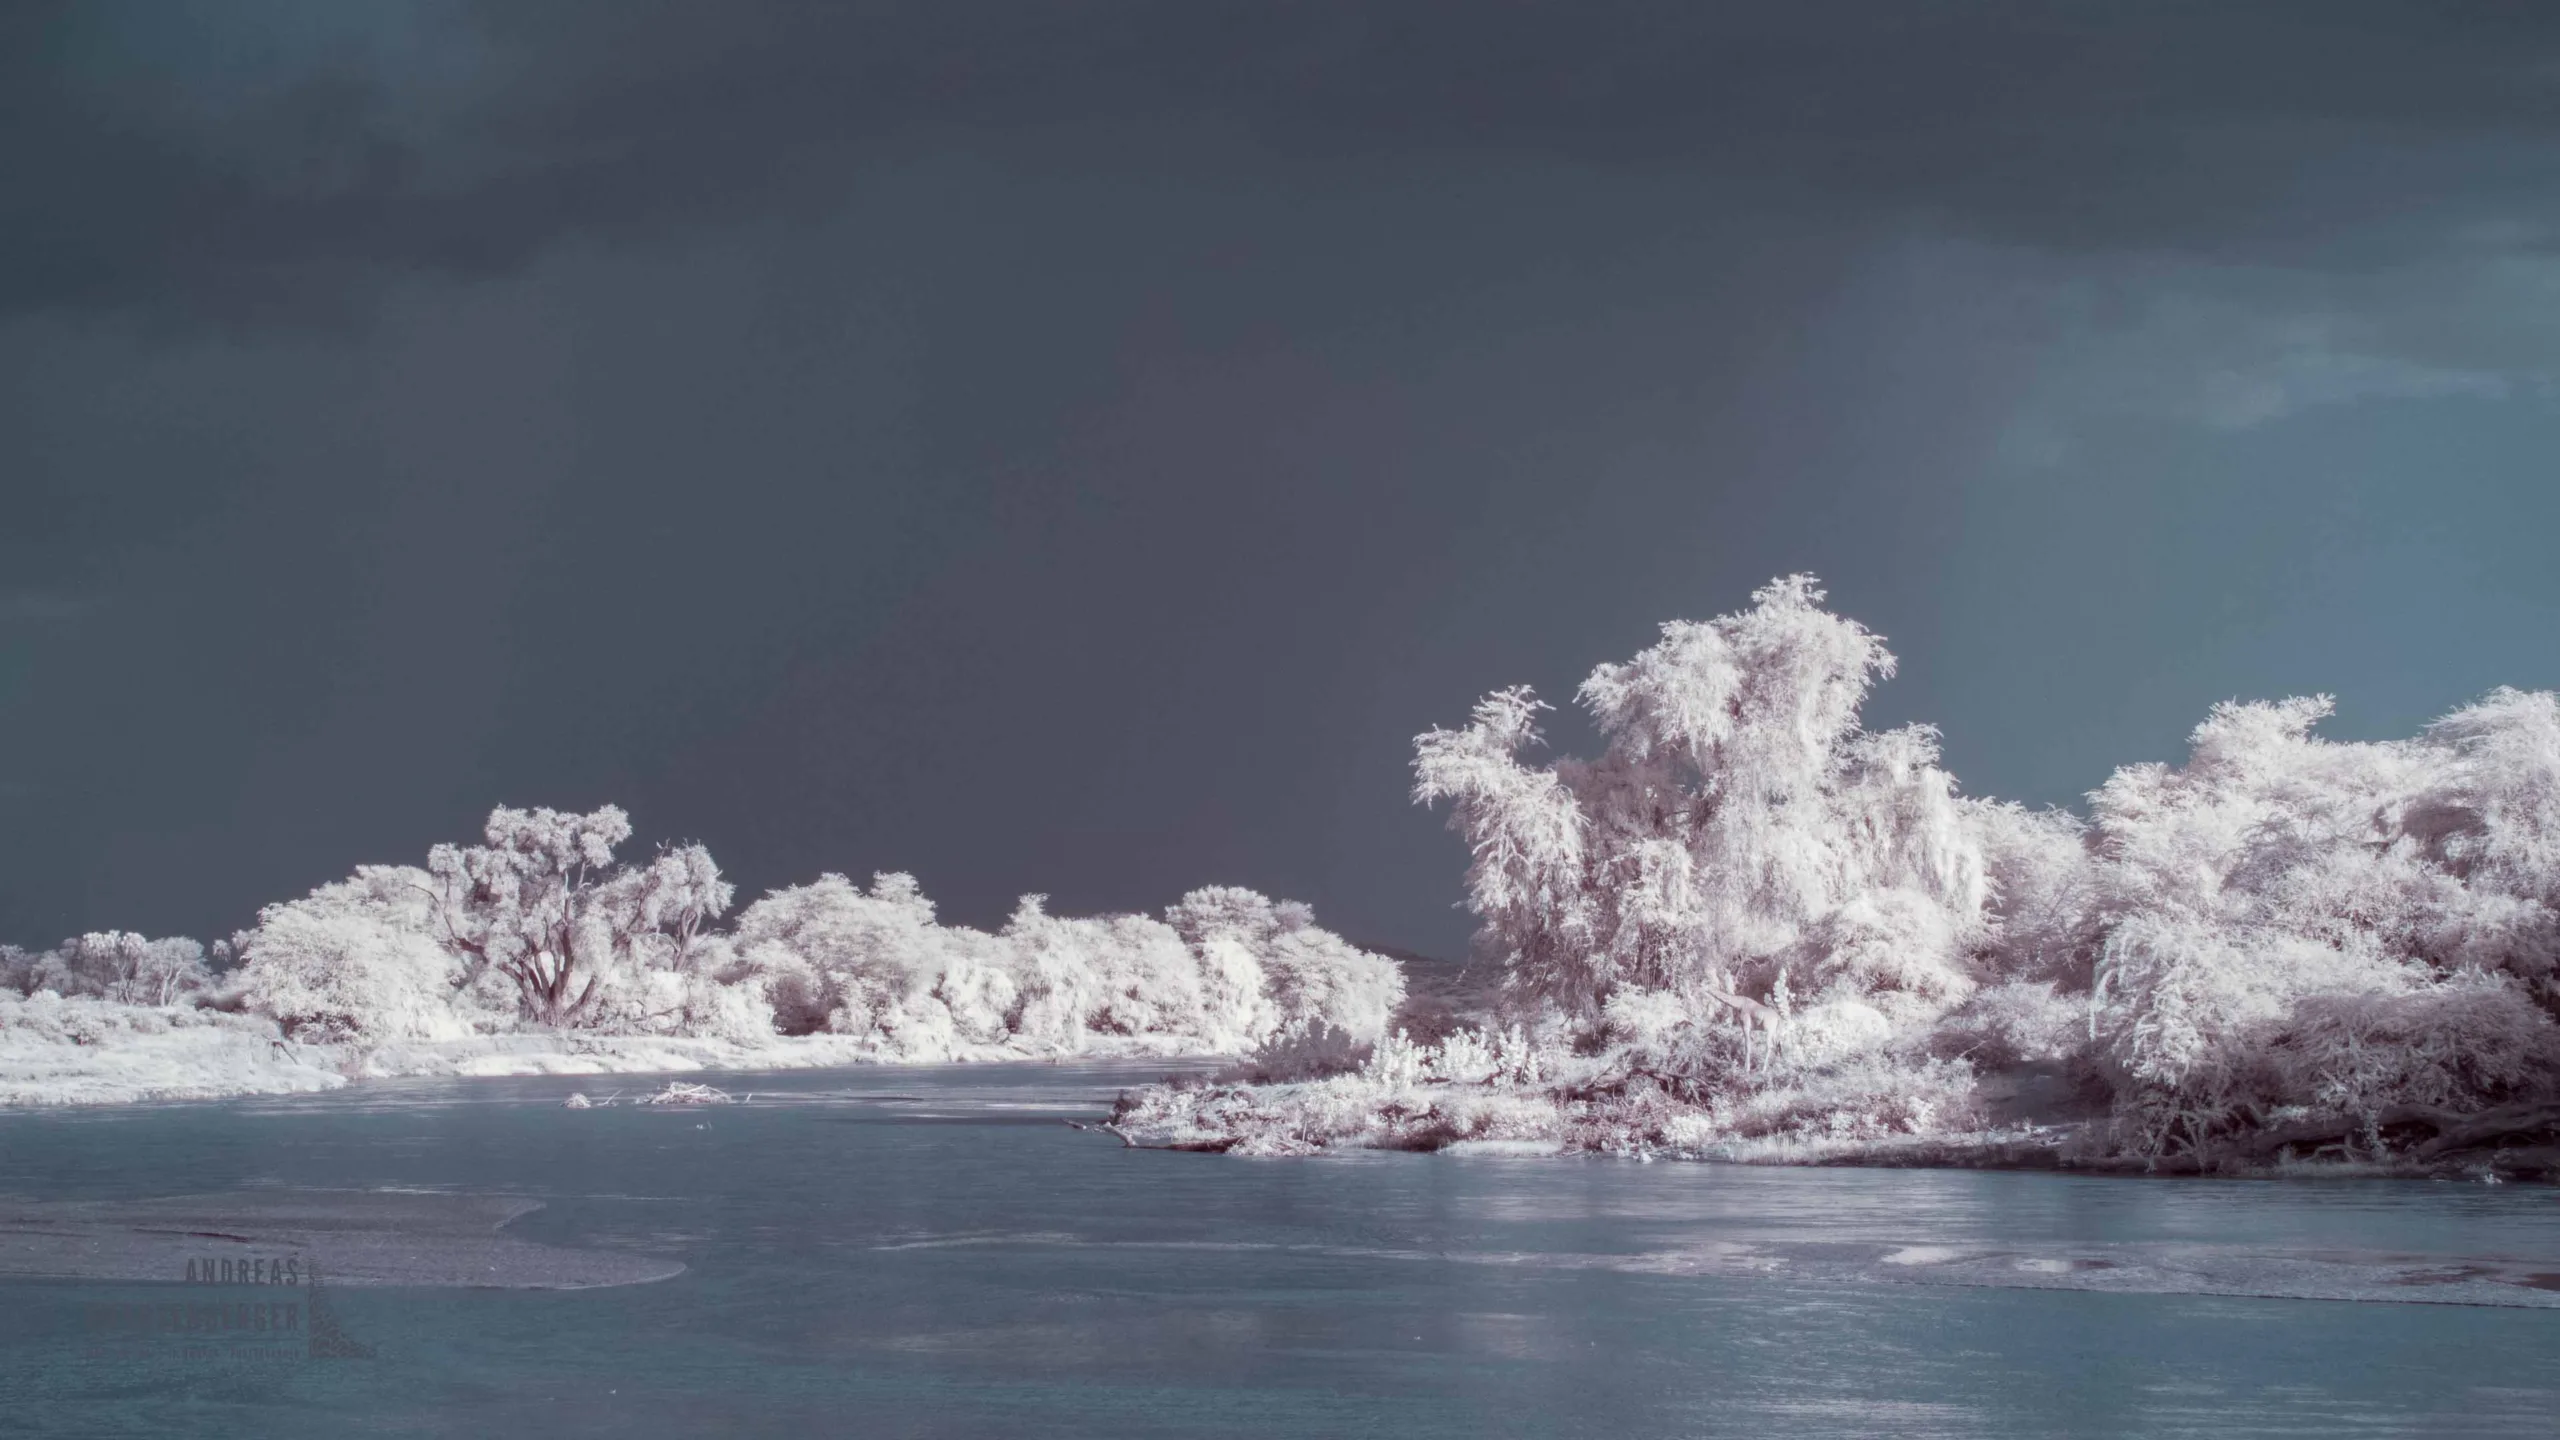
For infrared wildlife photography, however, options are a bit limited. Most of the park consists of dense bush, with mountains casting early shadows. The best location for IR shots is along the Ewaso Ng’iro River, where you’ll find doum palms and bright sand contrasting beautifully with the dark river.
Elephants often cross the river, offering fantastic photo opportunities—but you need patience and knowledge of the regular crossing points. Everything along the river provides good IR potential—if the animals cooperate. 😊
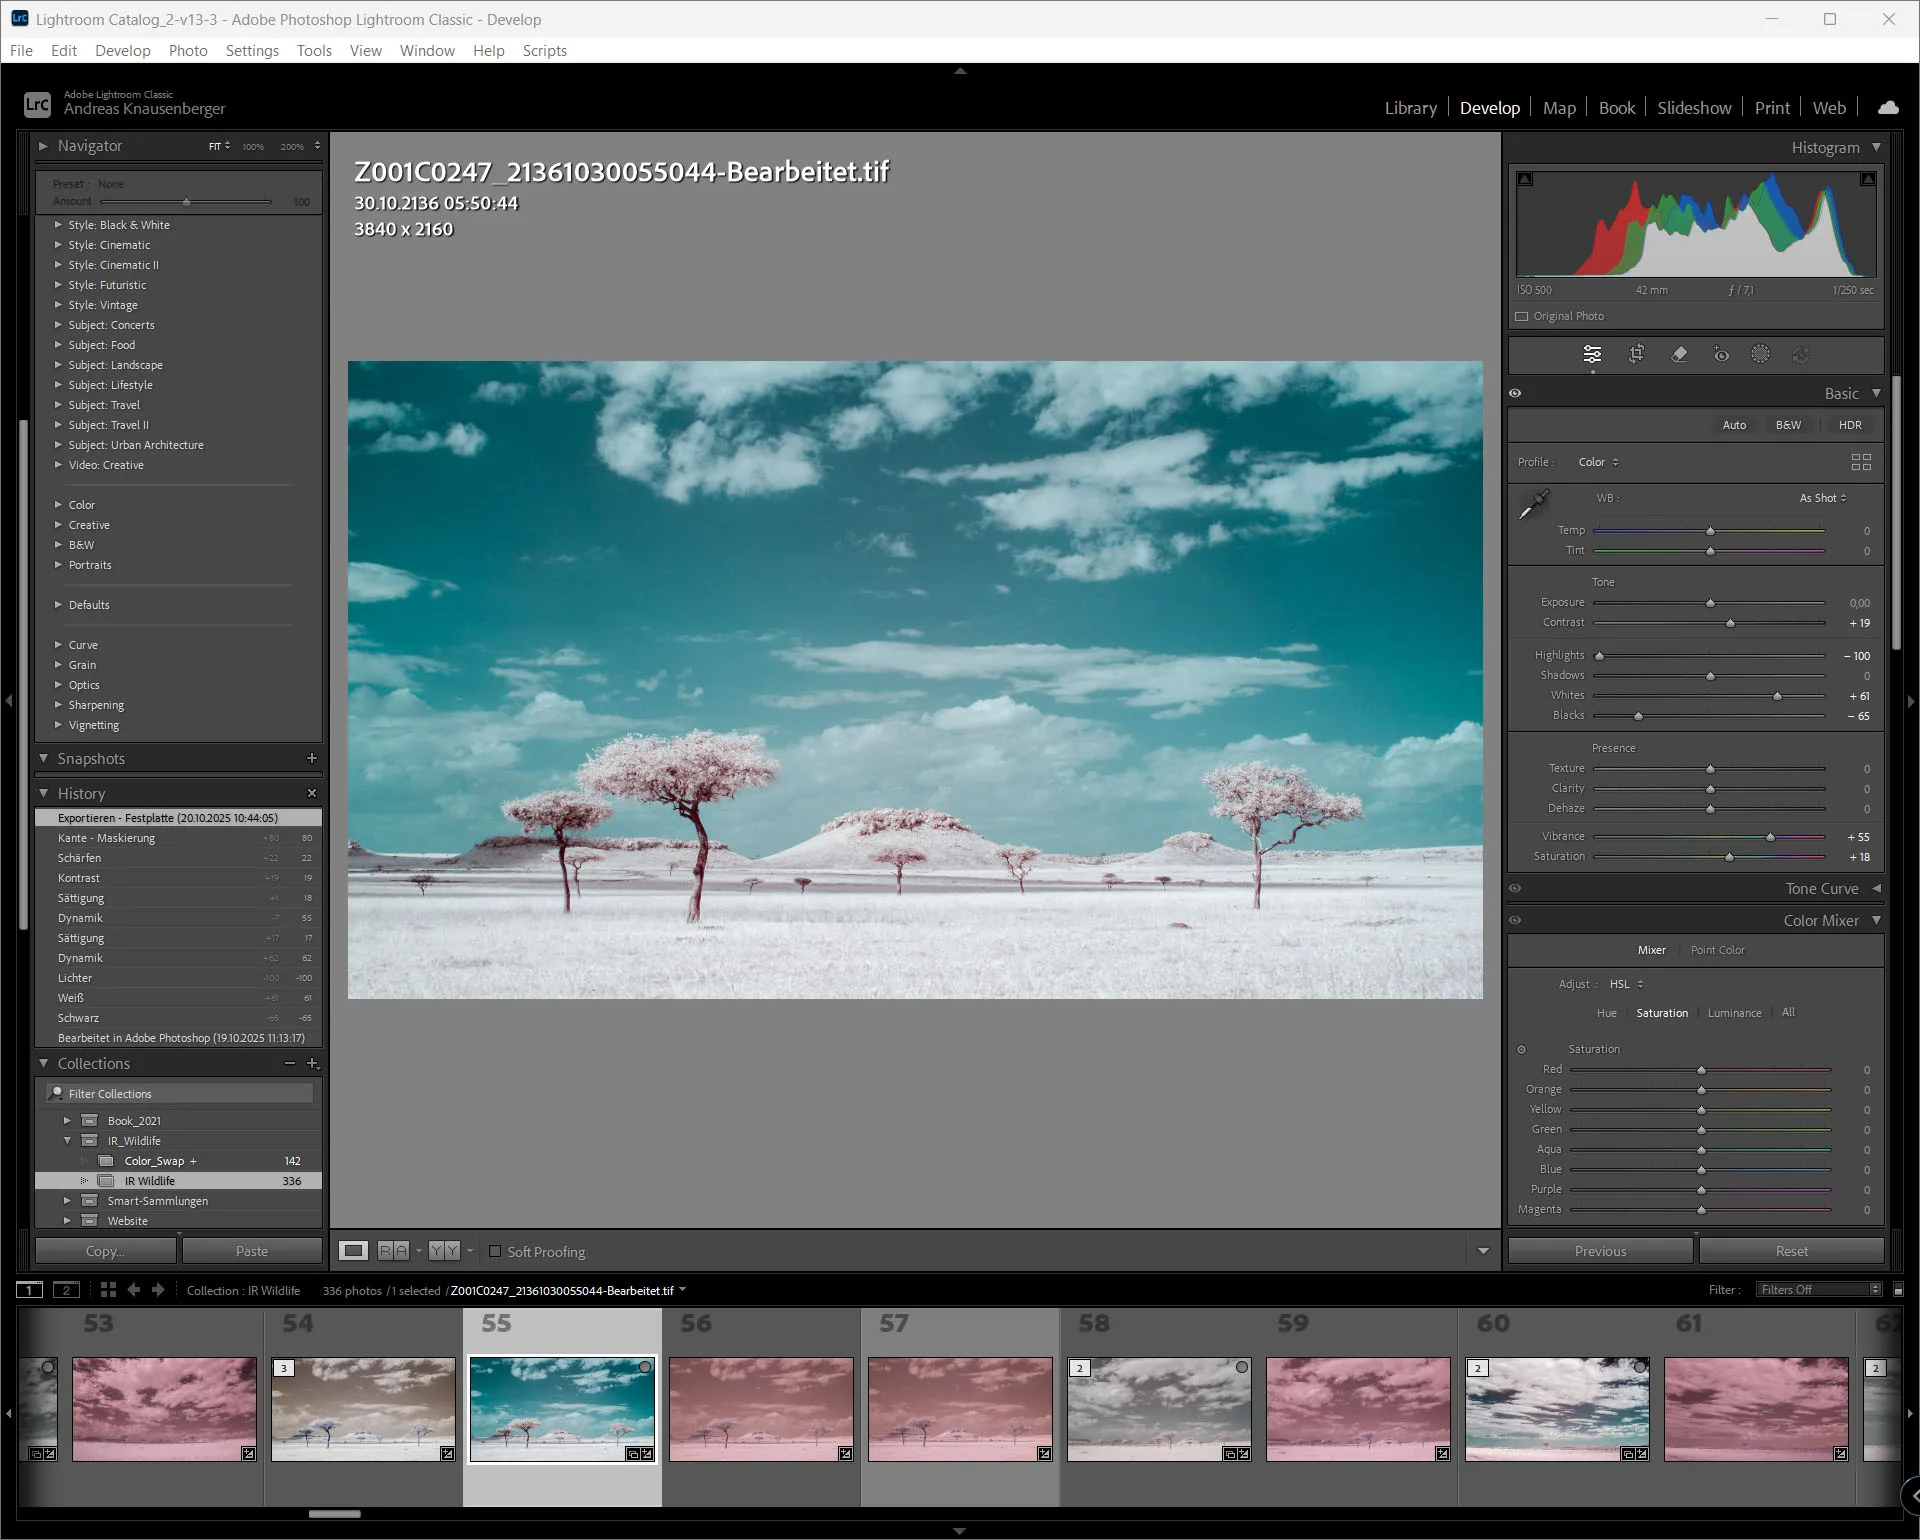
How to Edit Infrared Wildlife Pictures
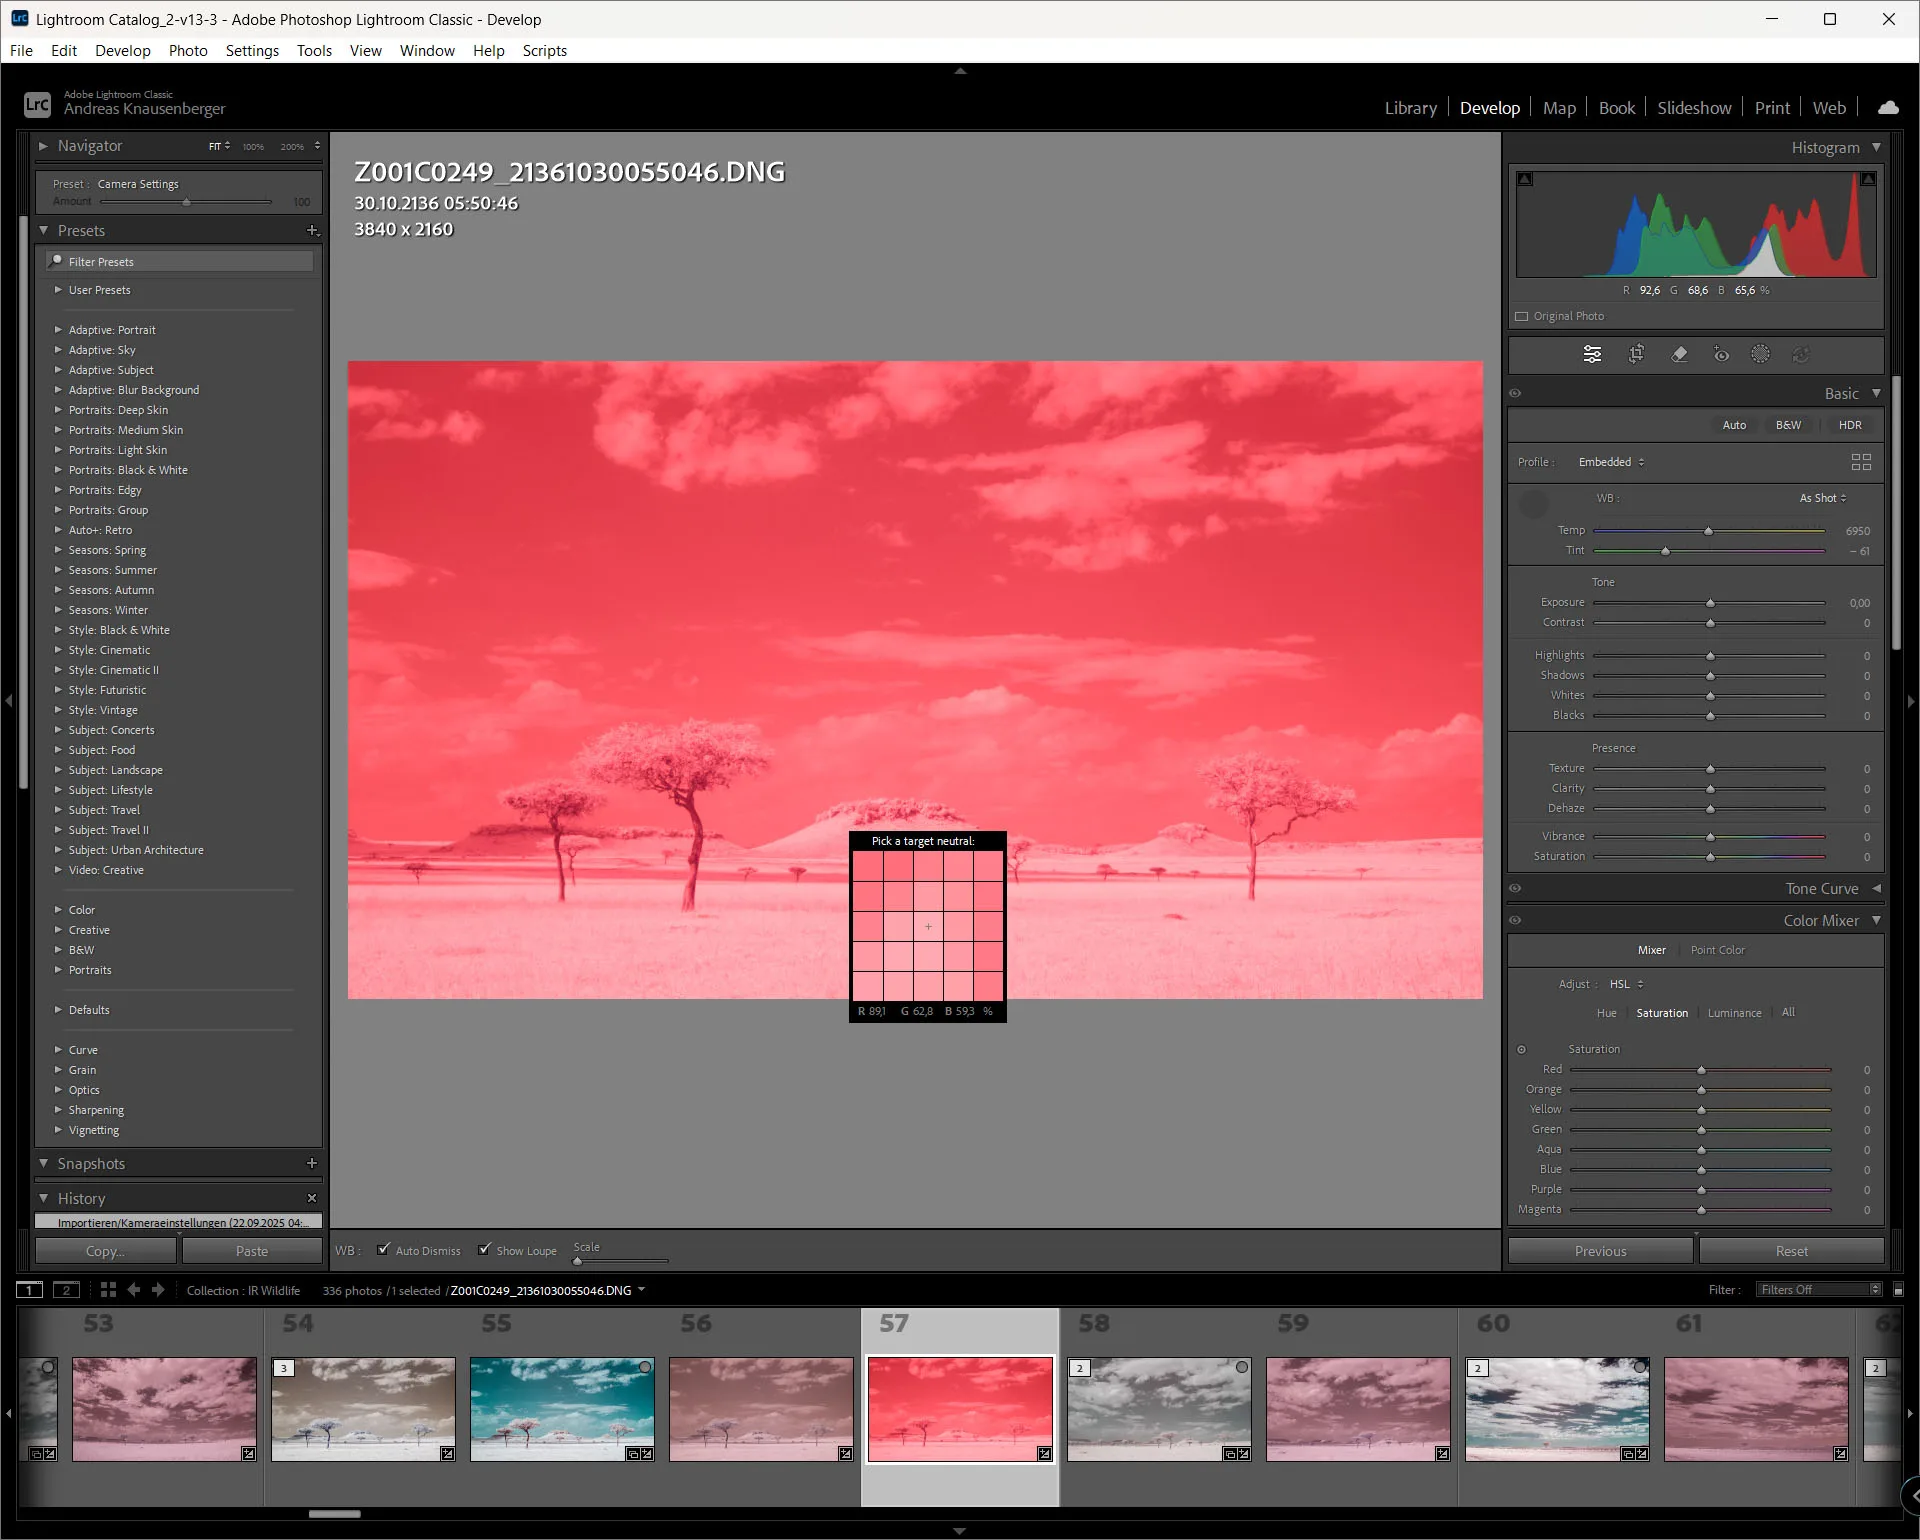
After long days in the bush, I couldn’t wait to start editing. Before leaving, I had done some quick test edits but wasn’t happy with them. Since the Z Cam produces an unusual DNG format, there were no Lightroom Classic presets available for proper white balance, and I couldn’t create my own profile. But I found a workaround!
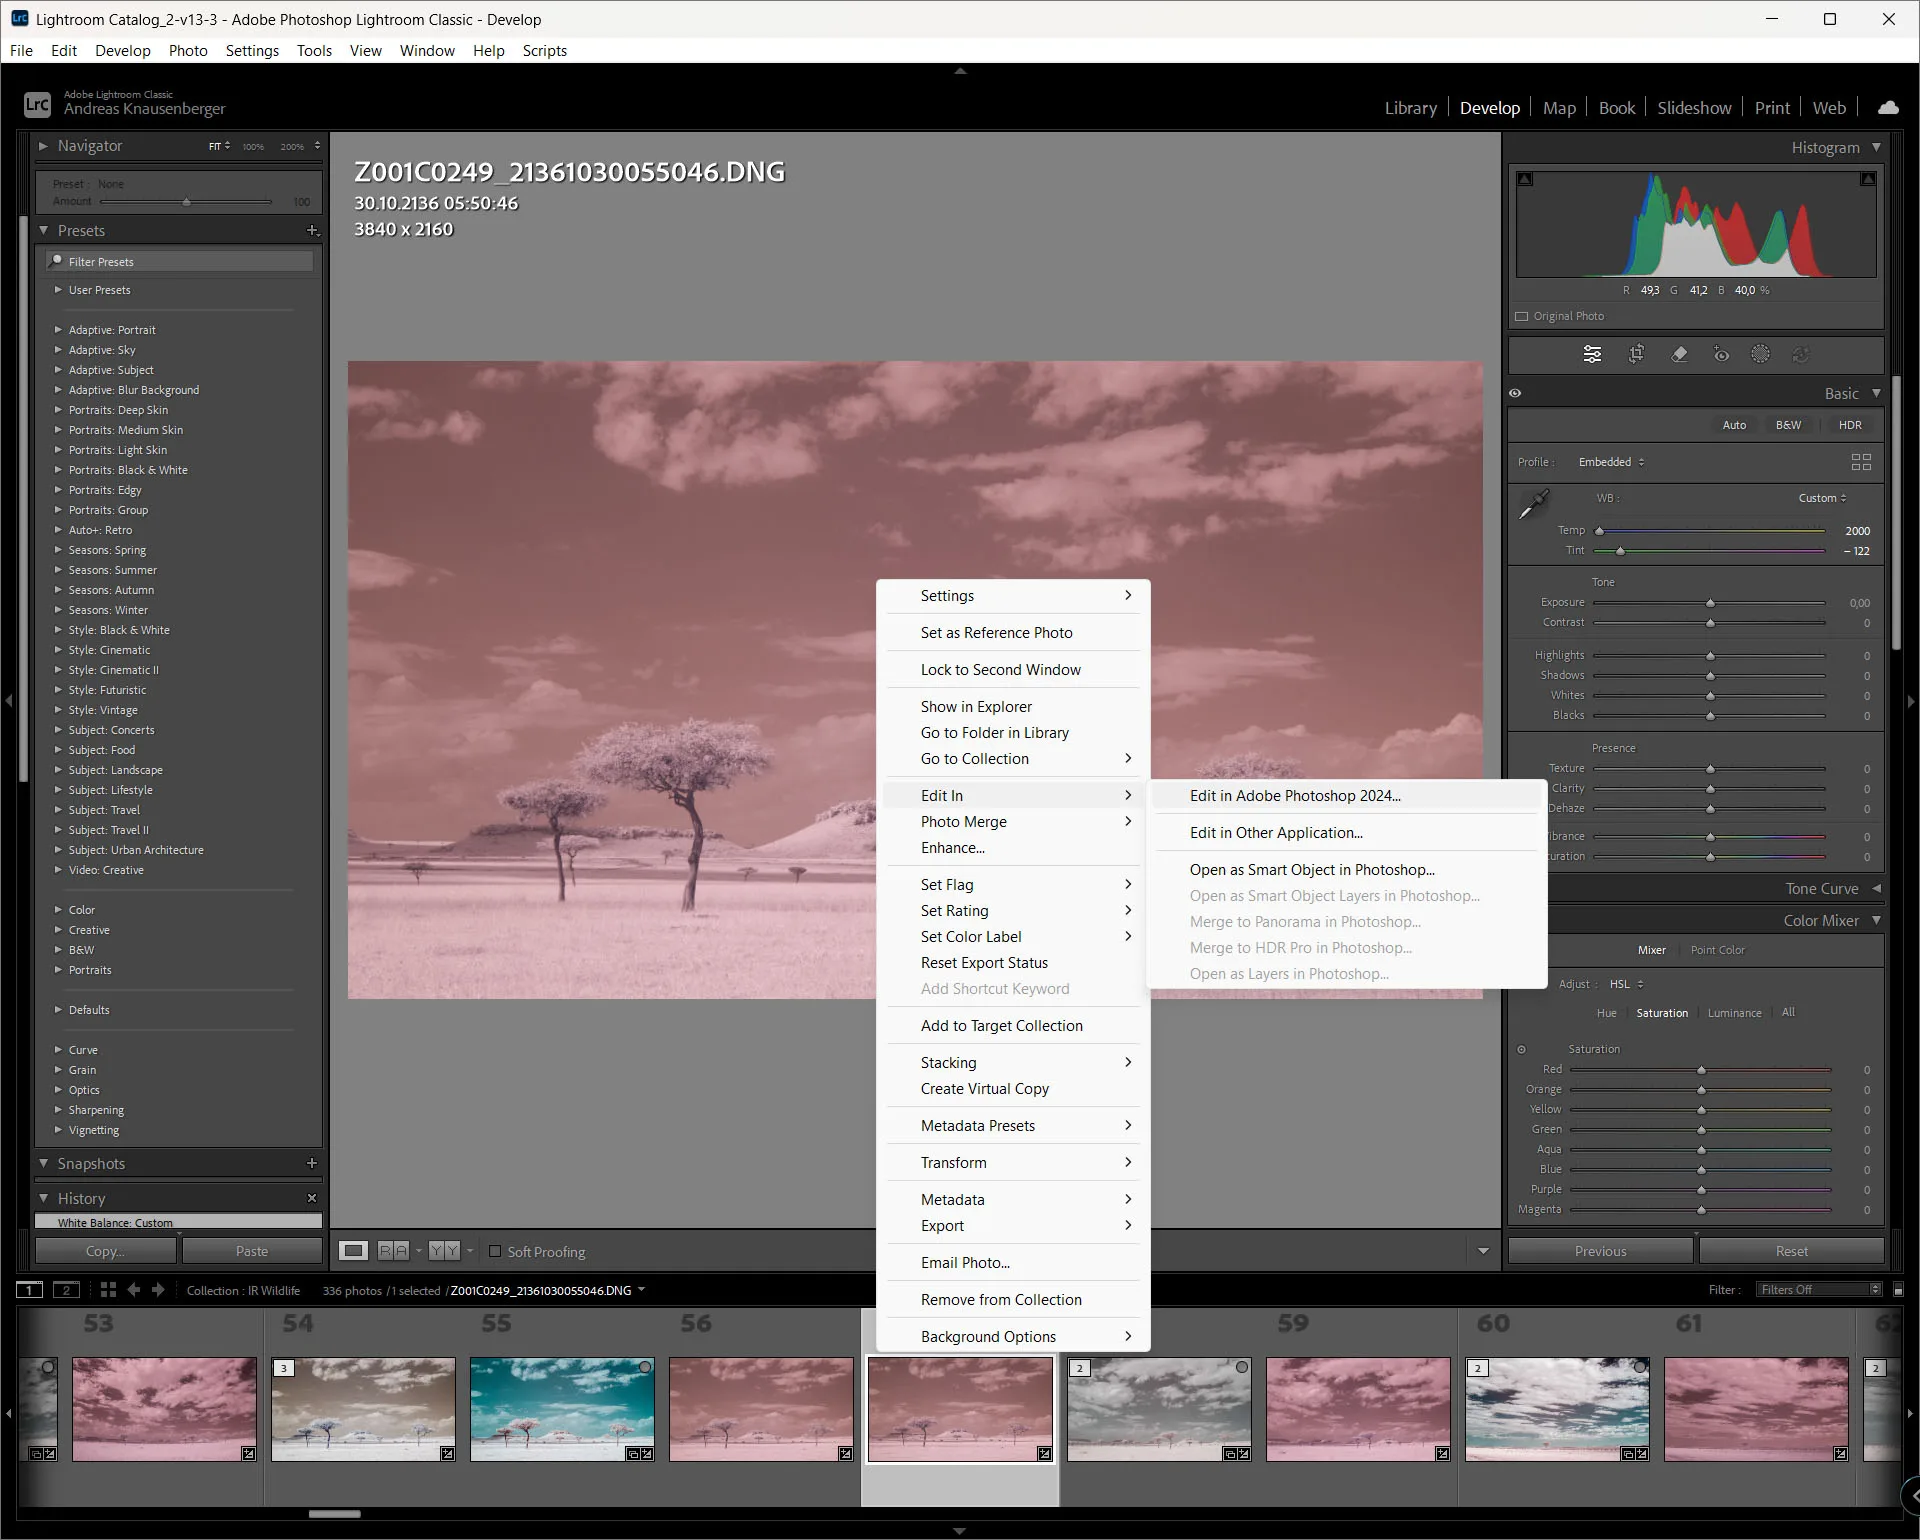
- Import your pictures into Lightroom Classic.
- White balance using the foliage or clouds—commit to one for consistency across a series.
- Once done, right-click → “Edit in Photoshop.”
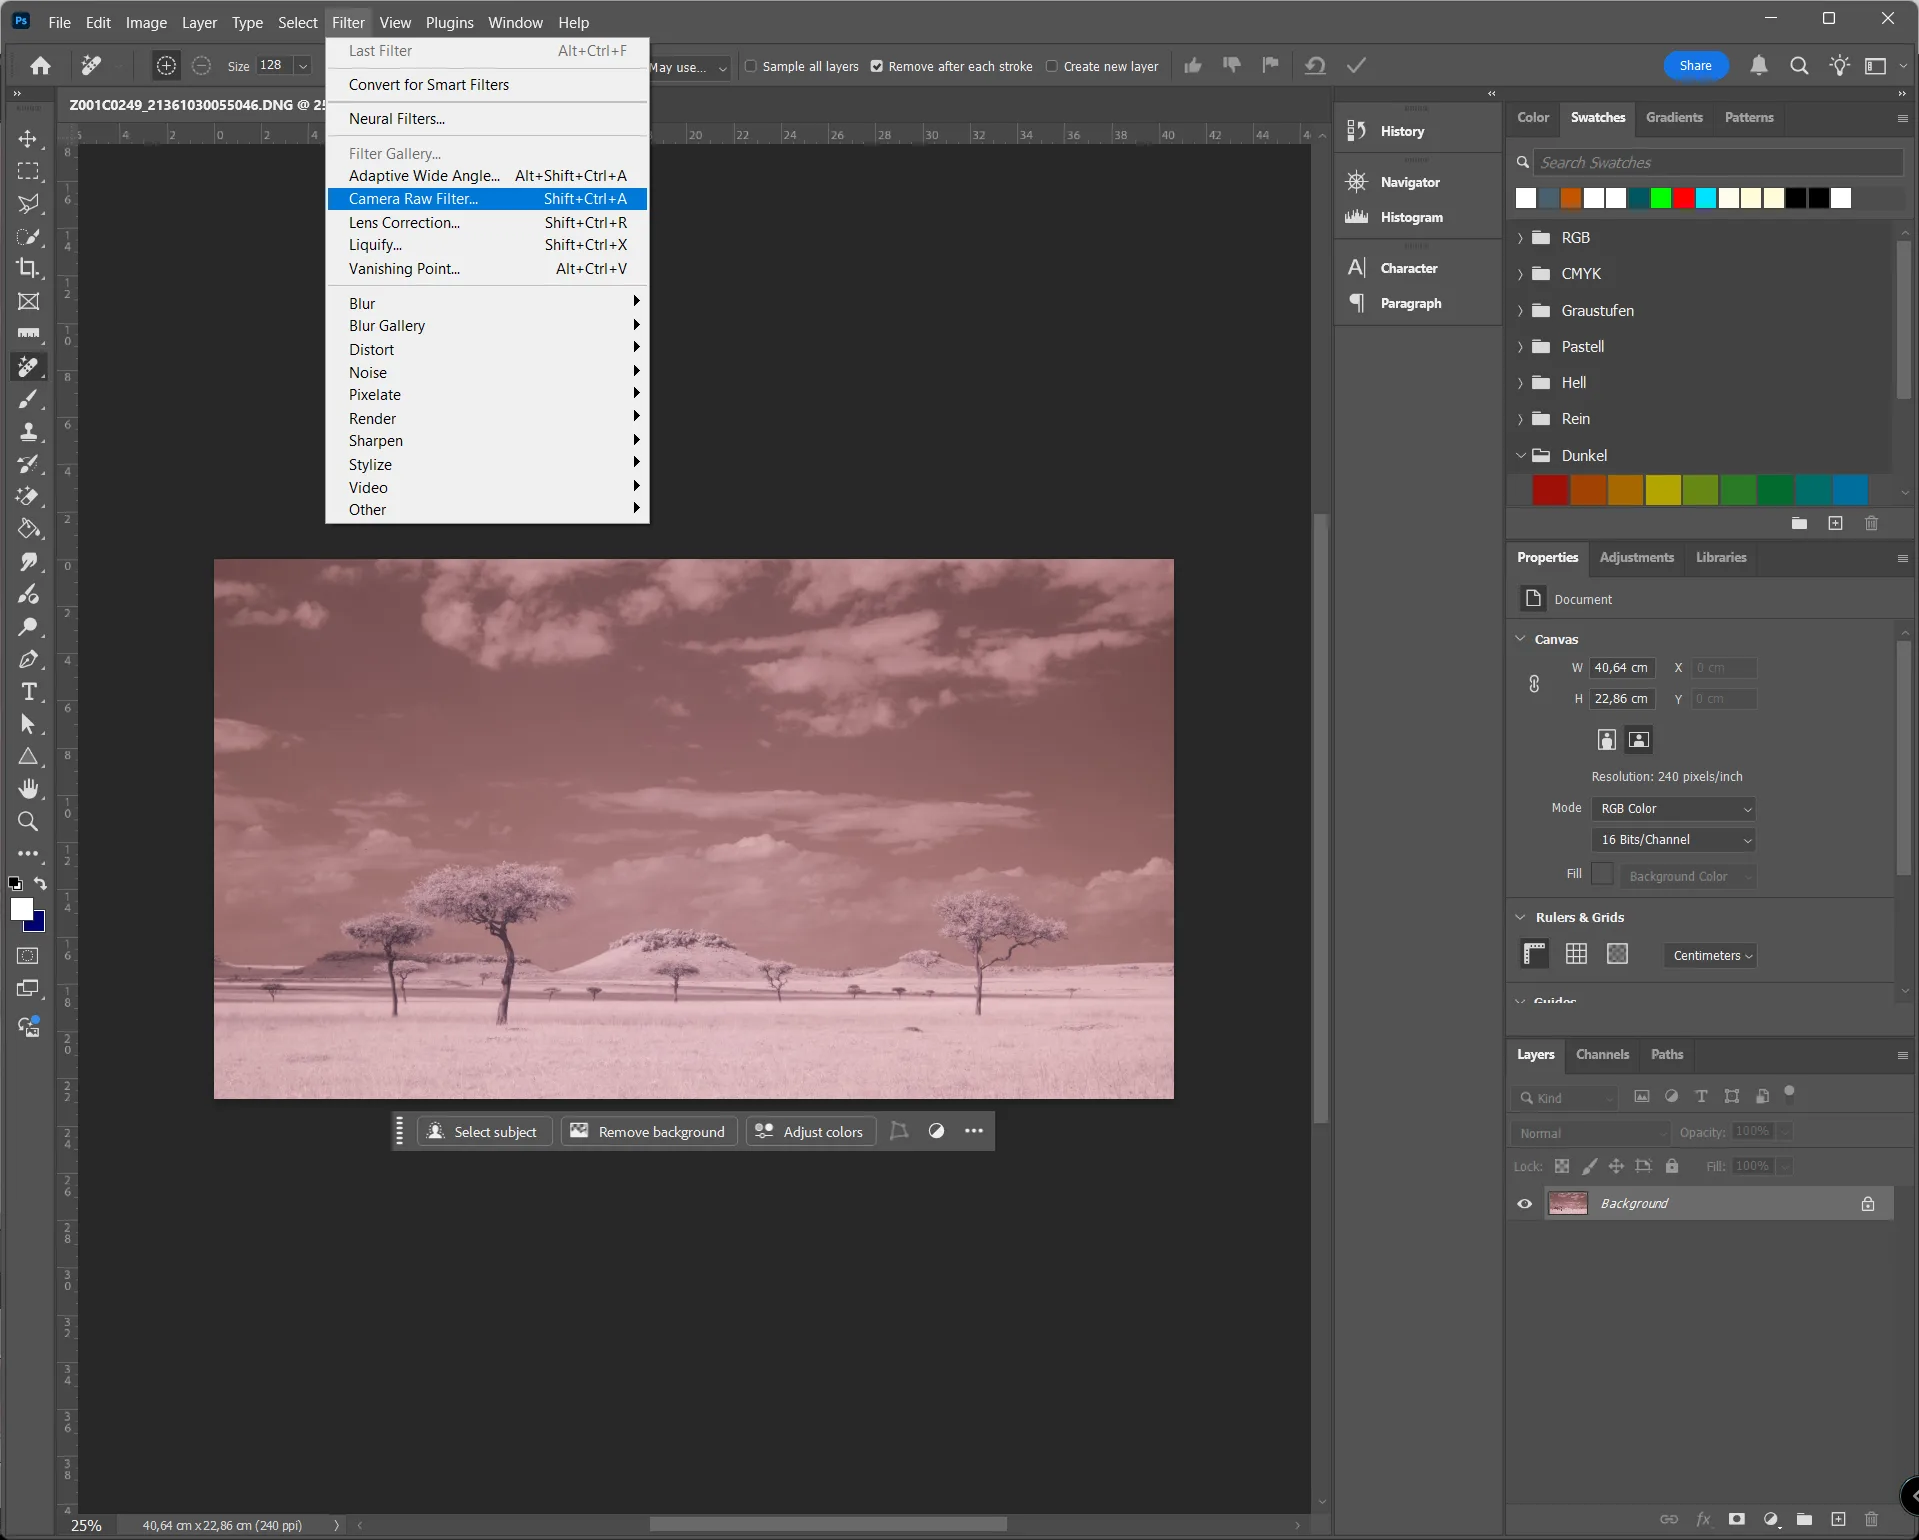
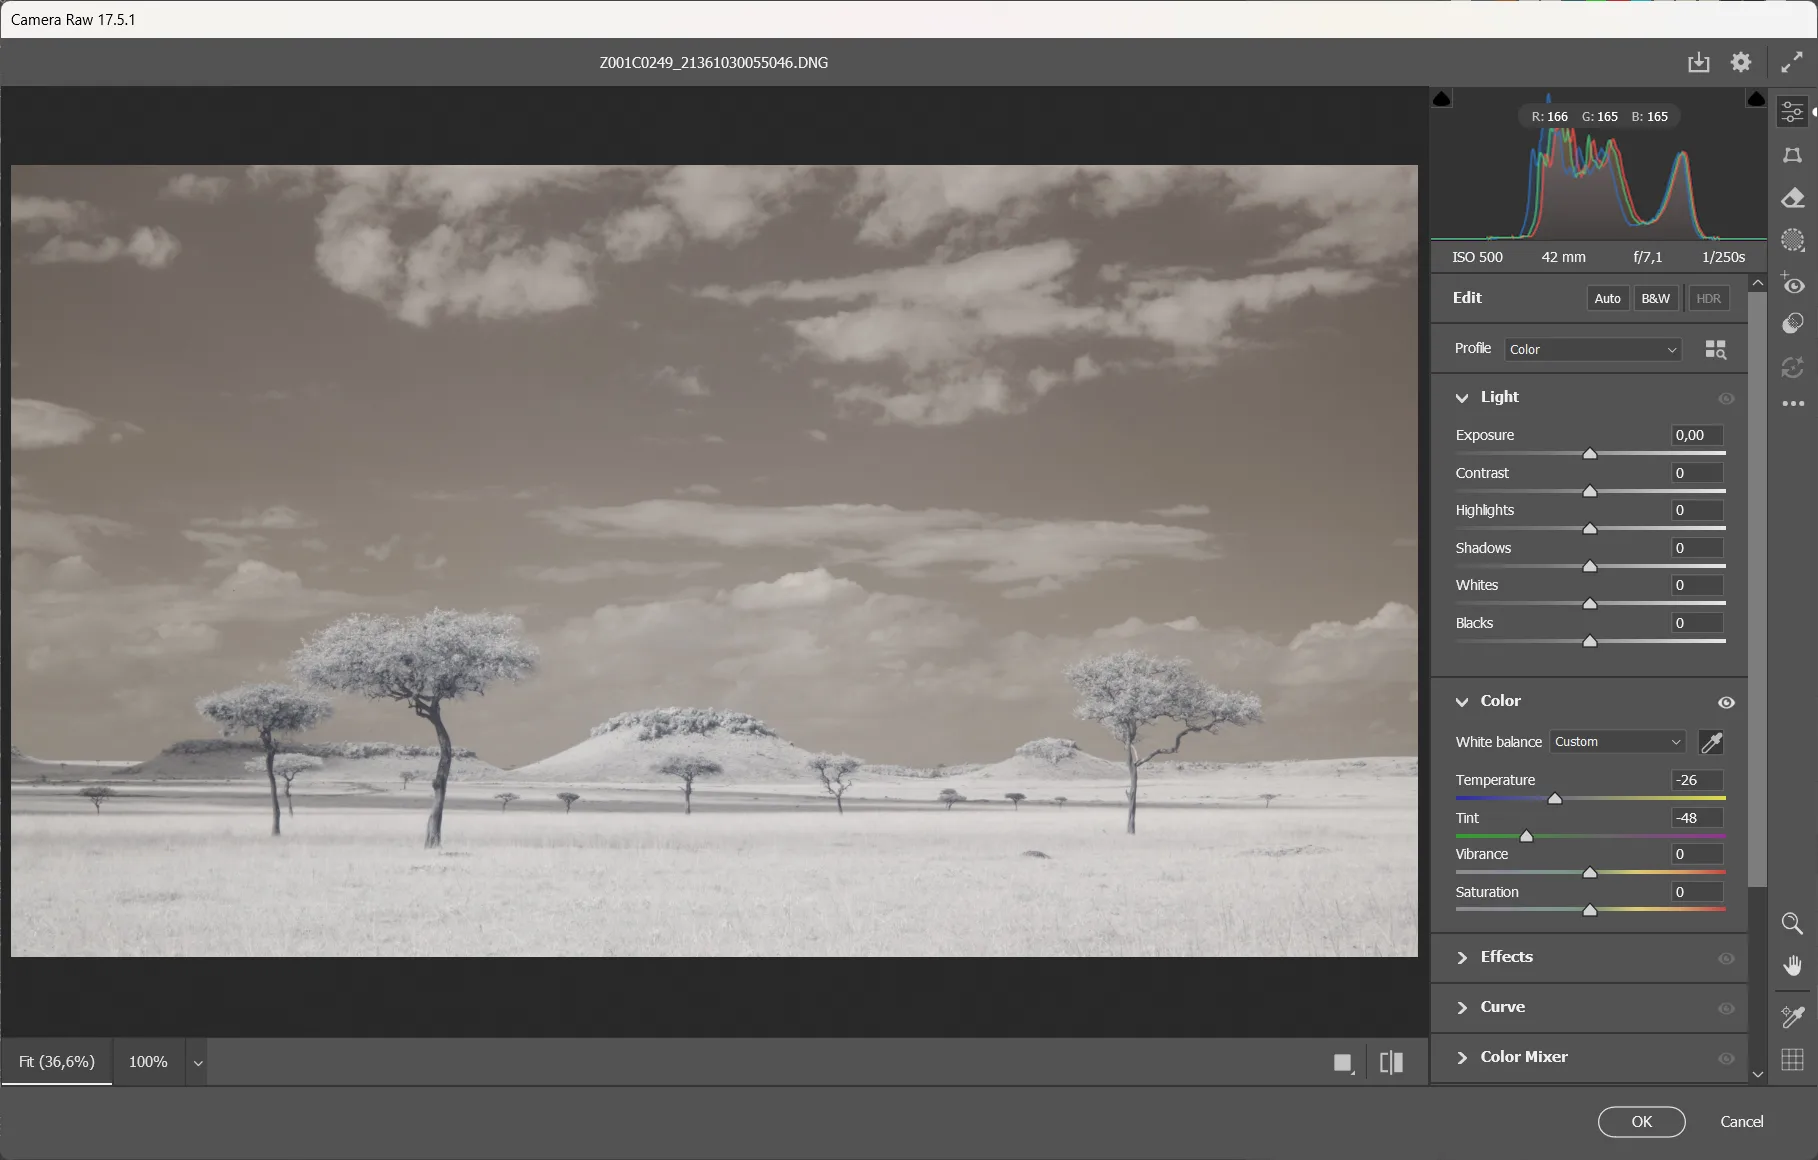
- In Photoshop, open Filter → Camera Raw Filter, and white balance again. This solves Lightroom’s white-balance limitation (Lightroom stops at –2000 K).
- Save the file; it will automatically reappear in Lightroom.
- Apply final adjustments—Blacks, Whites, Highlights, Shadows, Clarity, Texture, Vibrance, and Saturation.
- Add sharpening and denoise (preferably in Lightroom before editing in Photoshop).
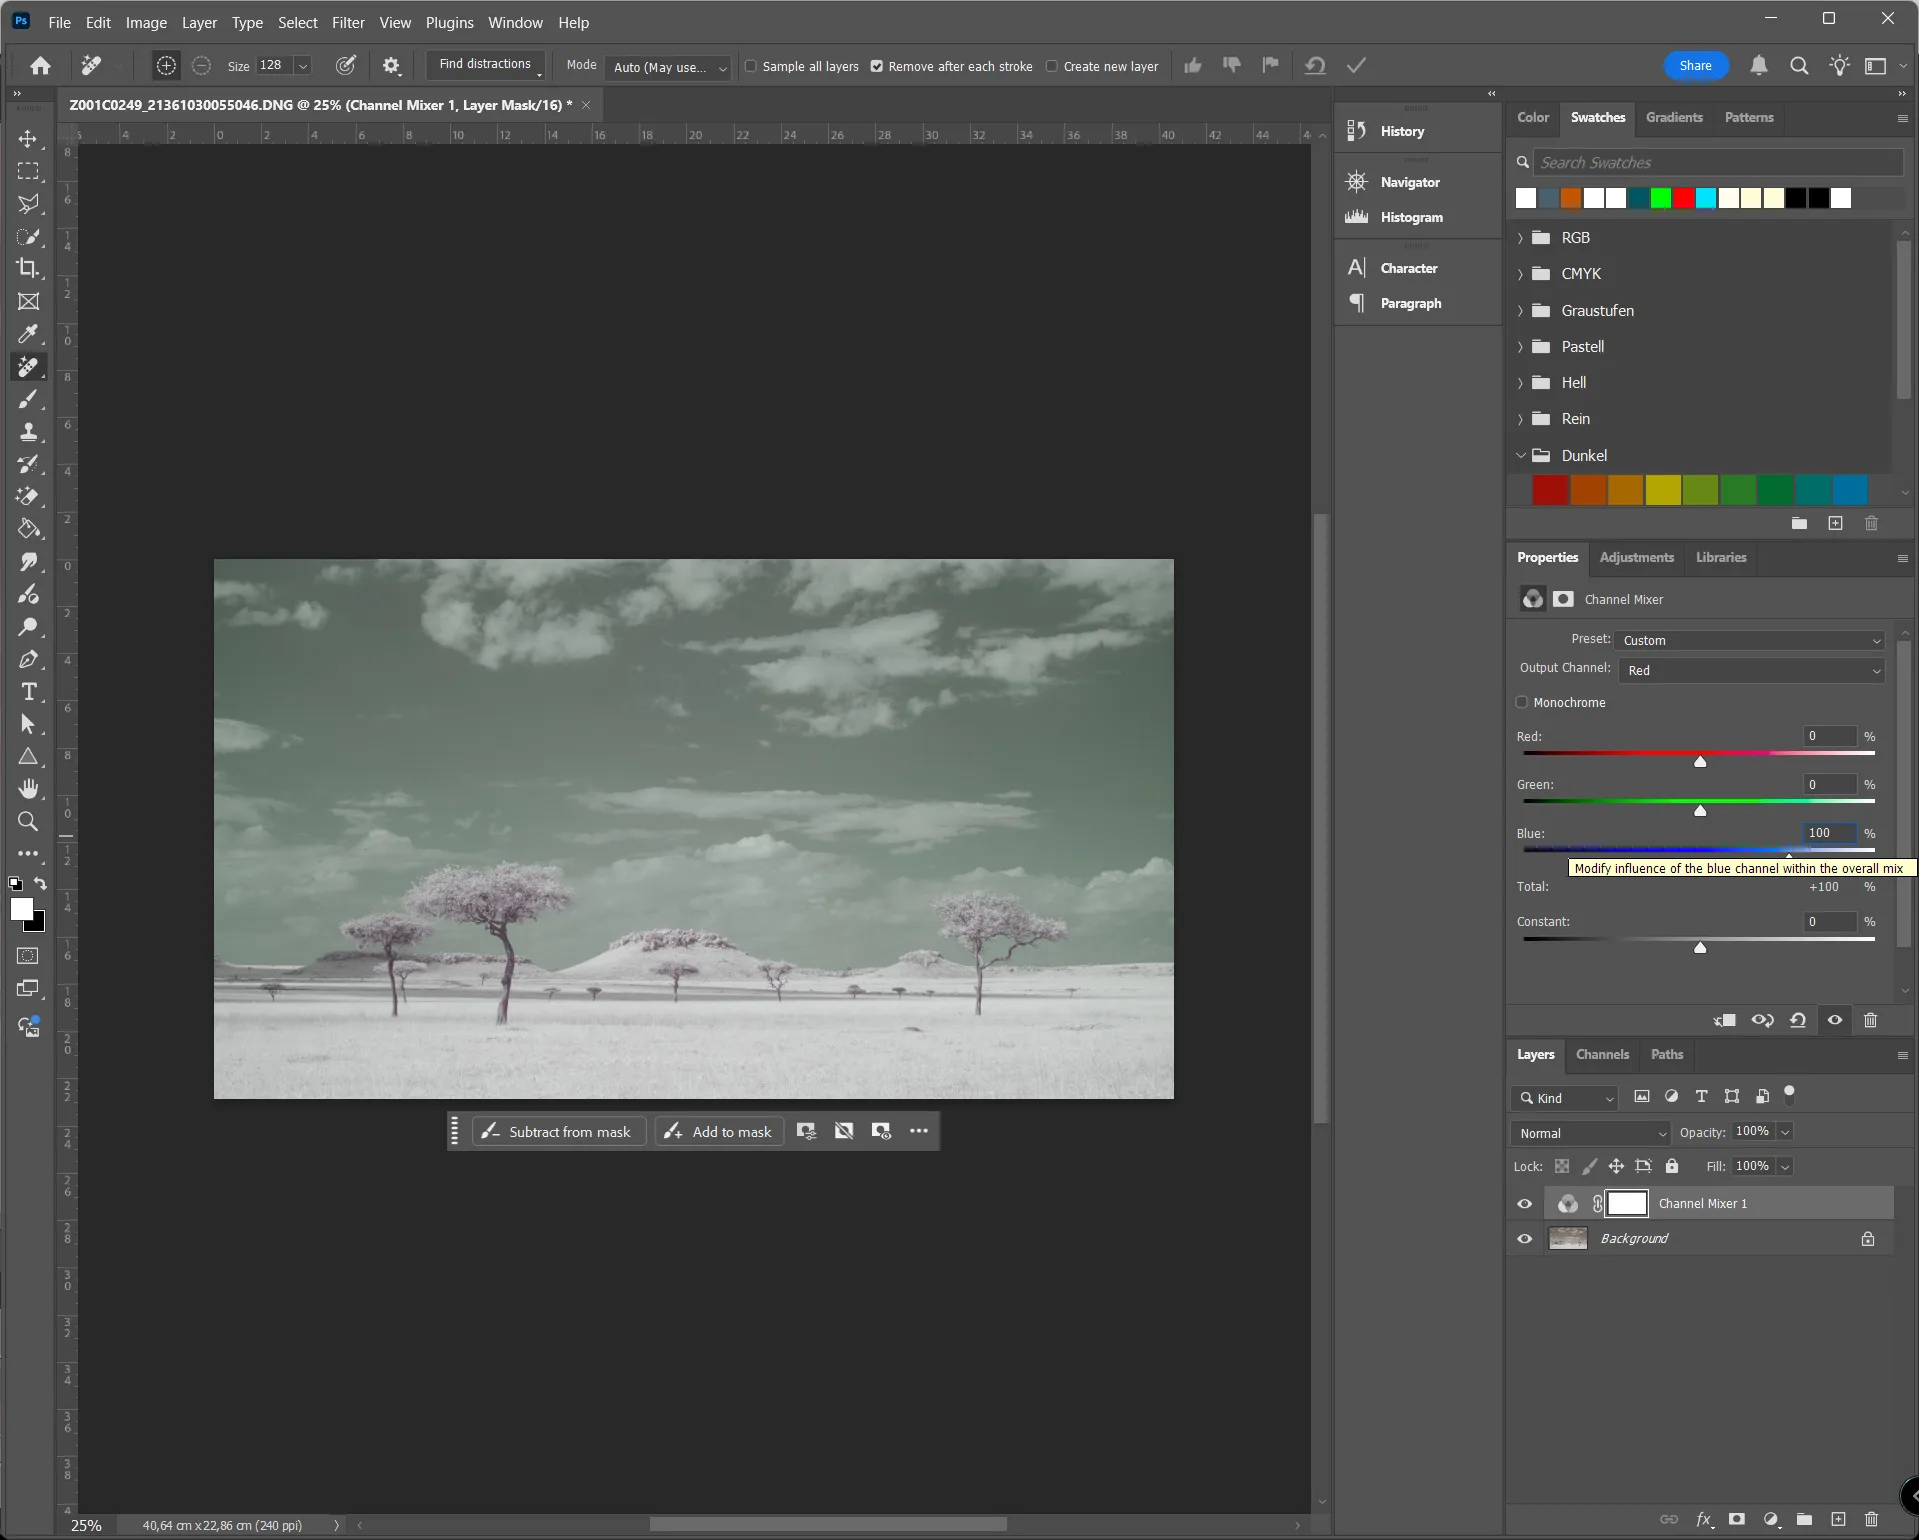
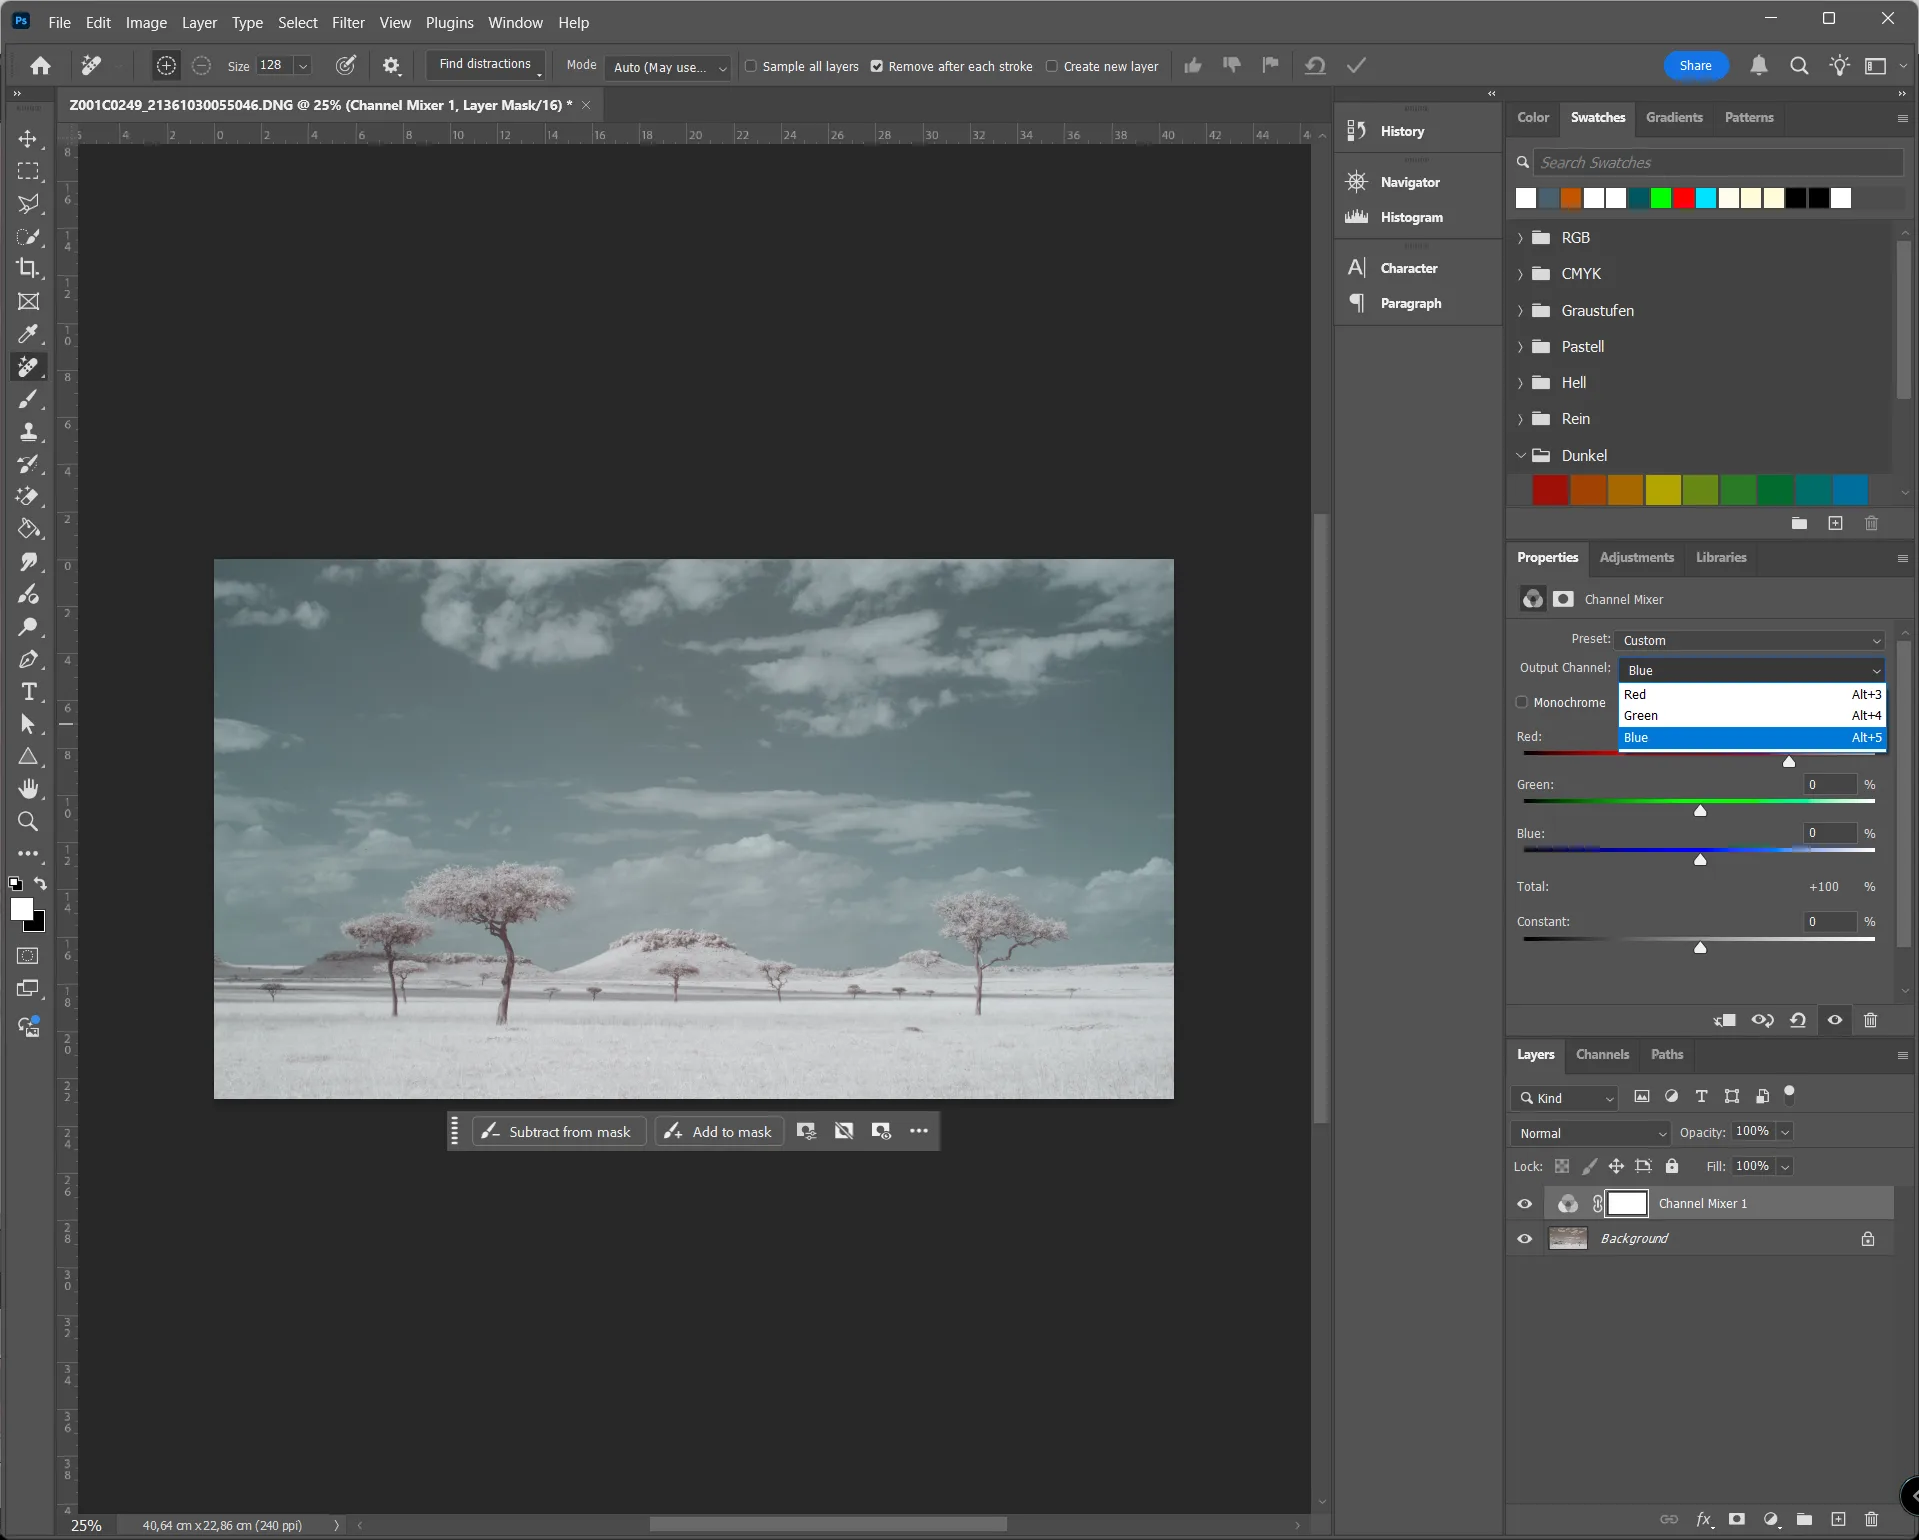
Color Swap – The Artistic Choice
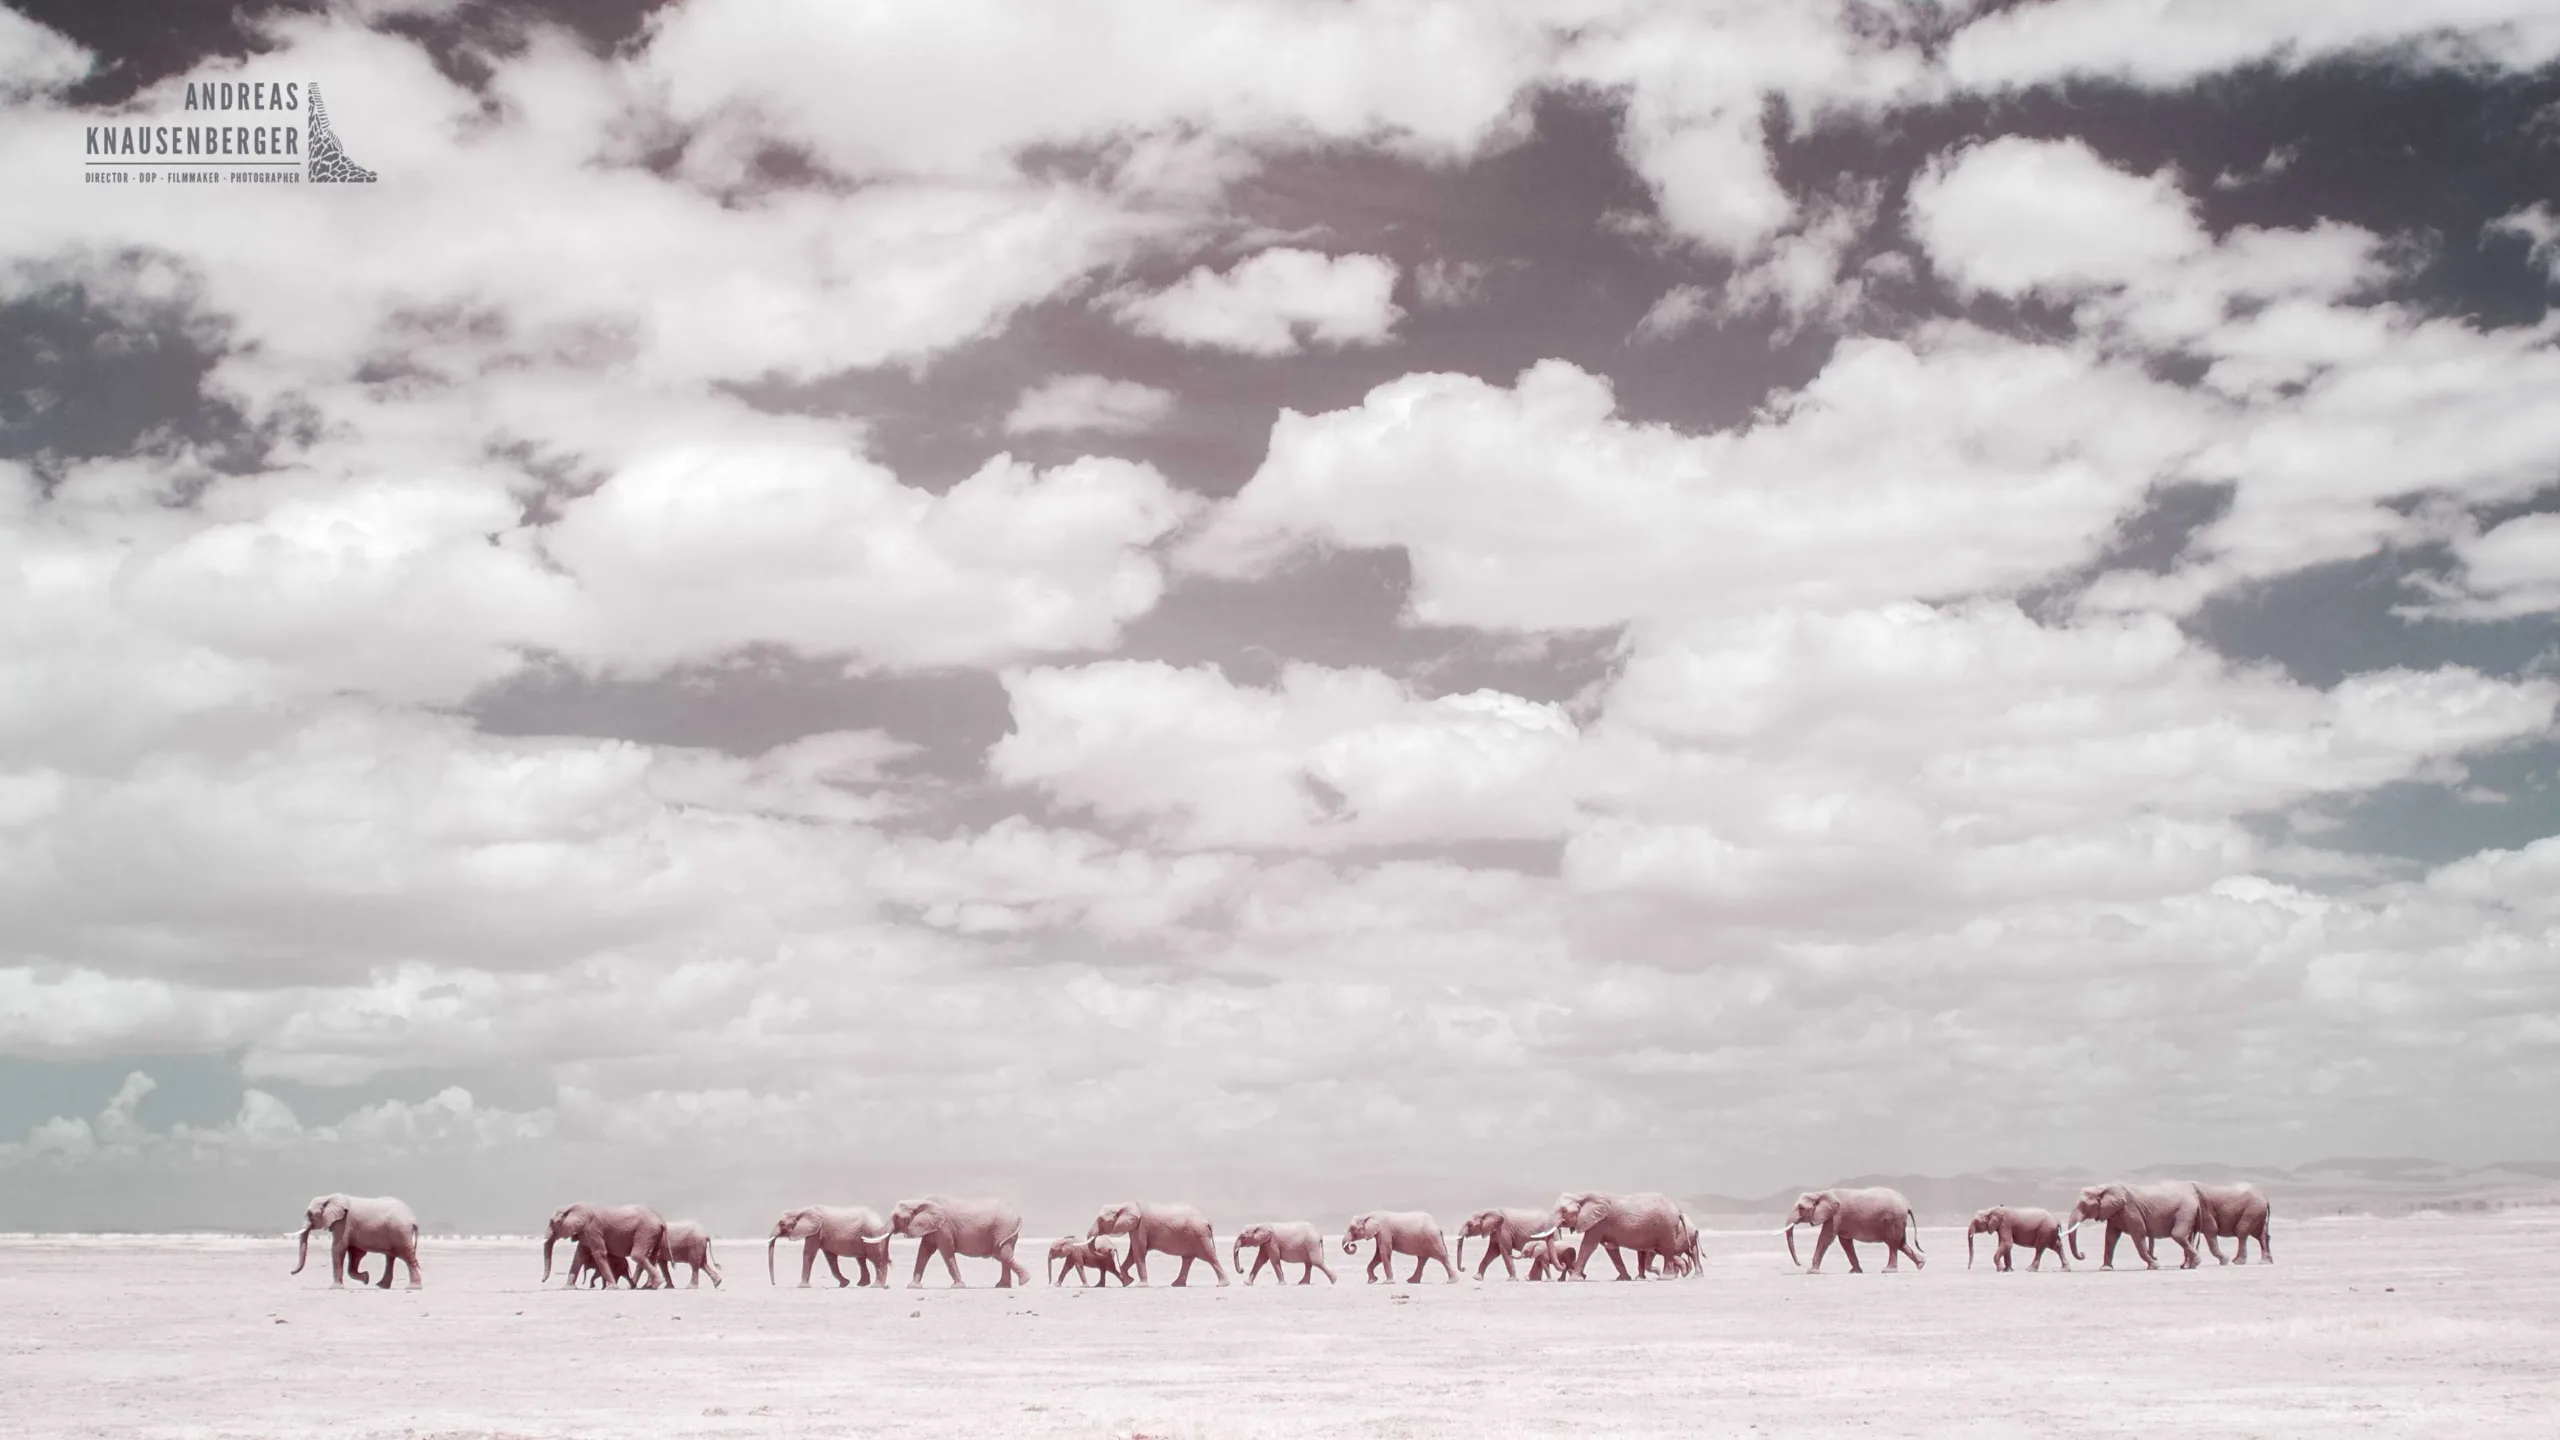
In post-processing, you have some creative freedom. A standard infrared wildlife photography image (720 nm) will show a brown/orange sky, white foliage, and deep contrasts—a striking look. But if you want a blue sky, you can perform a color swap in Photoshop, switching the red and blue channels.
To do this:
- Add an Adjustment Layer → Channel Mixer.
- In the Red channel: set Red = 0, Blue = 100.
- In the Blue channel: set Blue = 0, Red = 100.
The result is a blue sky with pinkish foliage—a look I personally love. You can record a macro in Photoshop to automate this. (See Adobe’s website for tutorials.)
Final Thoughts
I absolutely love infrared wildlife photography!
With this article, I wanted to give you an opportunity to explore this exciting side of wildlife photography—something new, creative, and different from the “normal” pictures we usually take on photo safaris.
Yes, it takes time to master, but I hope this guide makes your starting point easier than mine was when I began this fascinating journey.
If you’d like to join me on one of my guided photographic safaris, please send an email to andreas@africawildlifeproductions.com, and I’ll share the dates and details for upcoming expeditions.
Well done. Excellent review of how to do infrared photography. Thumbs up!
Magic! Cool! Wonderful! And perfectly described. Chapeau, Andreas!