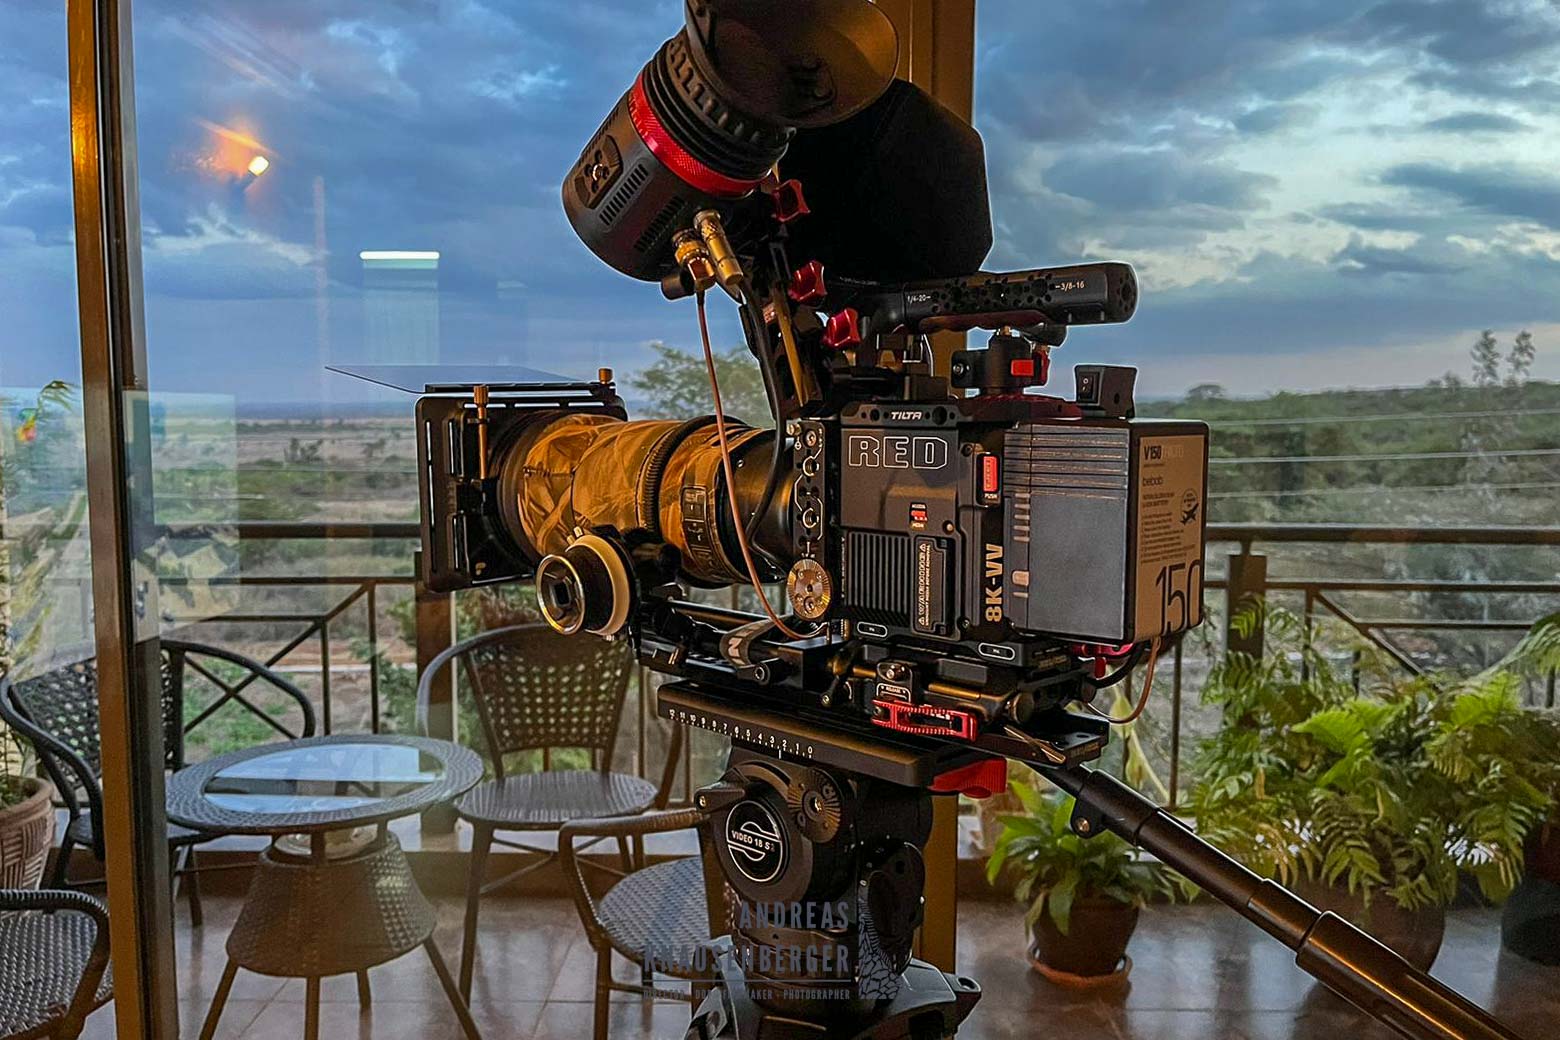
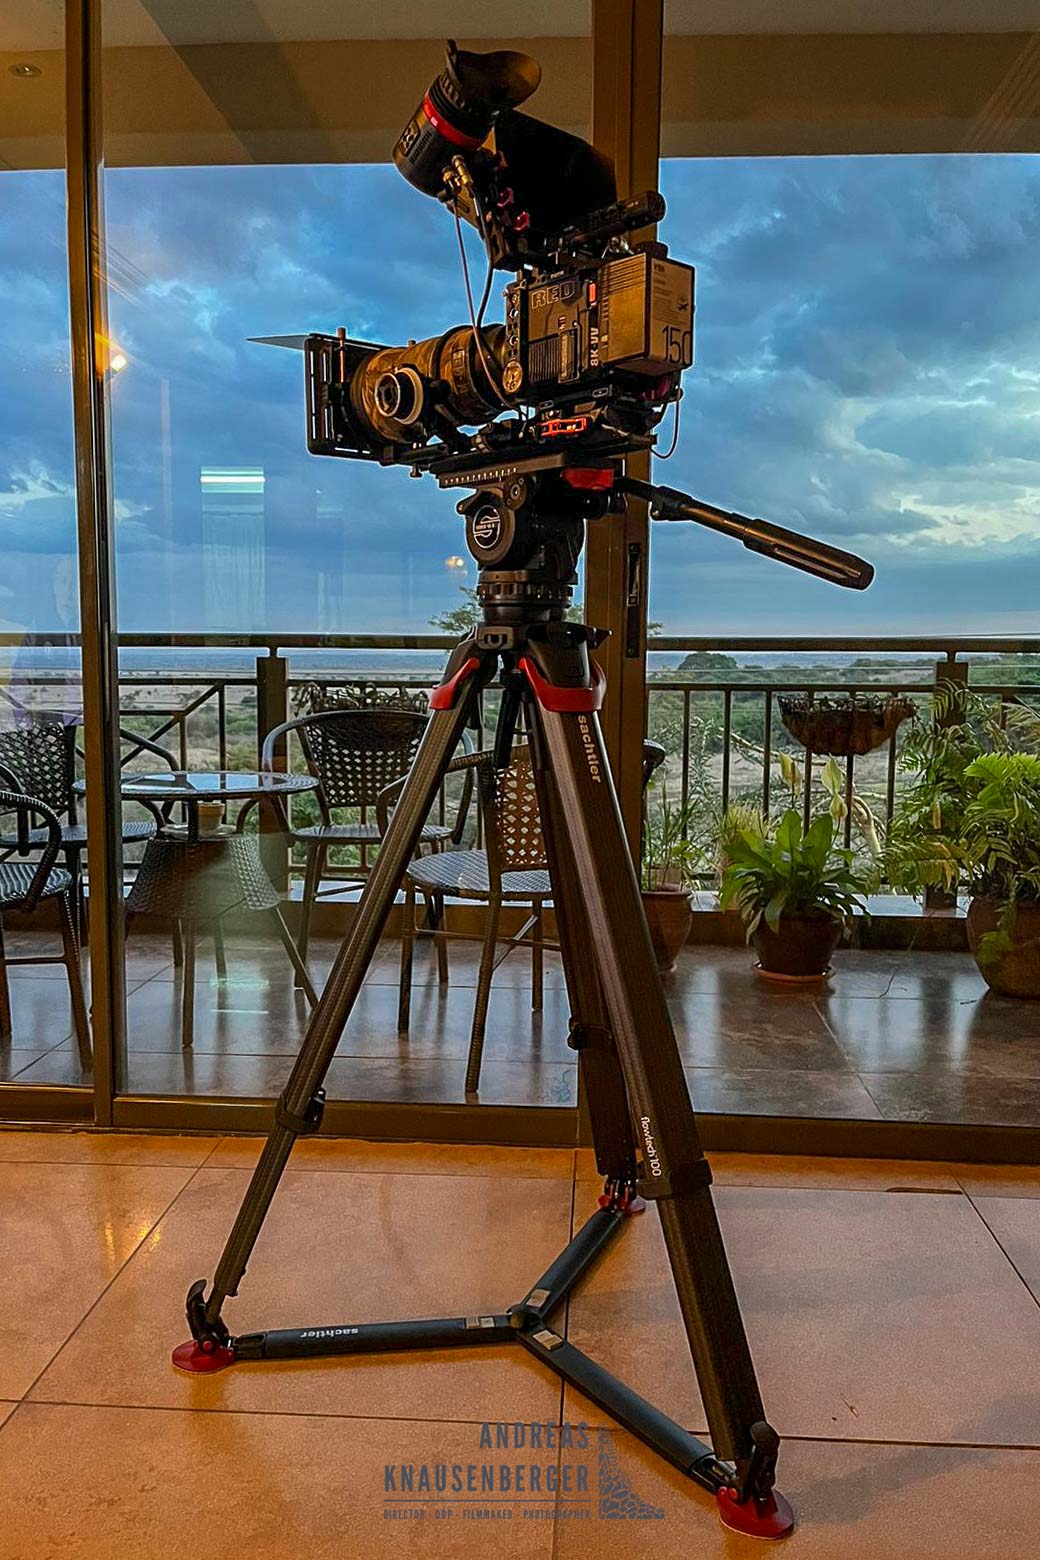
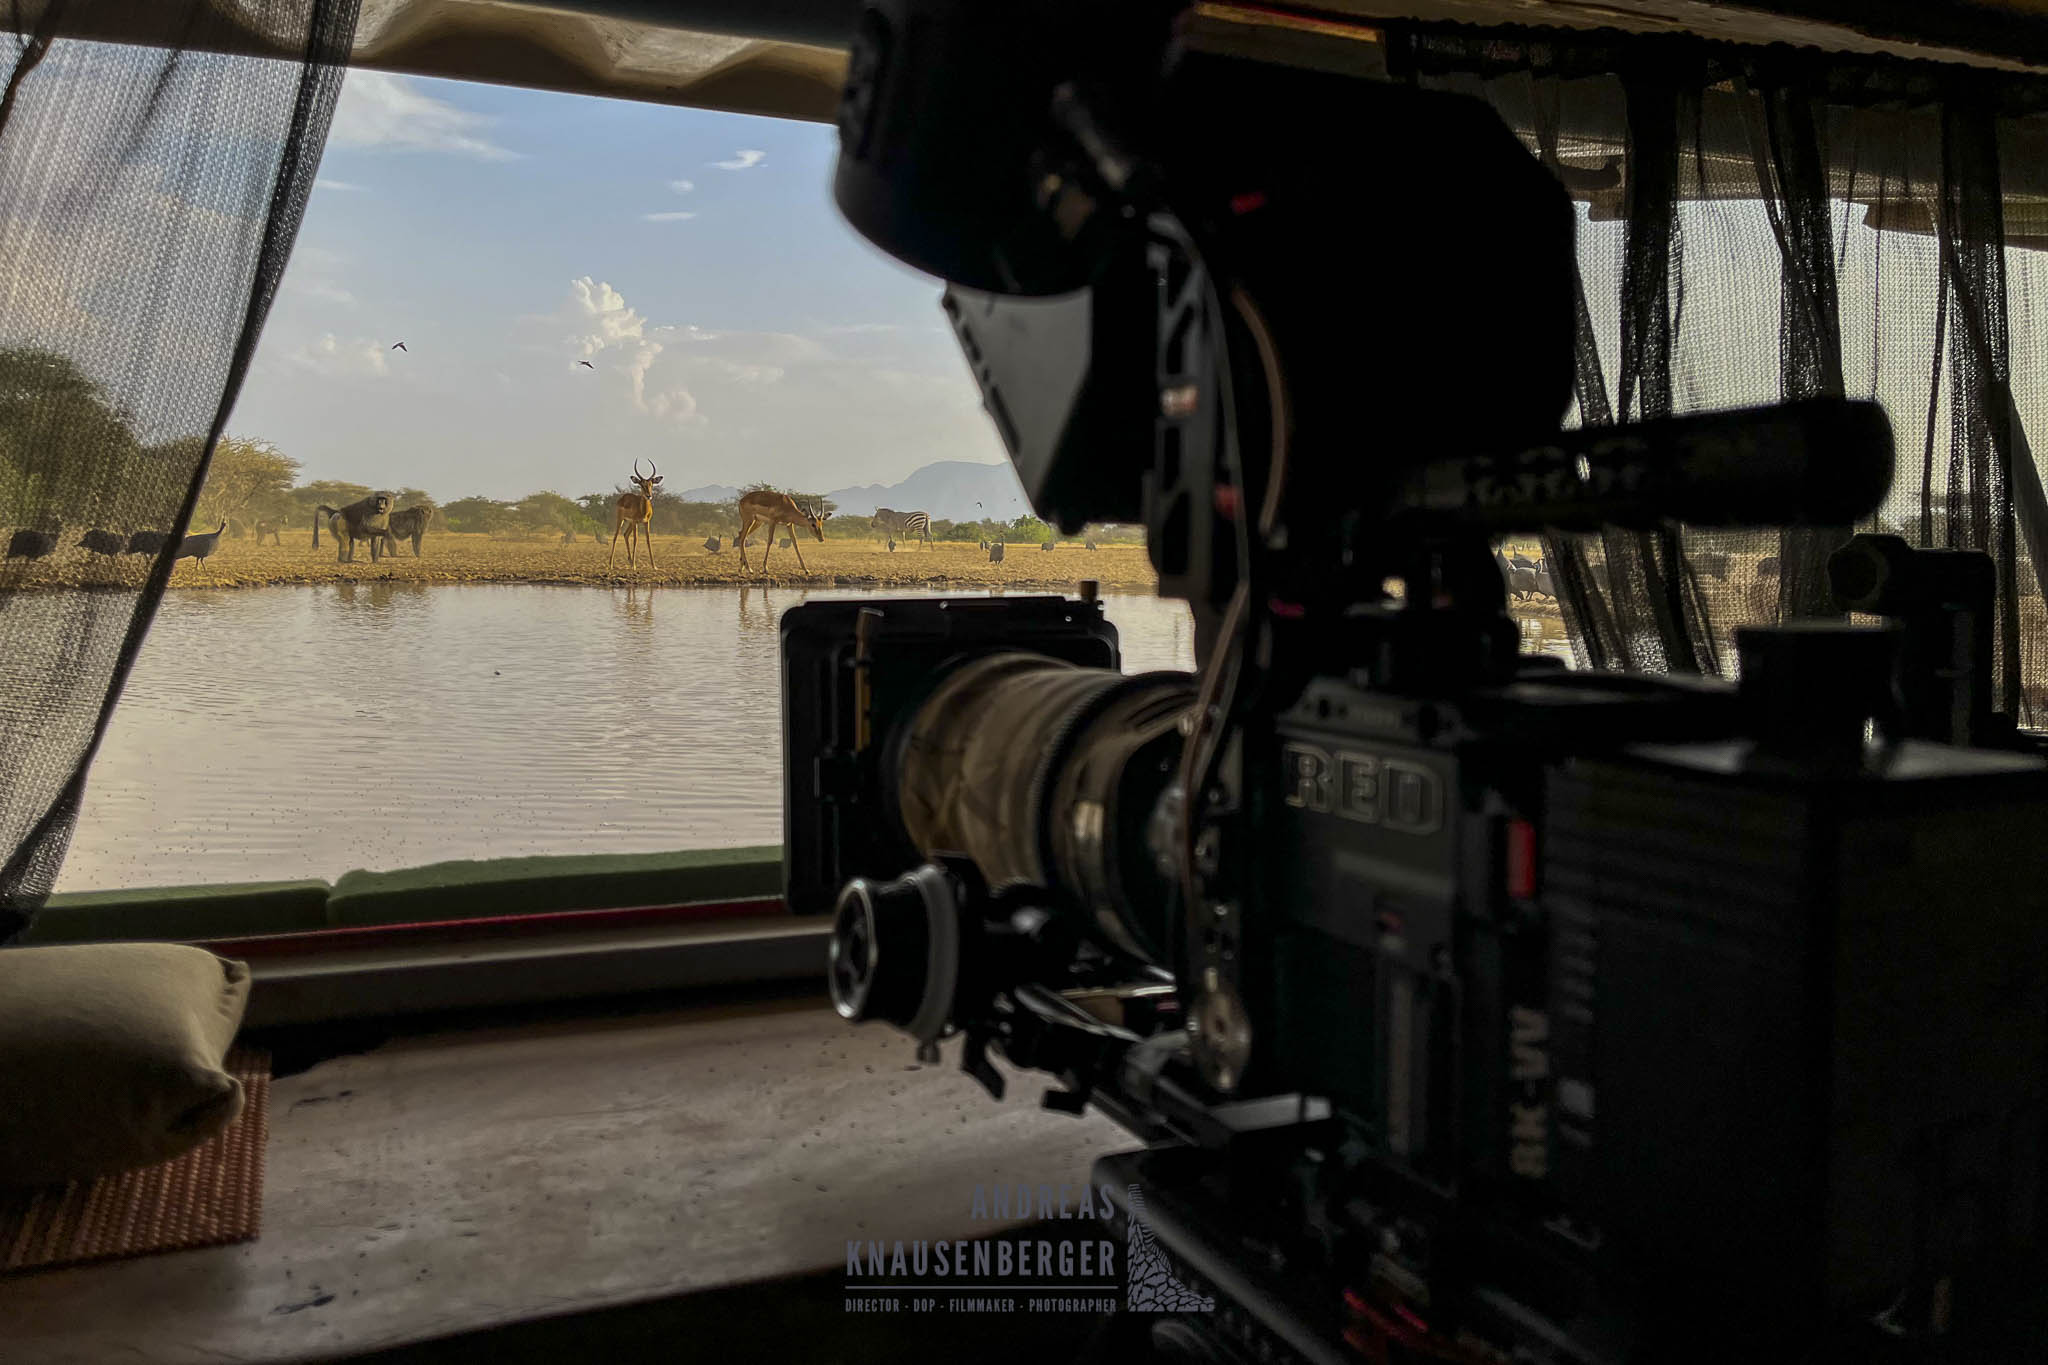
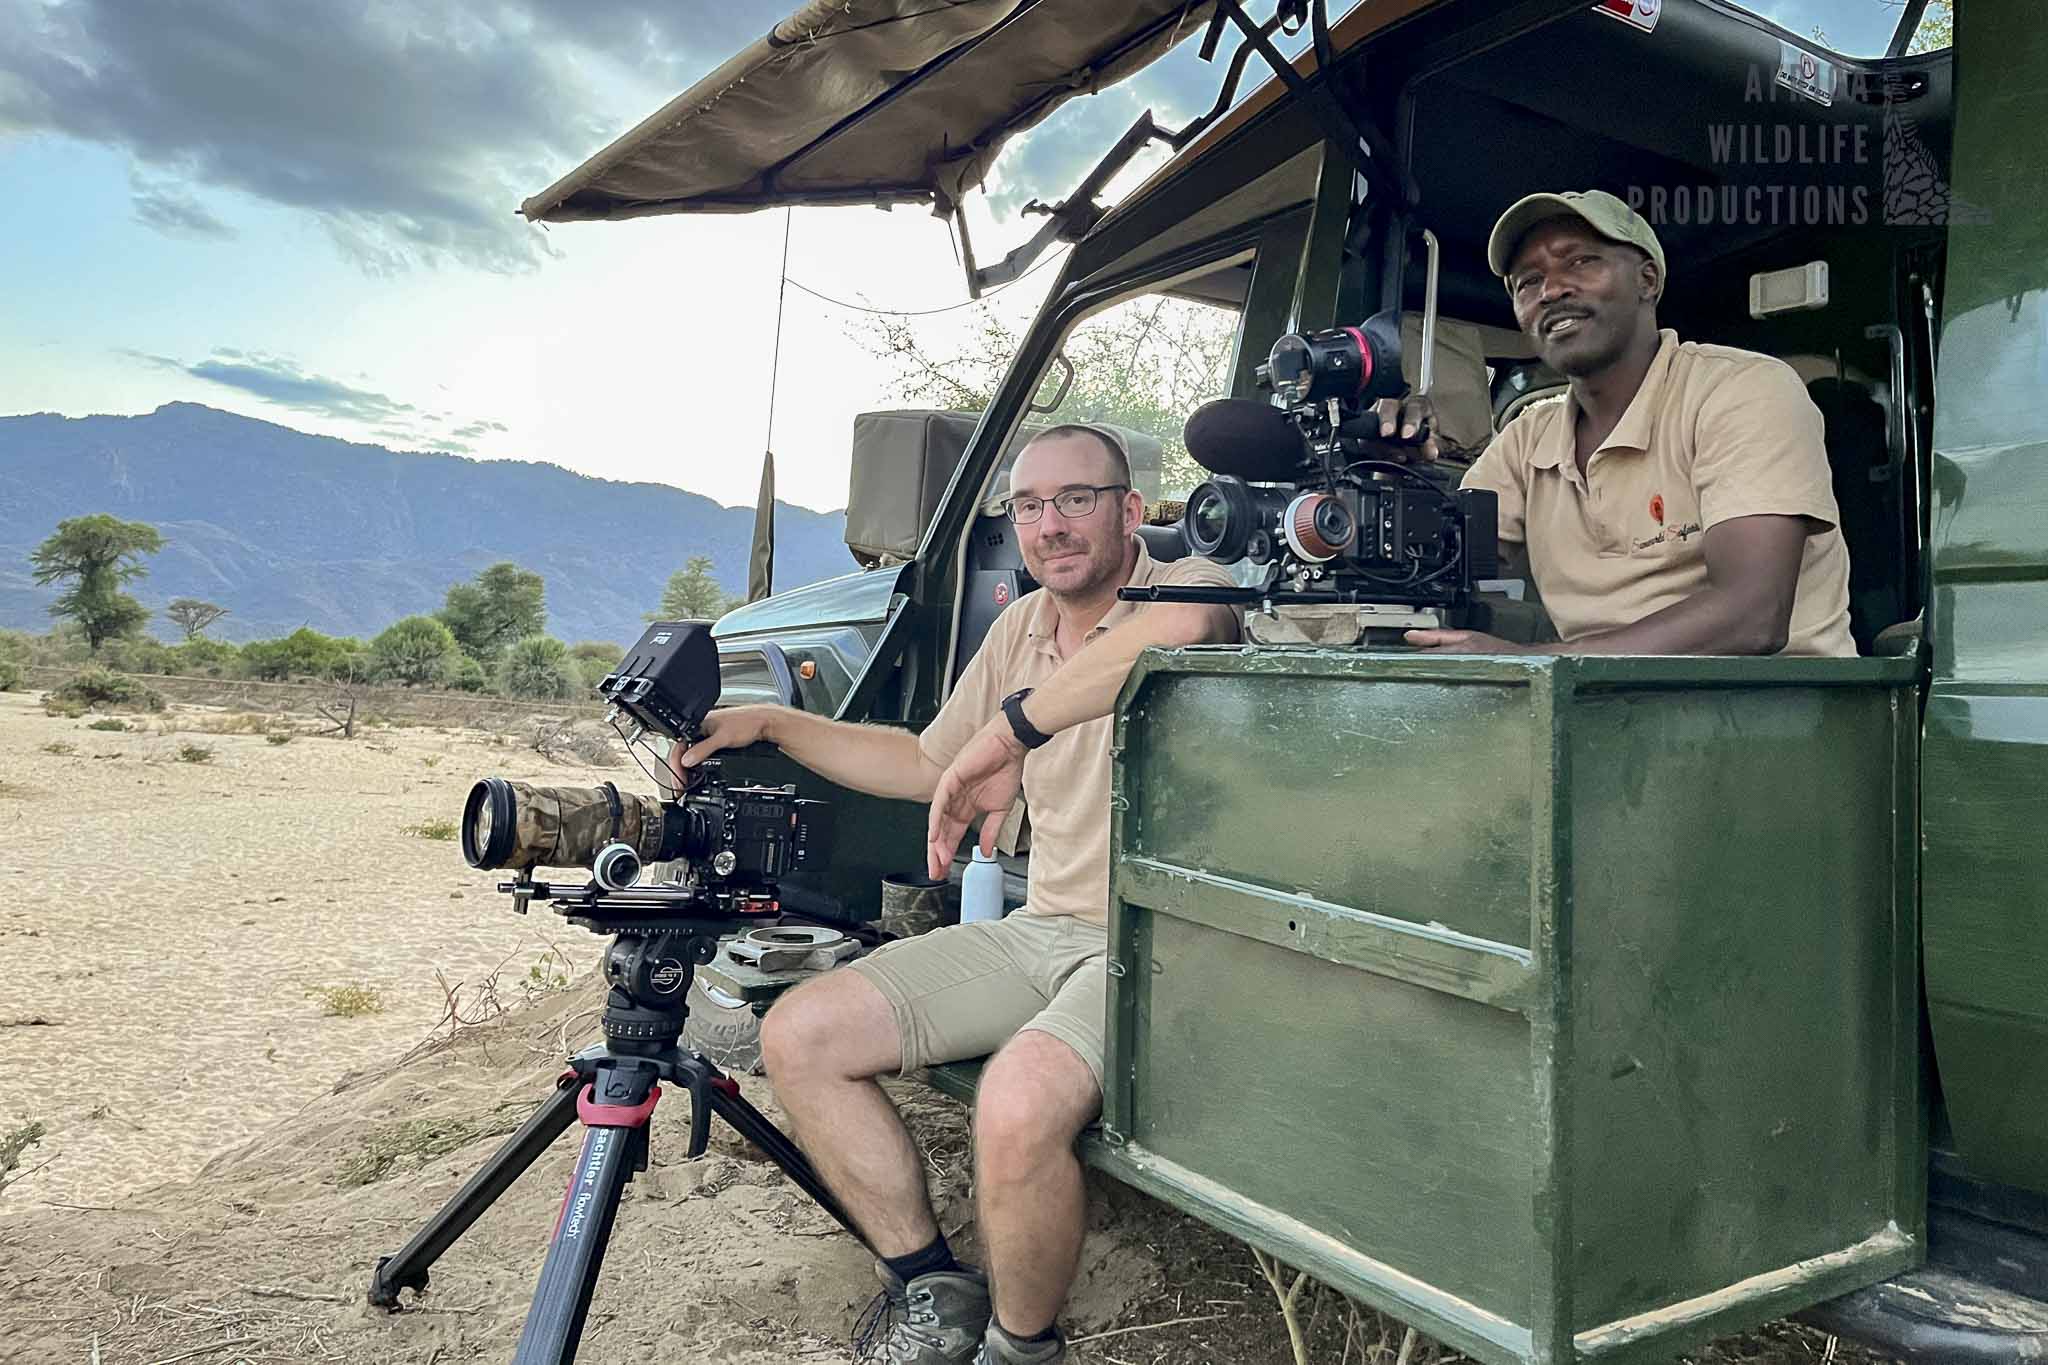
RED V-Raptor Wildlife Camera Rig!
In this article I will show you my RED V-Raptor wildlife camera rig and what rig parts I use to film wildlife in Kenya.
Tripod - Sachtler Flotec 100 & Sachtler Video 18 S2:
On the last shoot I had some problems with the older Sachtler tripods when it came to the time you need to adjust the tripod legs and level the head. With the Flotec 100, I can adjust the height of the tripod in seconds! The Sachtler Speed Level Clamp is also amazing as it allows to level the fluid head in a very short time. Which is crucial especially when filming from a car.
In some situations you have only a few seconds time to level the head and start filming. With the new Sachtler Speed Level Clamp, leveling the fluid head is lightning fast, every wildlife filmmaker’s dream!
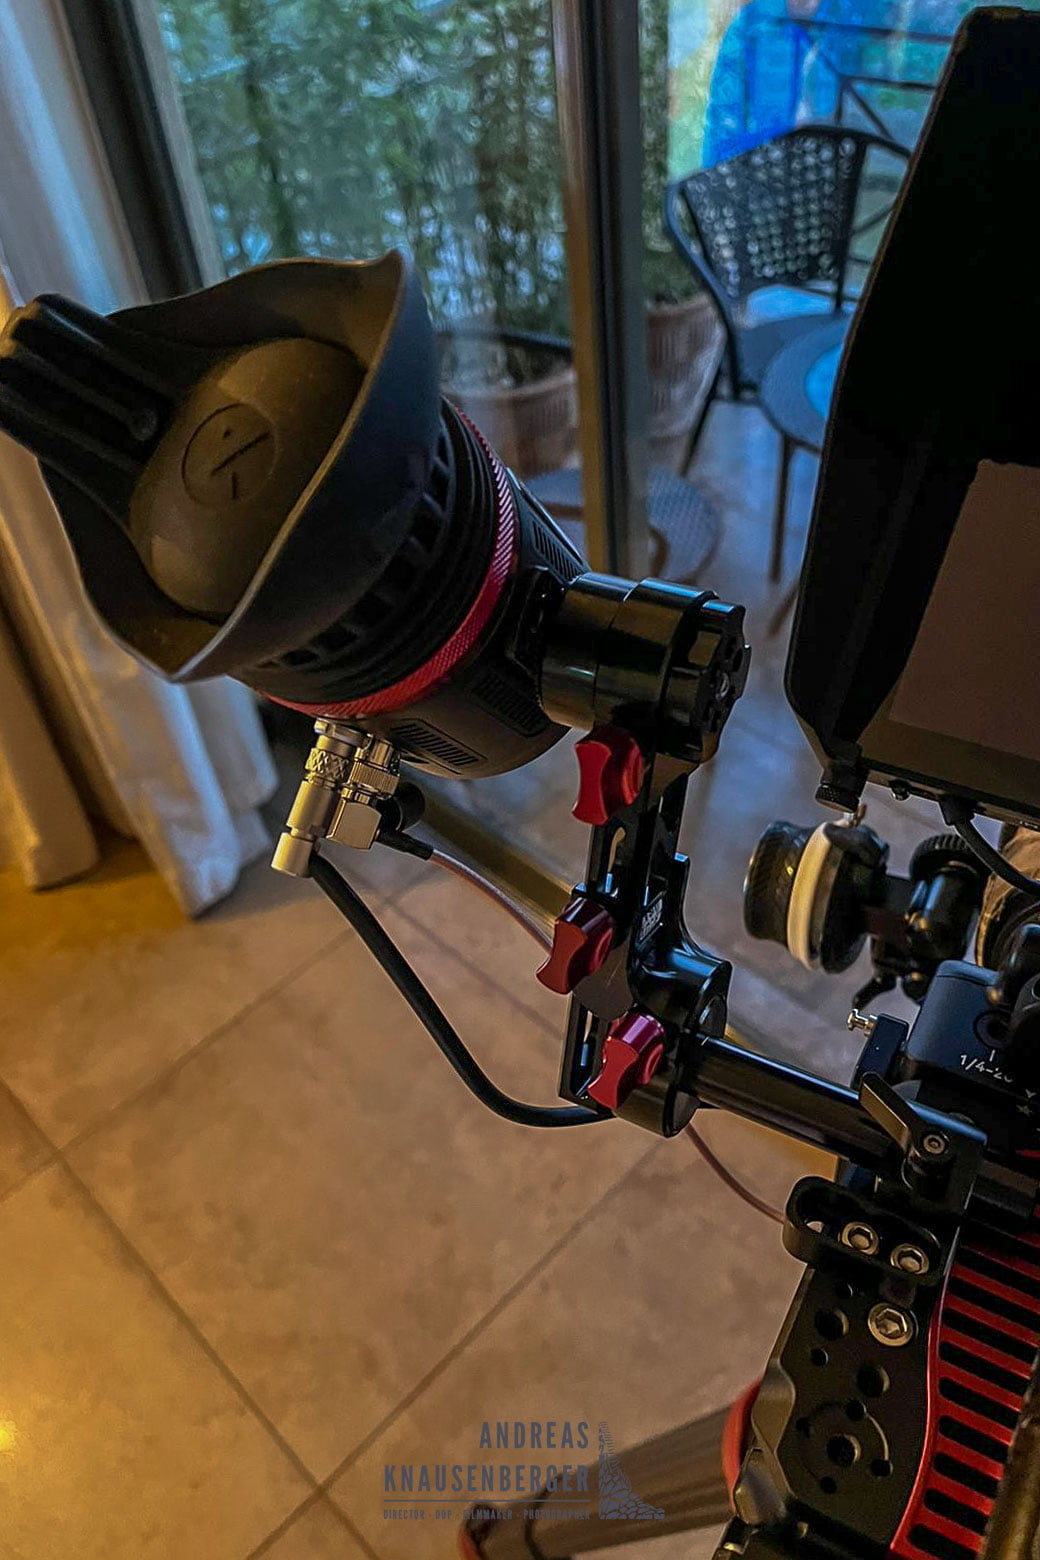
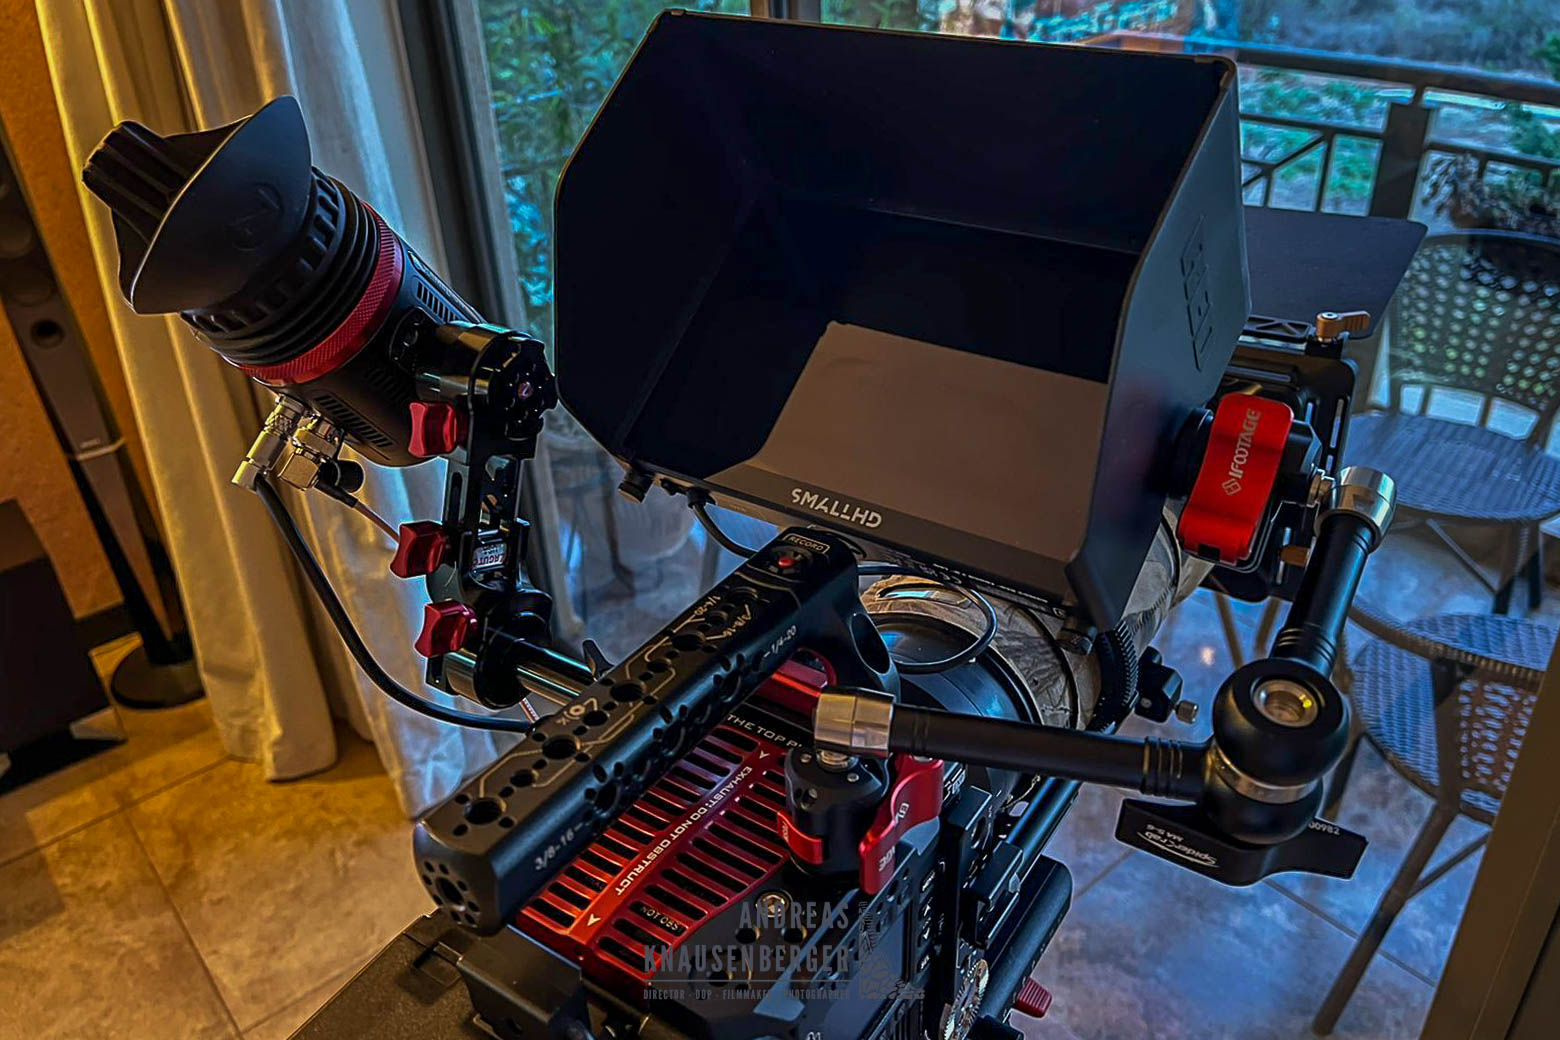
Zacuto Kameleon Pro EVF & Zacuto Axis Mini EVF Mount:
The power and SDI cable is from Zacuto itself and it is a little bit long for my taste. But it has an on/off switch which allows to switch the EVF on and off. Very helpful as well in the field while waiting for something to happen on a sighting.
As a mounting option I choose the Zacuto Axis Mini EVF mount. To mount the Axis Mini to the camera I have used a Small Rig 15mm rod adapter which is then mounted on the Tilta RED V-Raptor Top Plate.
Spider Crab MA5-6 - DMCS3 Monitor Mount Solution:
The original RED monitor mount was clearly not ideal for wildlife shoots. There was no way to tilt the monitor in a way usable to angle other than shooting straight forward out of the camera door. Therefore I was looking for a solution where the monitor can be used in all different tilts and angles.
After spending long hours in research I came across the SPIDER CRAB MA5-6. A rock solid articulating arm with quick release mechanism. So you can quickly remove the monitor and arm if needed in seconds.
The Spider Crab MA5-6 is mounted to the Tilta RED V-Raptor Top Plate and to the side of the DMCS3 Monitor. Both ends are, as mentioned before, on a quick release module.
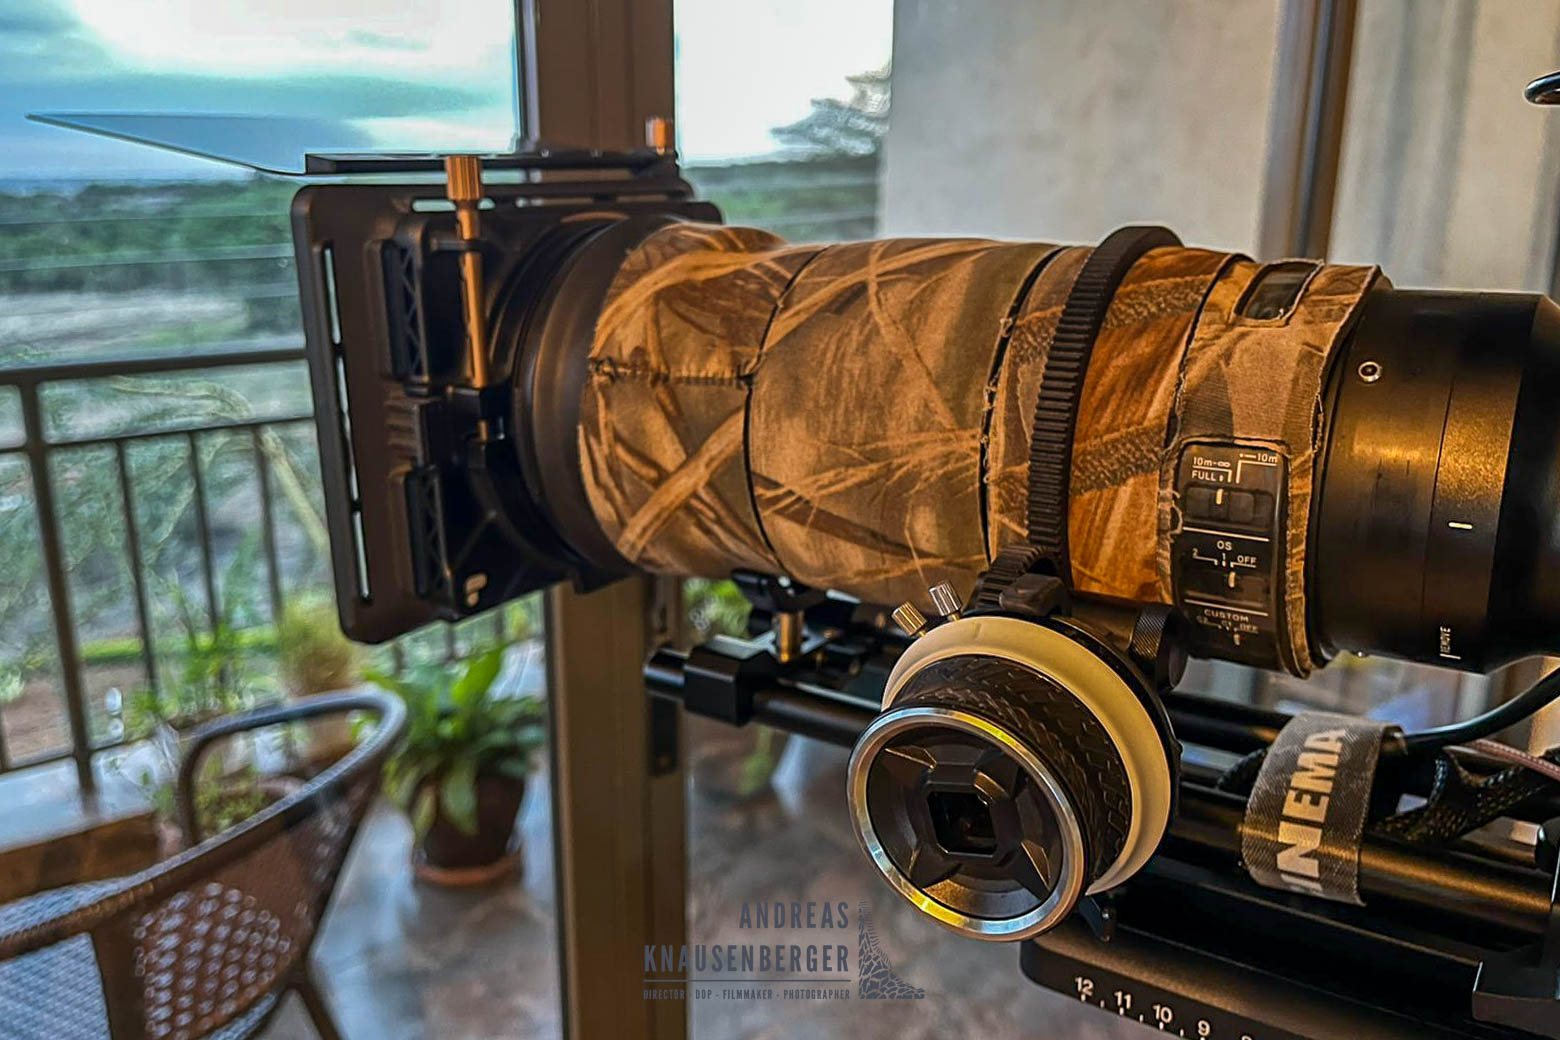
Small Rig Mini Follow Focus & Nitze Lens Mount Support & PolarPro Basecamp Matte Box:
For the bigger and more heavy lenses I bought the Nitze 15mm lens support. A great bit of gear, high quality made and it works with all my lenses I am using for wildlife and run’n’gun IRIX Cine Lenses. Check out my other blog article for more details about the Nitze Lens Support!
As the RED V-Raptor wildlife camera has no inbuilt ND solution you need to use a matte box or screw on filters for your lenses. In my case I had already the Polar Pro Basecamp Matt Box. It fits on my main SIGMA 120-300 f2.8 lens as well as other lenses up to 110mm diameter.
The Basecamp Matte Box is a lightweight, high quality matte box with interchangeable filters. As the light can be quite harsh in Africa, I own the ND2-5 as well as the ND6-9 variable ND filters. These will cover all light conditions!
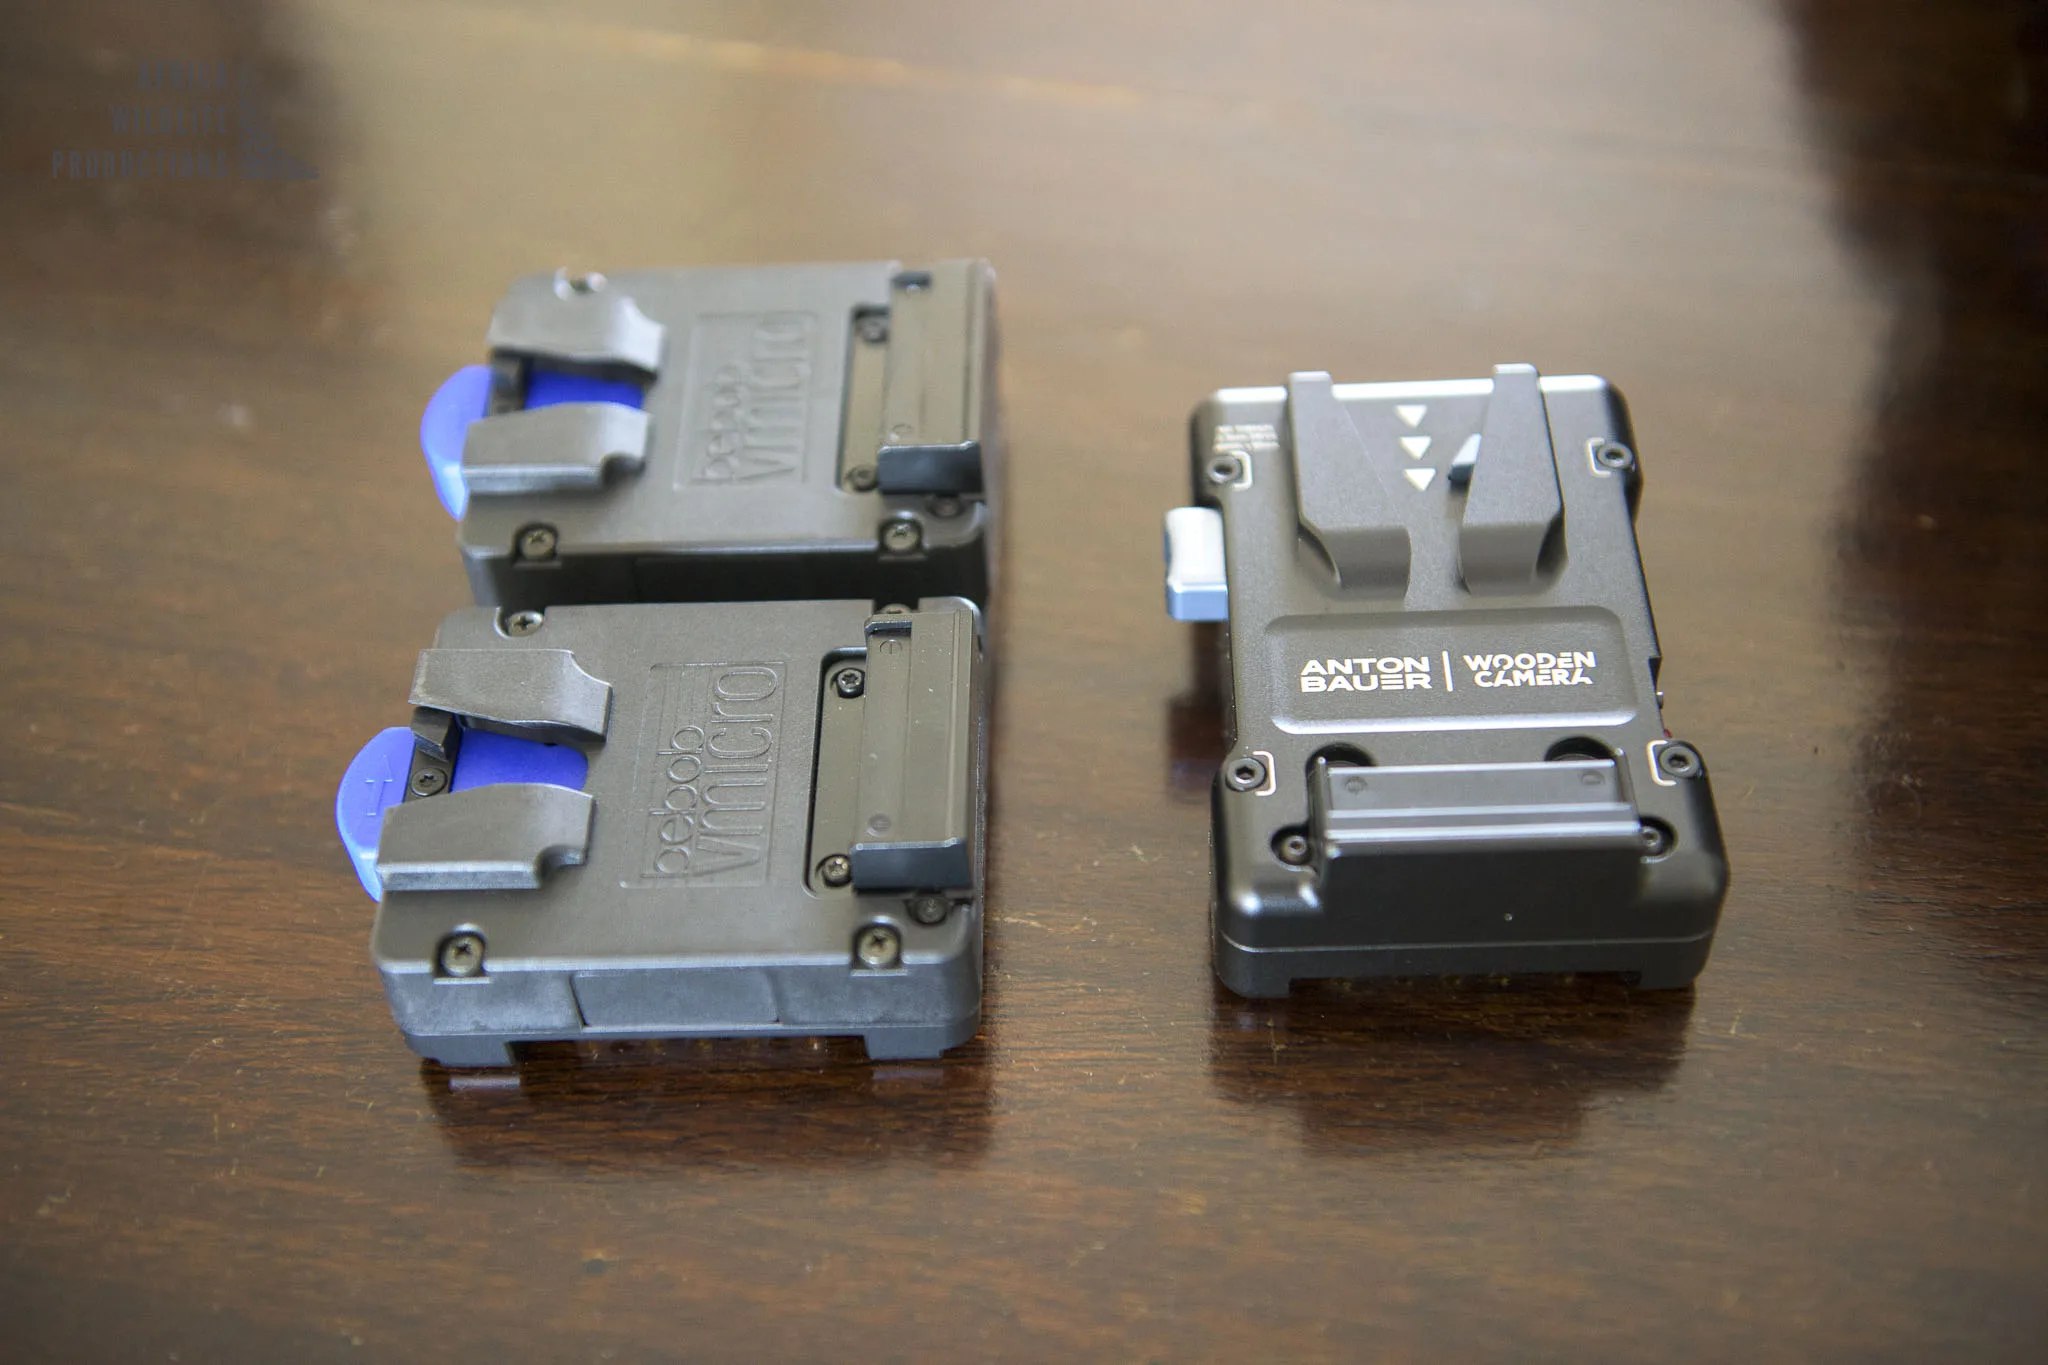
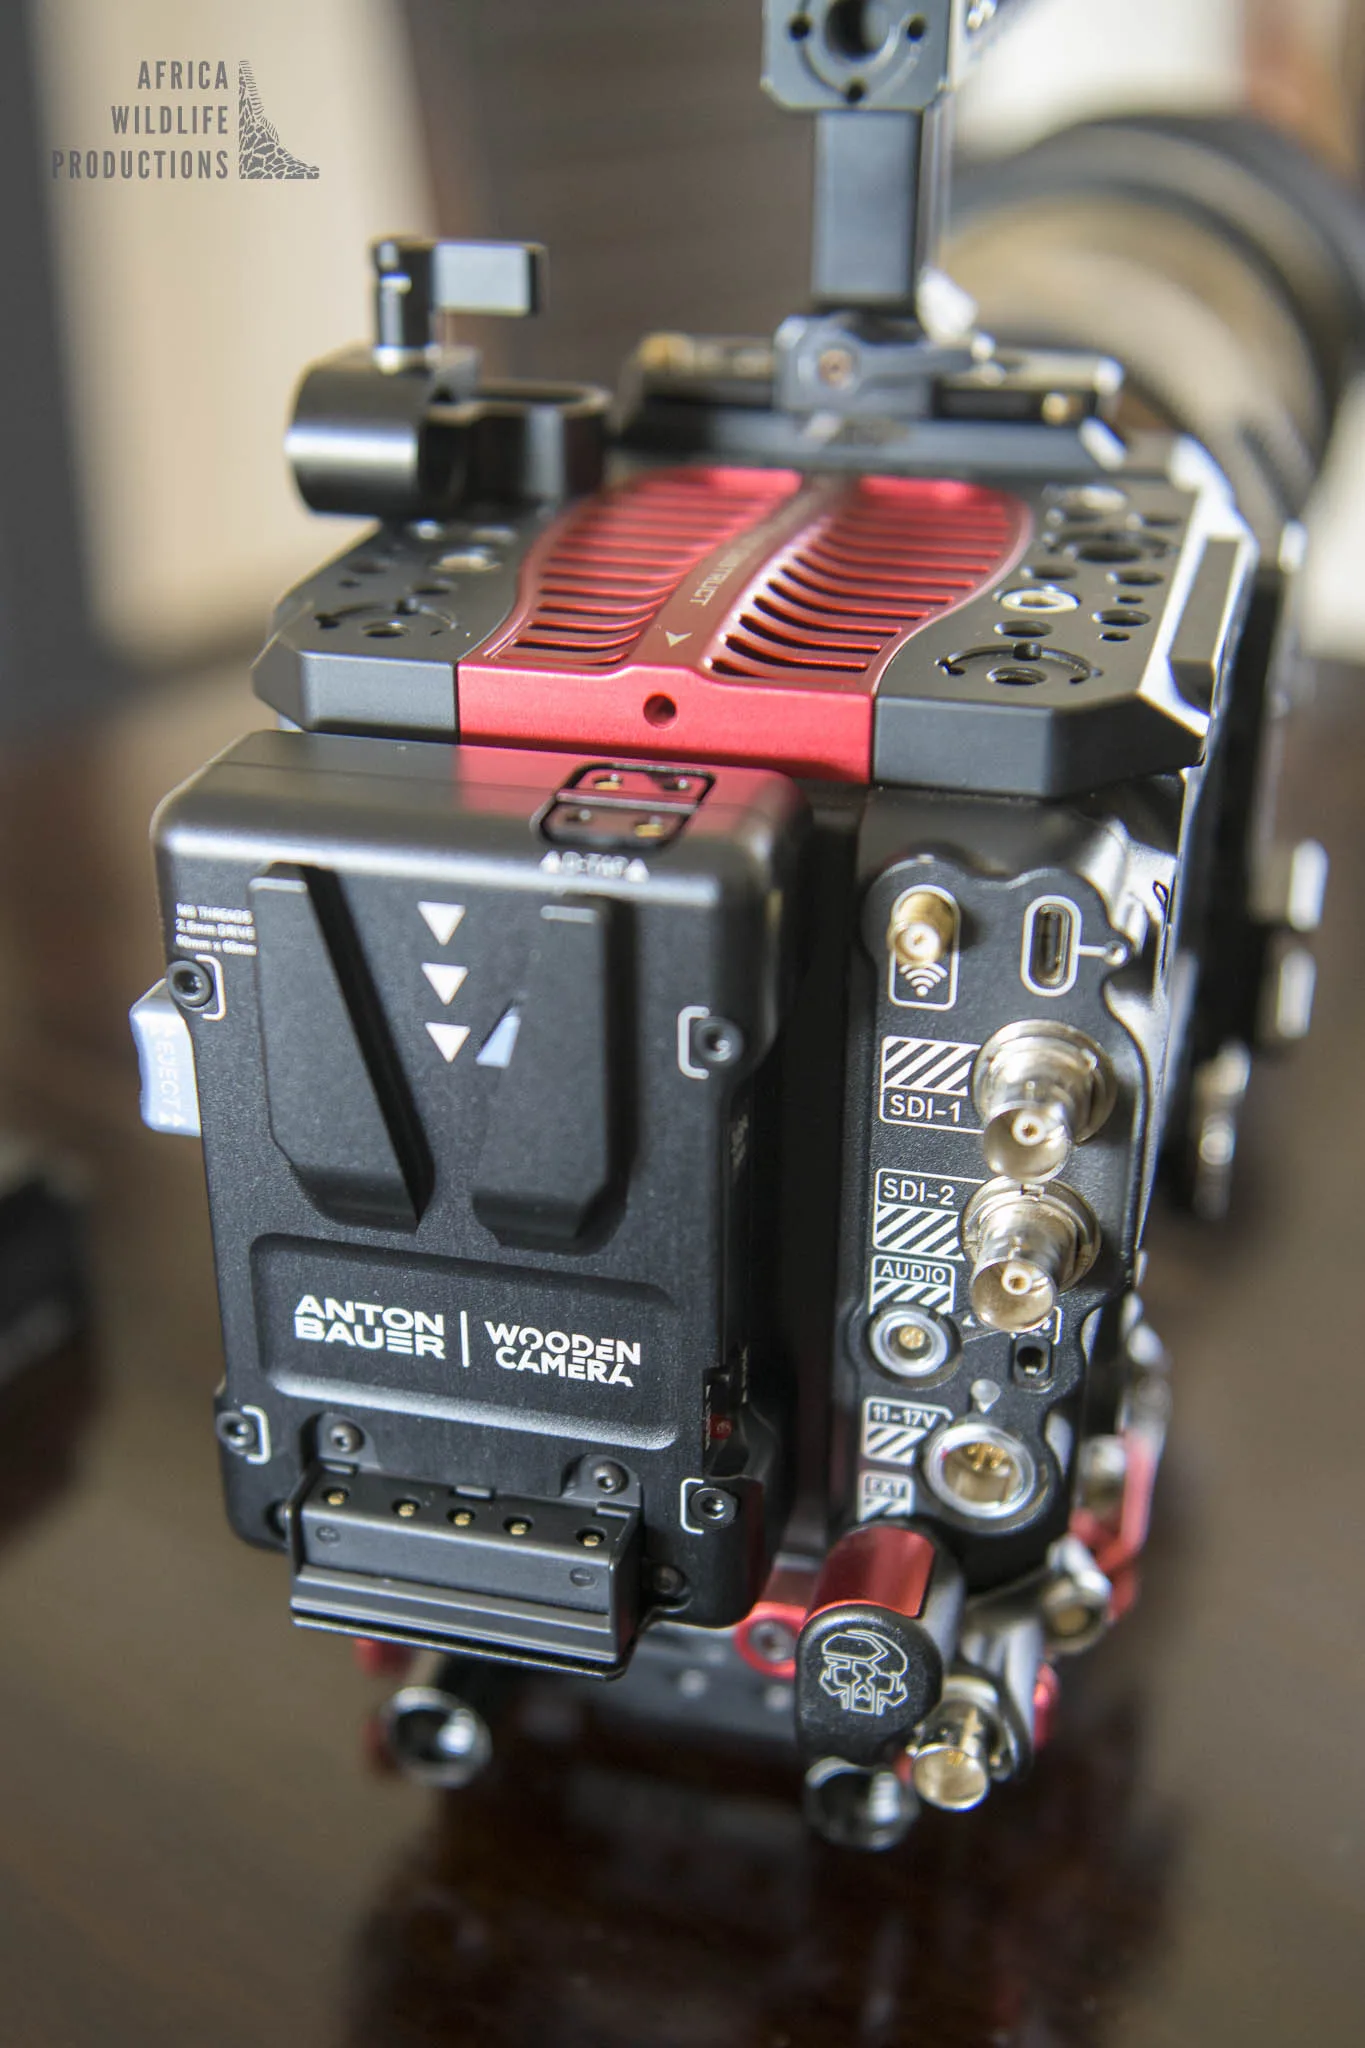
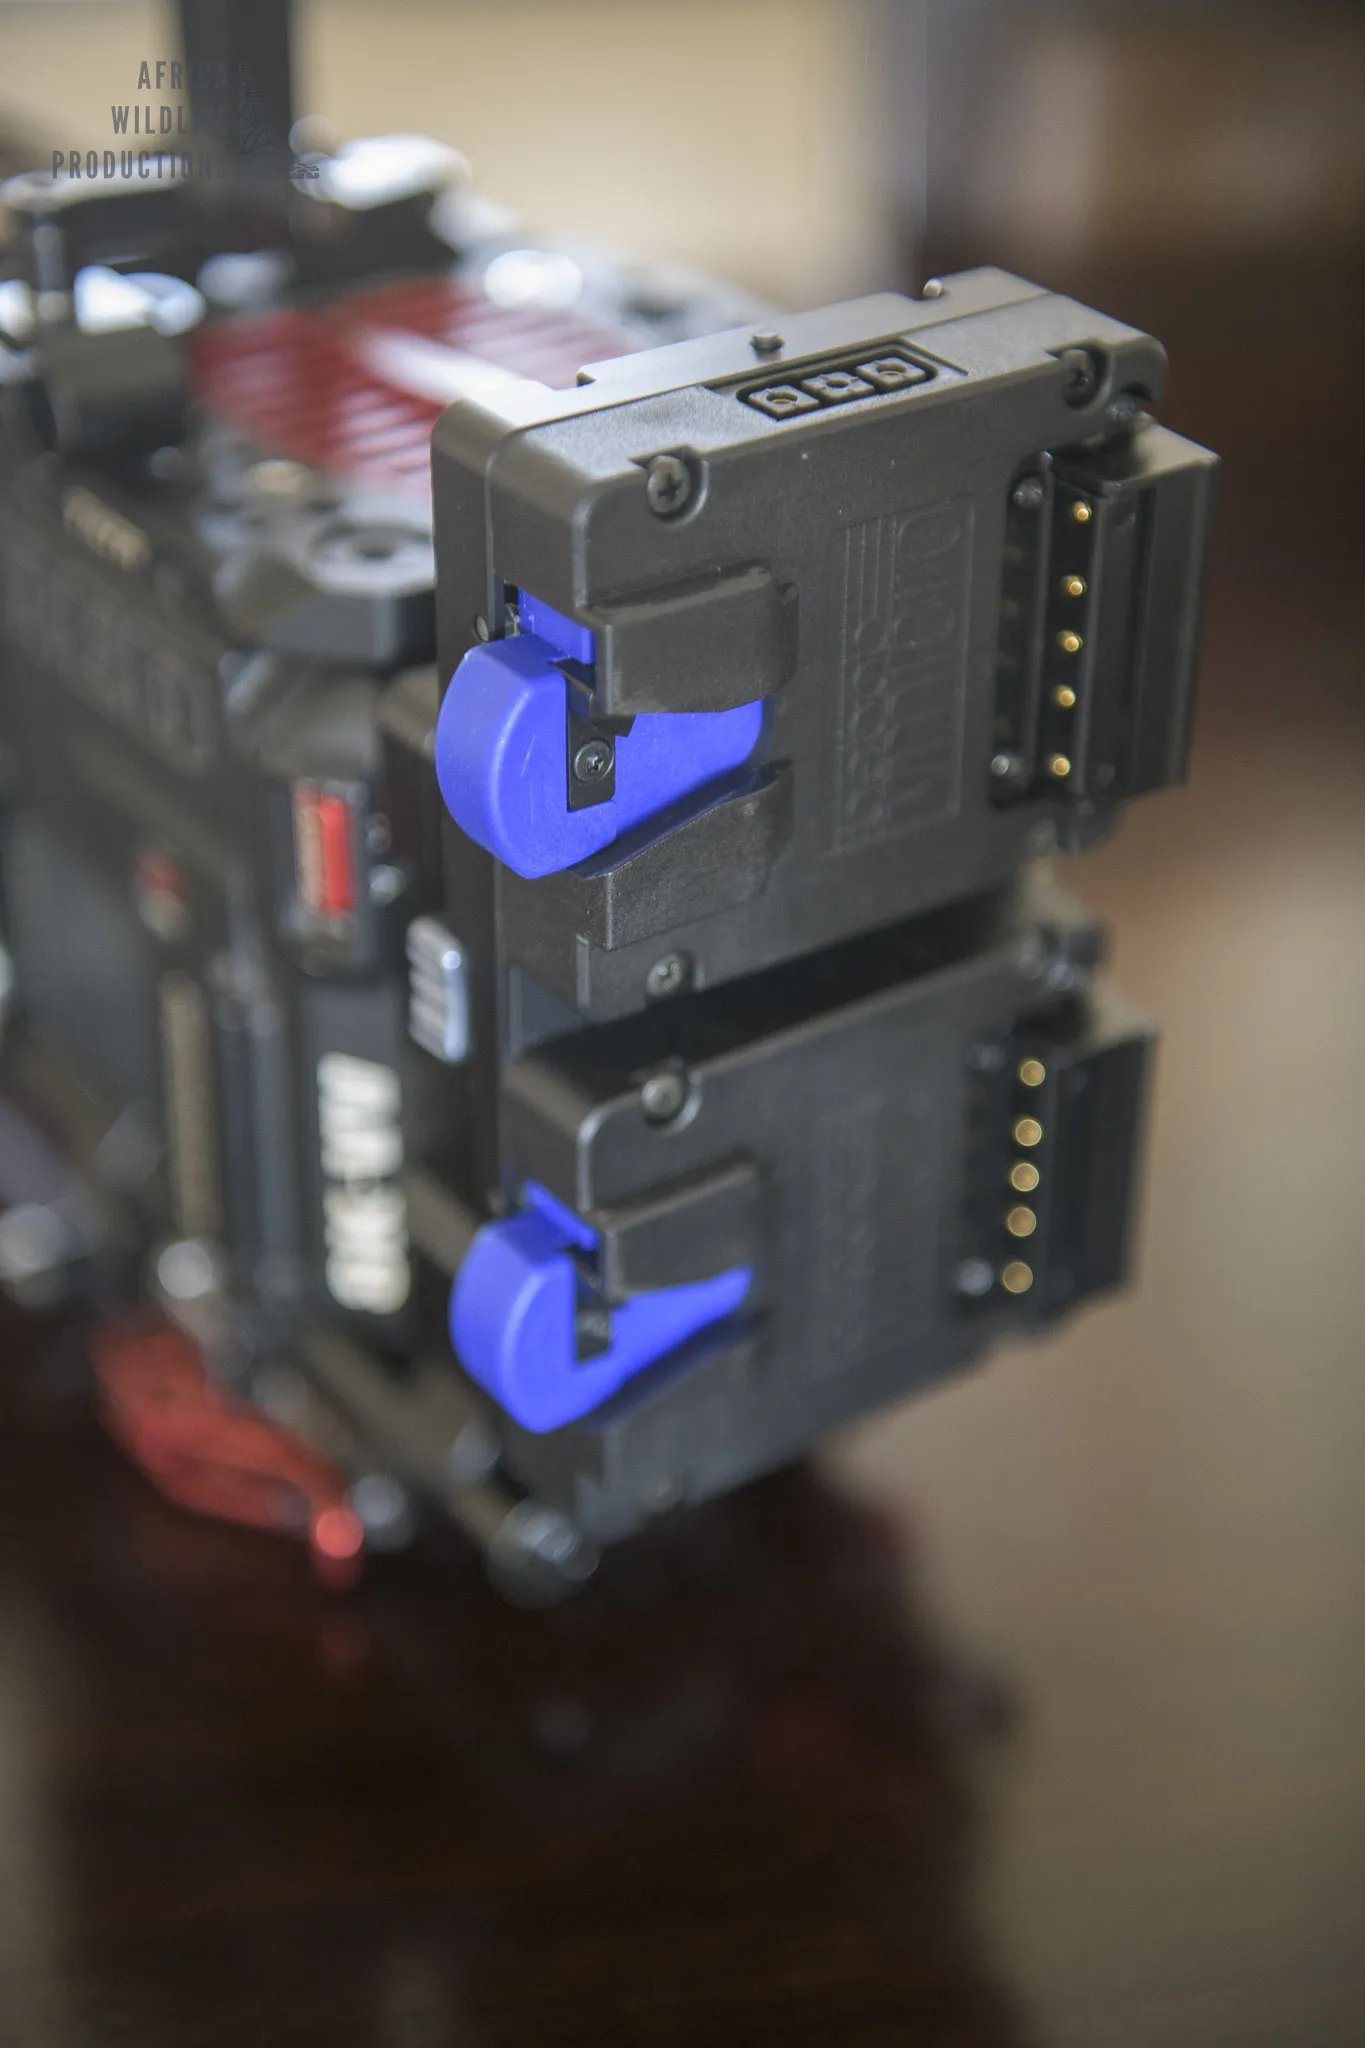
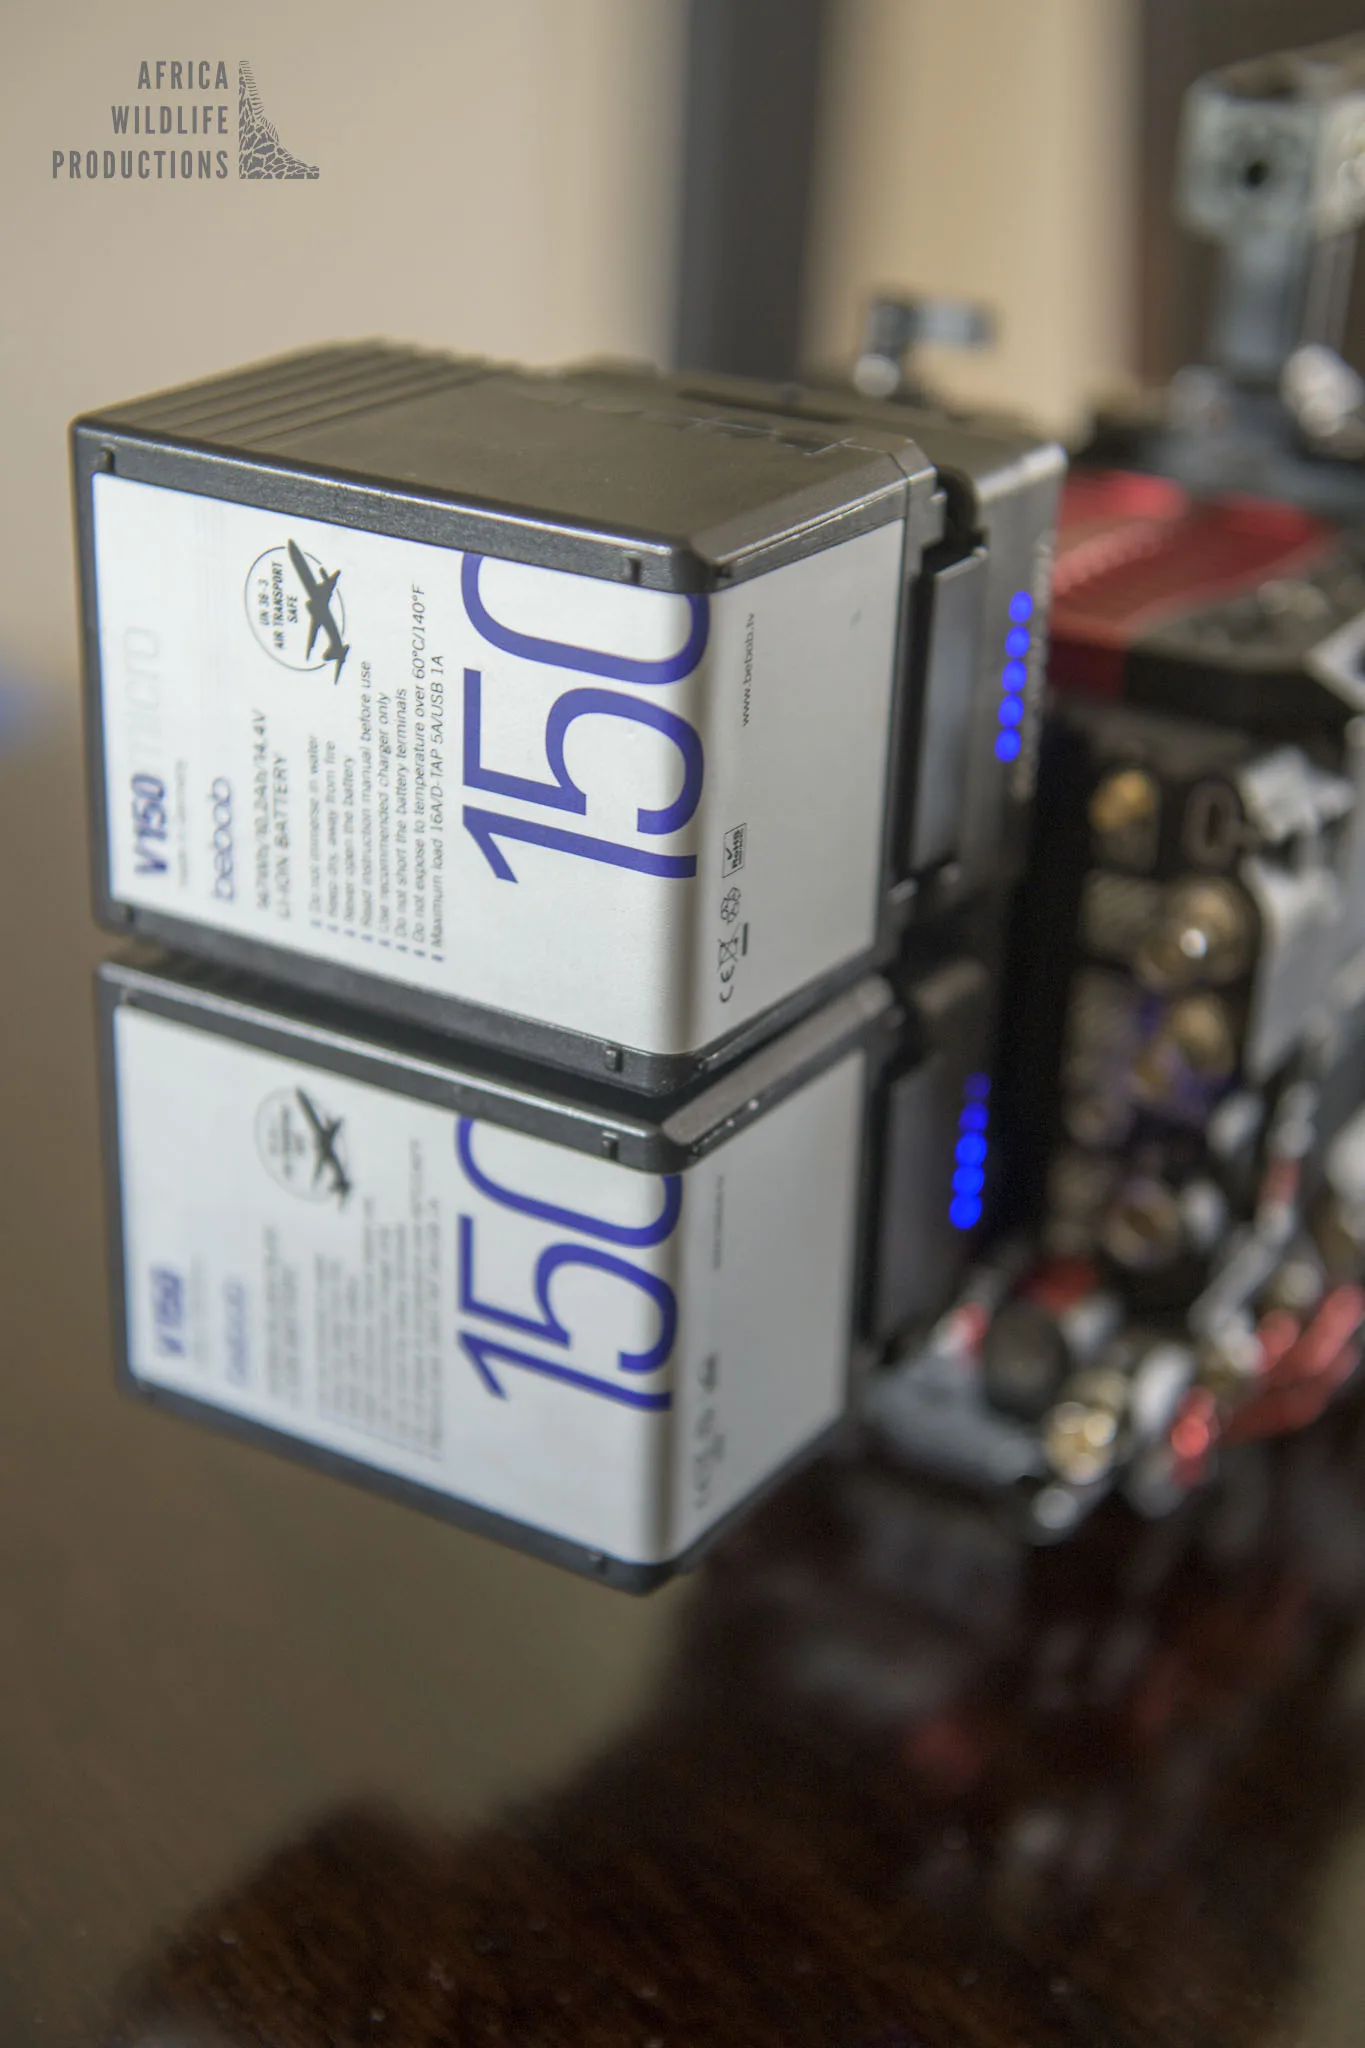
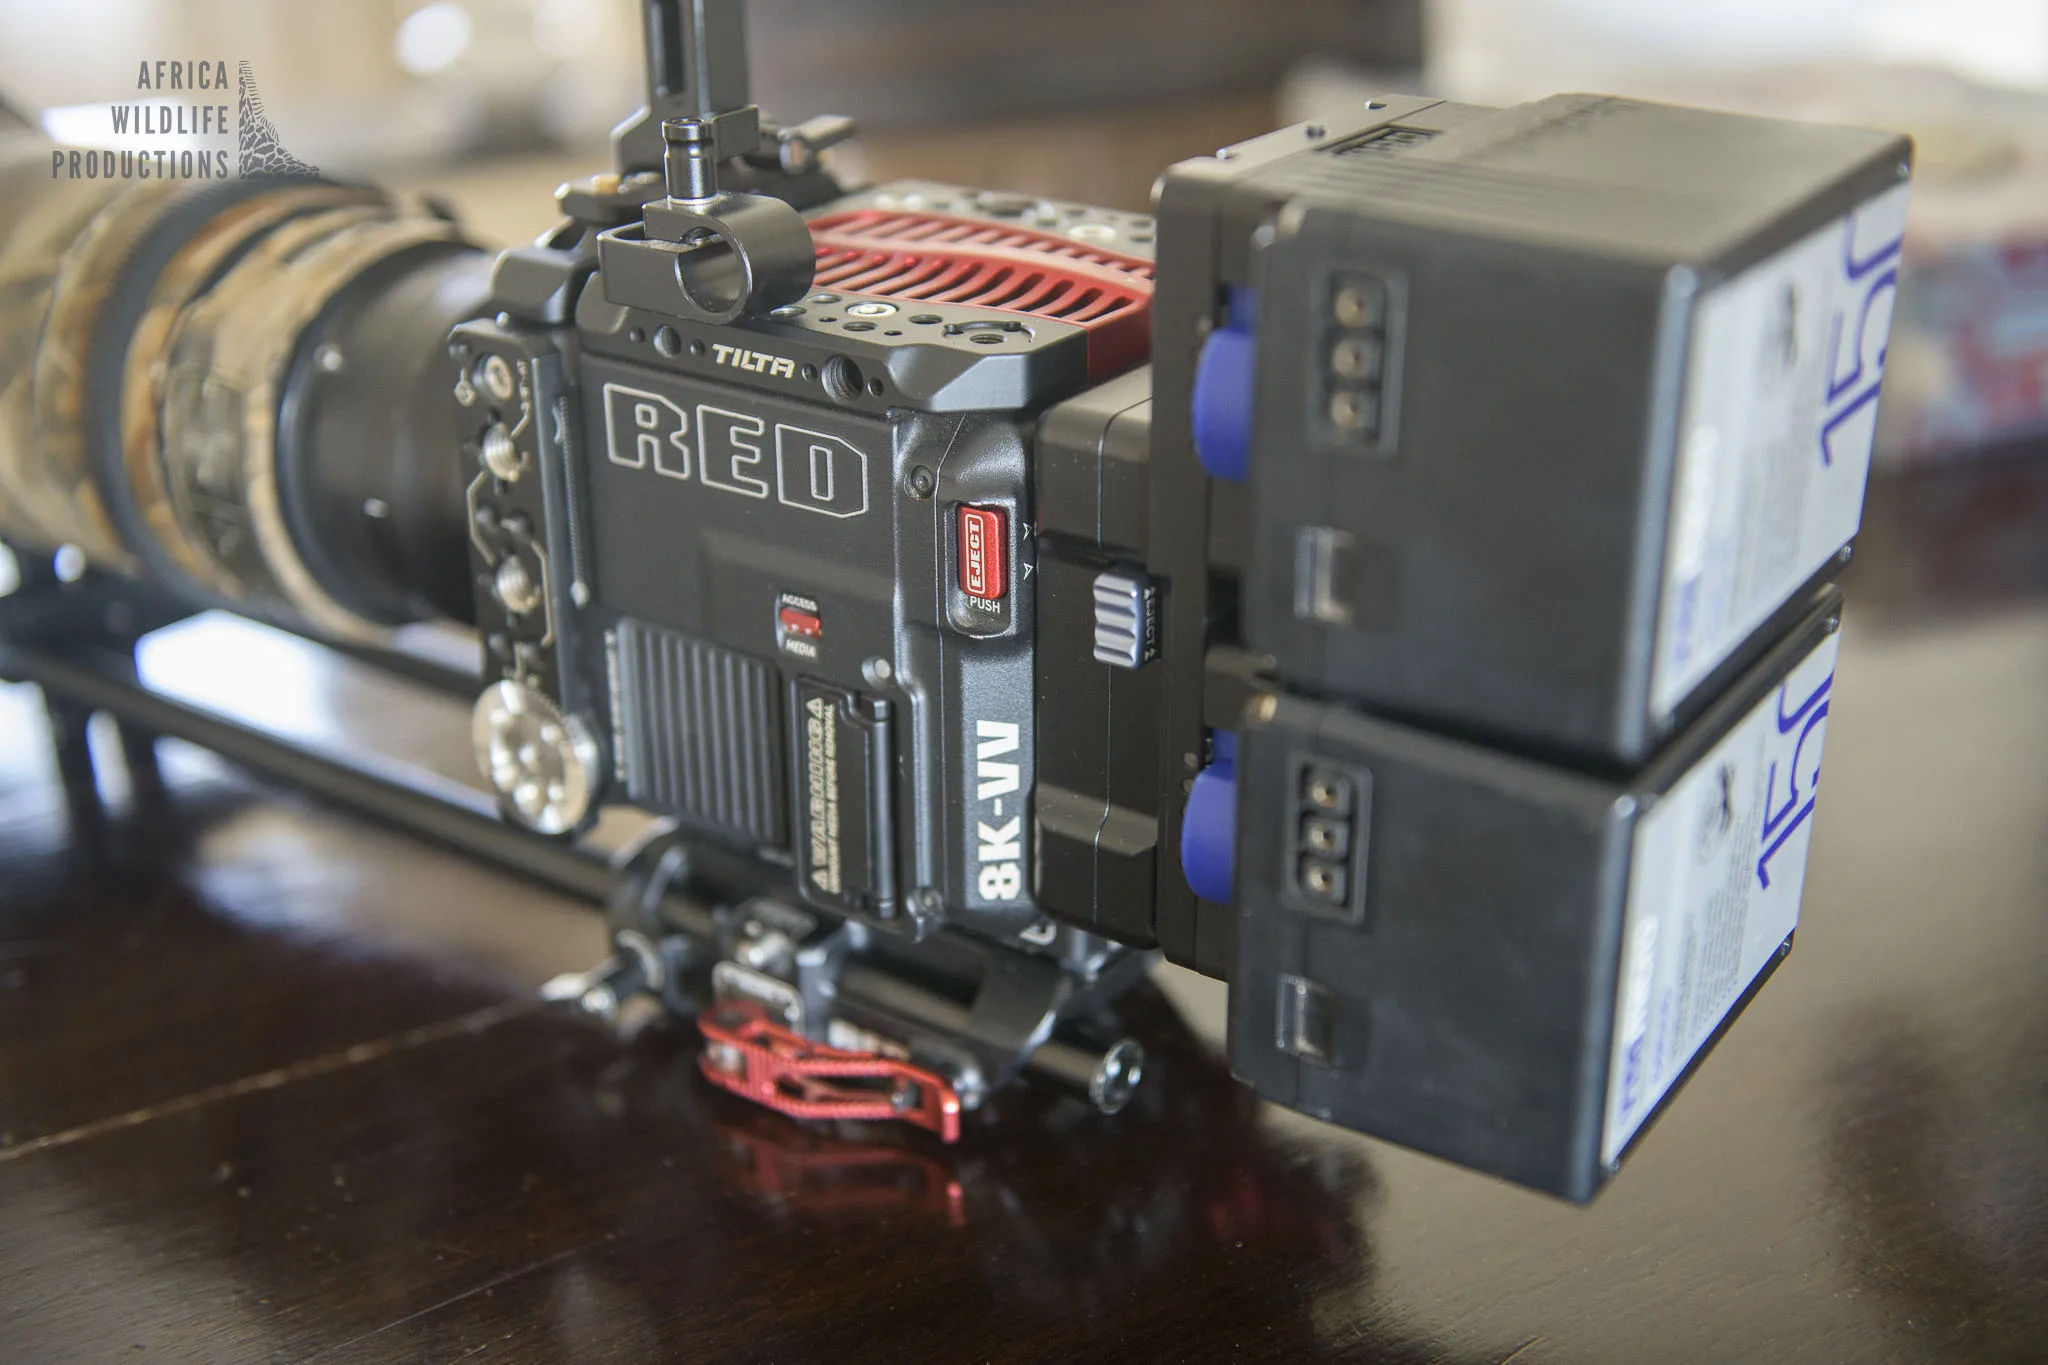
Batteries - Bebob 150wH Micro / Bebob 98wH Micro / REDvolt 98wh:
Recently I upgraded my power solution as I needed to get longer run times in the field. The Bebob VMicro Hot Swap Plate works really well and I have seen other wildlife cinematographers using it on their rigs as well. The only issue with it is, that you can’t use it directly on the cameras V-Mount. It is too wide. Therefore you need a “spacer” to be able to use it. After quite some research, I decided to go with the Wooden Camera Micro Battery Plate Adapter. It also has two d-tap outputs and a fuse. The only problem I had with it was, that one of the d-tap is too small for standard d-tap cables and is difficult to use.
After installing the Wooden Camera Micro Battery Plate Adapter you can then use the Bebob VMicro Hot Swap Plate and two v-mount batteries. With my 150wH BeBob I can easily double the runtime before swapping batteries. I highly recommend this solution especially if you are filming important behaviour sequences!
Metabones Mount-Rod Support Kit / Metabones RF to Nikon:
It took me forever to find a solution! But at the end I bought the Metabones Mount-Rod Support Kit. A smart piece of gear which is mounted onto the 15mm rails. It then connects the bottom of the Metabones RF to Nikon Adapter. A rock solid solution and definetly enough support for the lens mount.
Microphone & Sound Solutions:
If I have a sound recordist available, I am sending wireless sound from the sound recordists into the 5-Pin Lemo input. The gain is then controlled by the wireless module and it works like a charm. Timecode is sent to the camera using the RED Expander Blade. With the latest firmware update, the TC is now always up to date and it works perfectly with the Ambient NanoLockit units.
Final Toughts:
Well, it took some time to find the right parts for this wildlife production camera, but I am happy with it. The rig performed very well in rough conditions, shooting for different productions for Disney+, National Geographic and some other production companies.
I might consider buying the Kippertie Revolva or the Strata PL-ND. But depends on the lenses used in future production. The other thing I might get in the future is a shark fin to extend the runtime of the rig and have a hot swap option. But I will wait till I can test some of the shark fins available before making the final decision.
If you want to get more information and feedback about the RED V-Raptor 8k VV and filming wildlife, do not hesitate to drop me a mail: andreas@africawildlifeproductions.com